Okta Configuration
In this solution, Okta serves as Identity Management Provider. Okta acts as Identity Provider for Cloud services and as Service Provider for Pulse Connect Secure.
For Cloud Secure solution in Okta, configure the following:
•Add PCS as SAML IdP
•Configure Cloud Applications
Steps to Configure
To configure Okta as Service Provider, do the following:
1.Sign up for Okta developer account at https://www.okta.com/developer/signup.
2.If you see a < > Developer prompt in the top left, click it and select Classic UI to switch to the Classic UI.
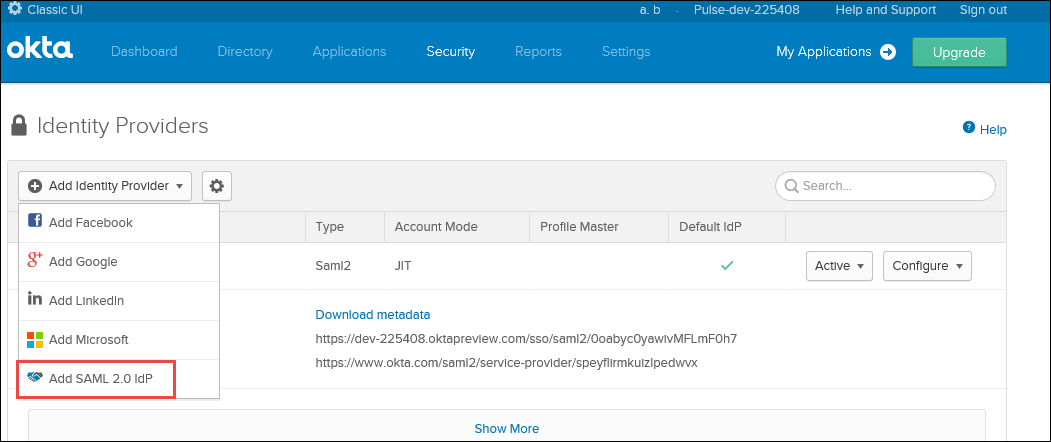
3.Navigate to Security > Identity Providers. Click Add Identity Provider.
4.Select Add SAML2.0 IdP from the list.
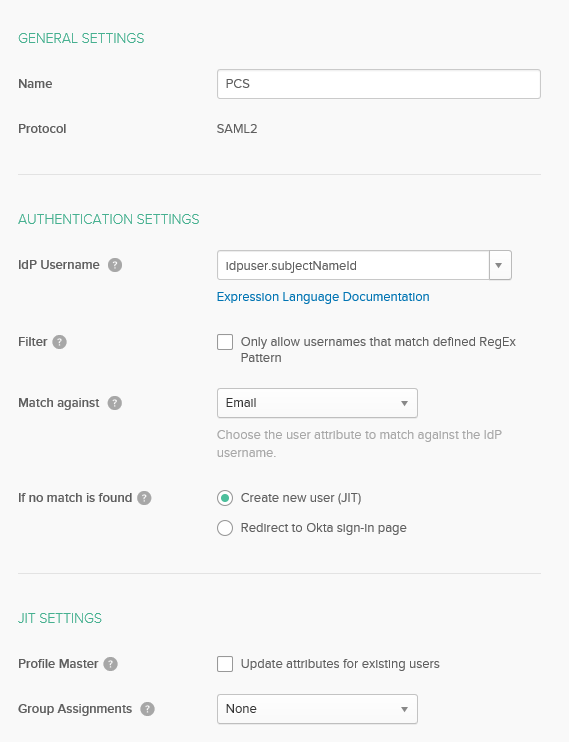
5.Provide the following details to configure Pulse Connect Secure as Identity Provider:
•Name = <name reference to PCS>
•Select the IdP username = Idpuser.subjectNameid.
•Match against = Email
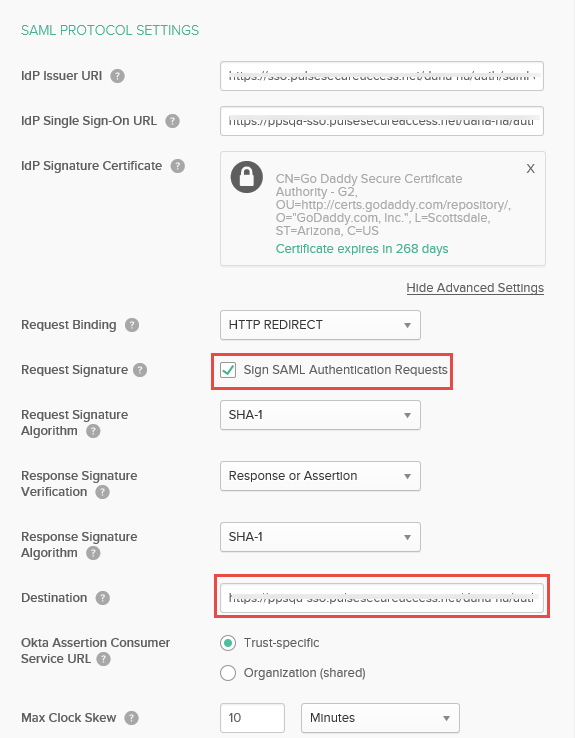
•Under SAML Protocol Settings, enter the following:
IDP Issuer = https://<Host FQDN for SAML>/dana-na/auth/saml-endpoint.cgi
IDP Login URL = https://<Alternate Host FQDN for SAML /dana-na/auth/saml-sso.cgi
Choose the IdP Signing Certificate configured under Authentication > Signin-in > Sign-in SAML > Identity Provider page of PCS and upload it (or)
Download PCS Metadata file from Authentication >Signing-in >Sign-in SAML > Metadata Provider. Copy Certificate content out of PCS Metadata to a file, save it, generate X509 Certificate out of it and upload it.
Click Show Advanced Settings, enable Sign SAML Authentication requests, set Request Binding = HTTP Redirect, Request/Response Signature Algorithm = SHA-1.
•Click Add Identity Provider.
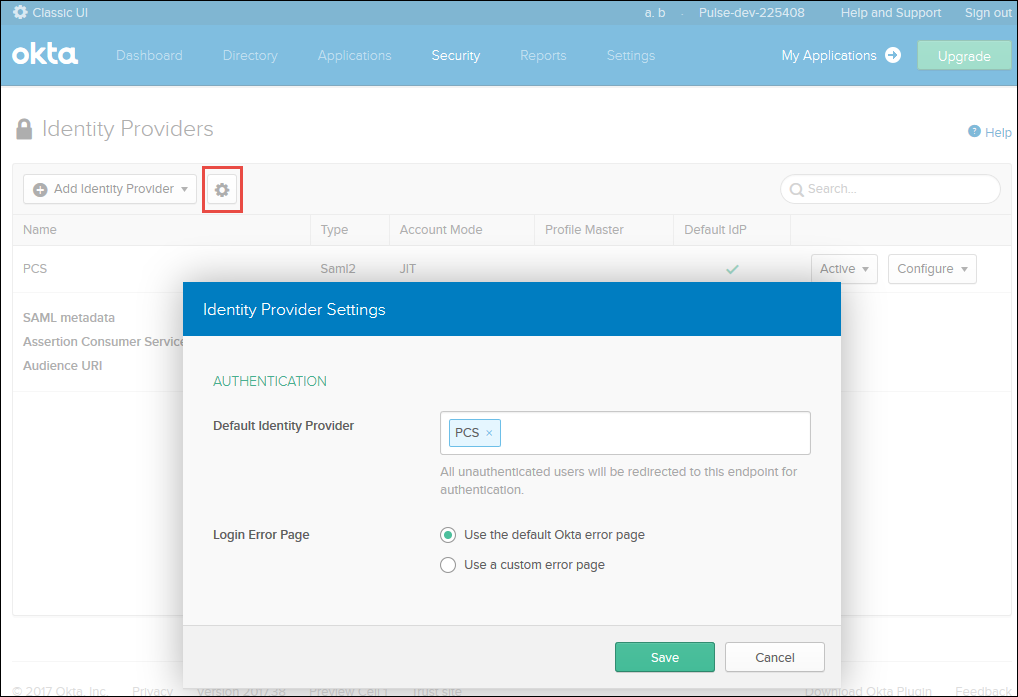
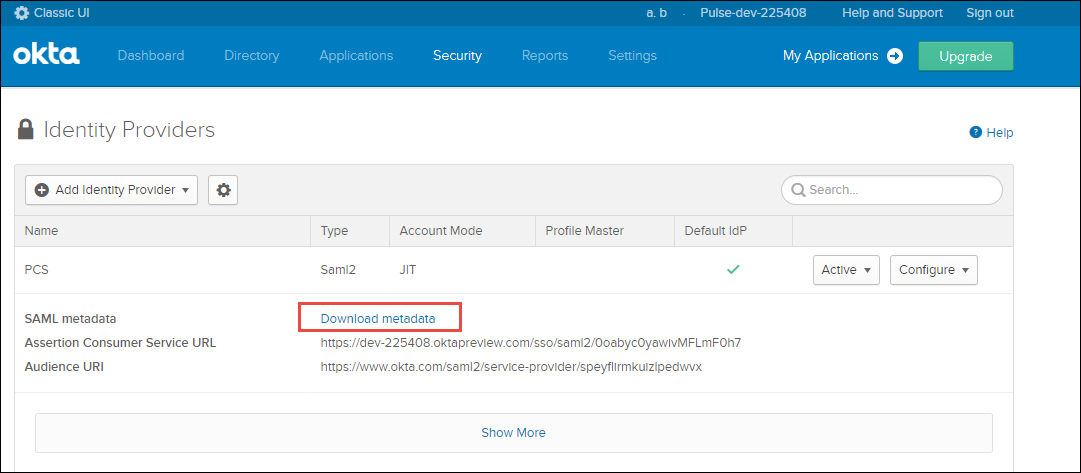
6.Click the Settings icon next to Add Identity Provider and add the Identity Provider created as a default Identity Provider.
7.After adding Identity Provider, click Download Metadata and save the xml file.
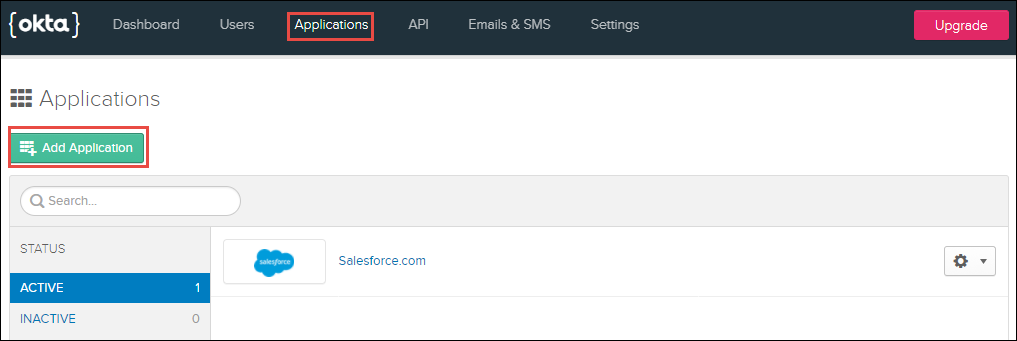
8.To add O365 application in Okta for SSO, do the following:
•Navigate to Applications > Applications.
•Click Add Application.
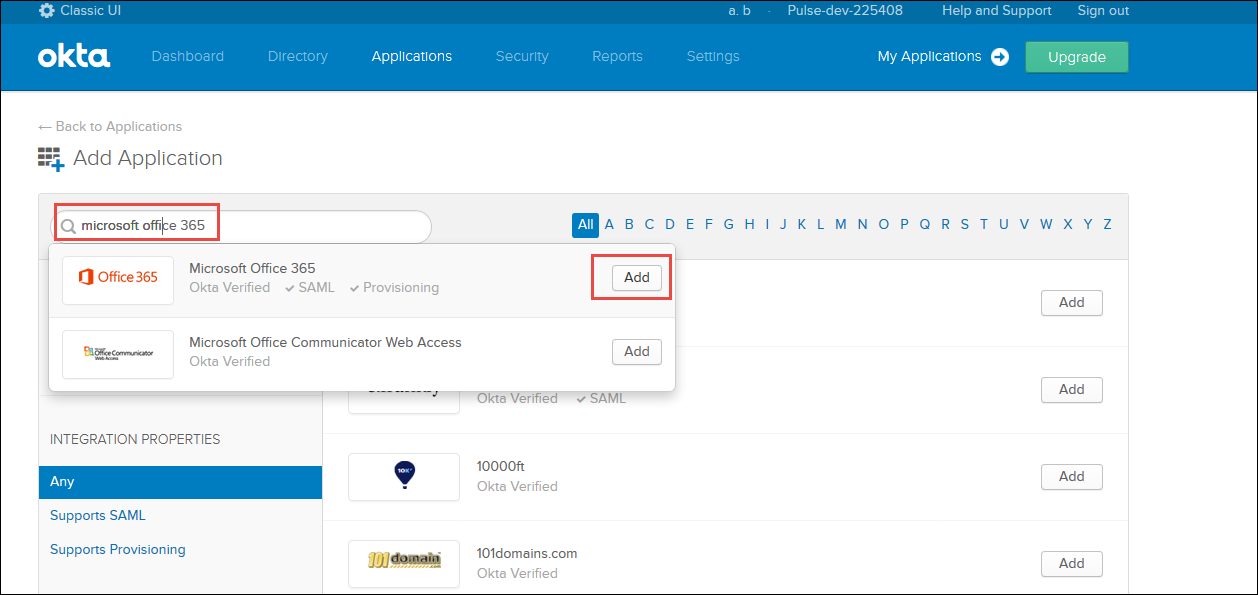
•Type Microsoft Office 365 in search list and click Add on the Okta Verified O365 application.
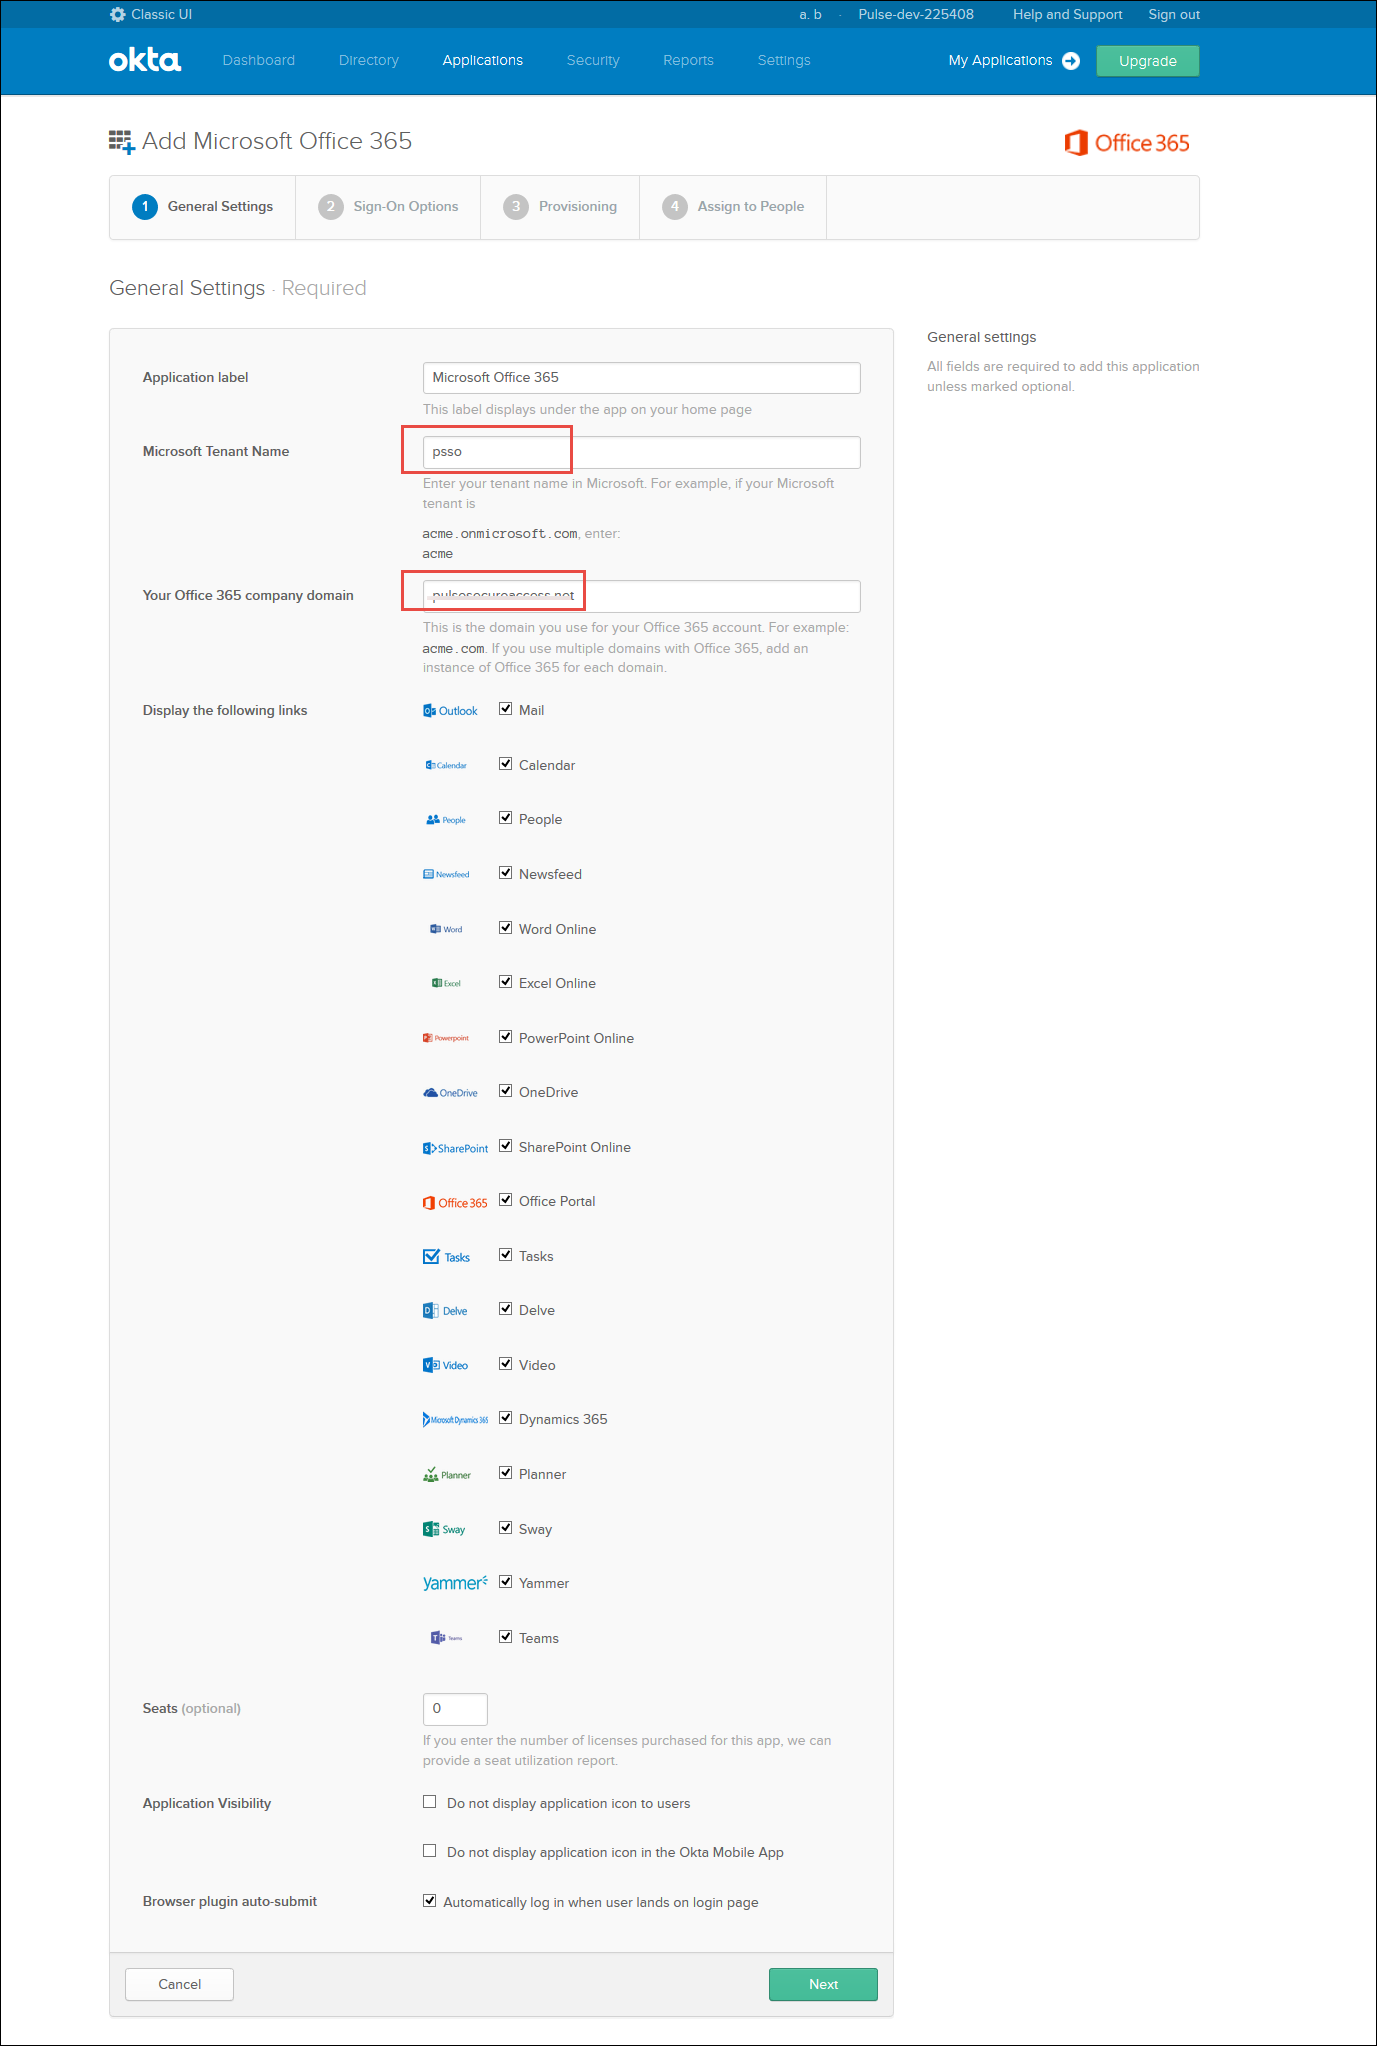
•Provide the Microsoft tenant name and O365 domain details and click Next.
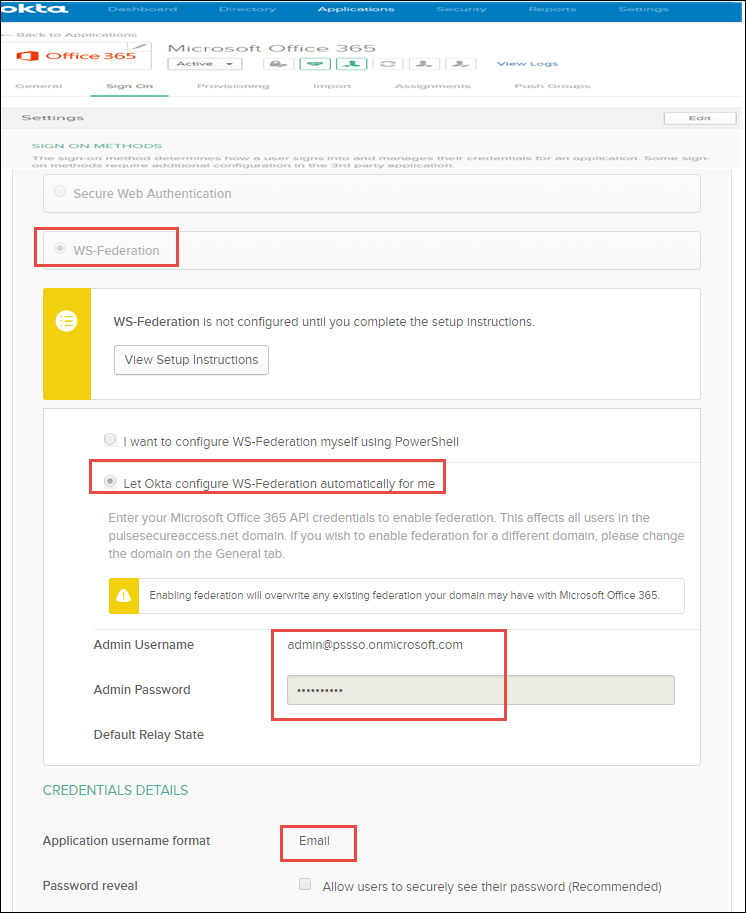
•Under Sign-On Methods:
•Select WS Federation for Office 365, enter the admin credentials, and Select Application user name format as Email.
Select SAML 2.0 for all the other applications.
•Select Let Okta configure WS-Federation automatically for me to automatically configure O365.
•Click Done.
If you select I want to configure WS-Federation myself using powershell then you have to configure office 3635 manually.
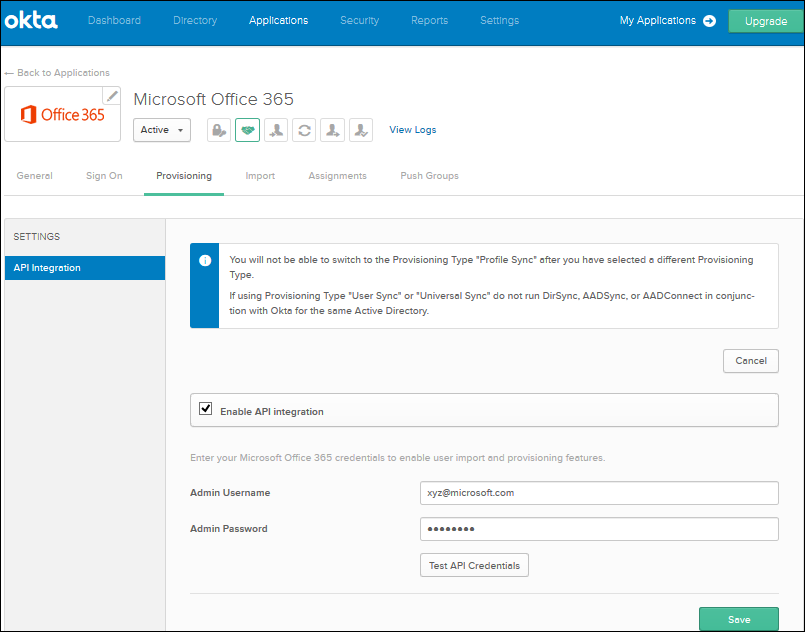
•Under Provisioning Settings, Click Configure API Integration and Select Enable API Integration, enter the O365 admin credentials and click Save at the end of the page.
•Under Assignments > Assign > Assign to People. Click Next.
•Select the user and click Assign.

•Select the license from the O365 licenses list.
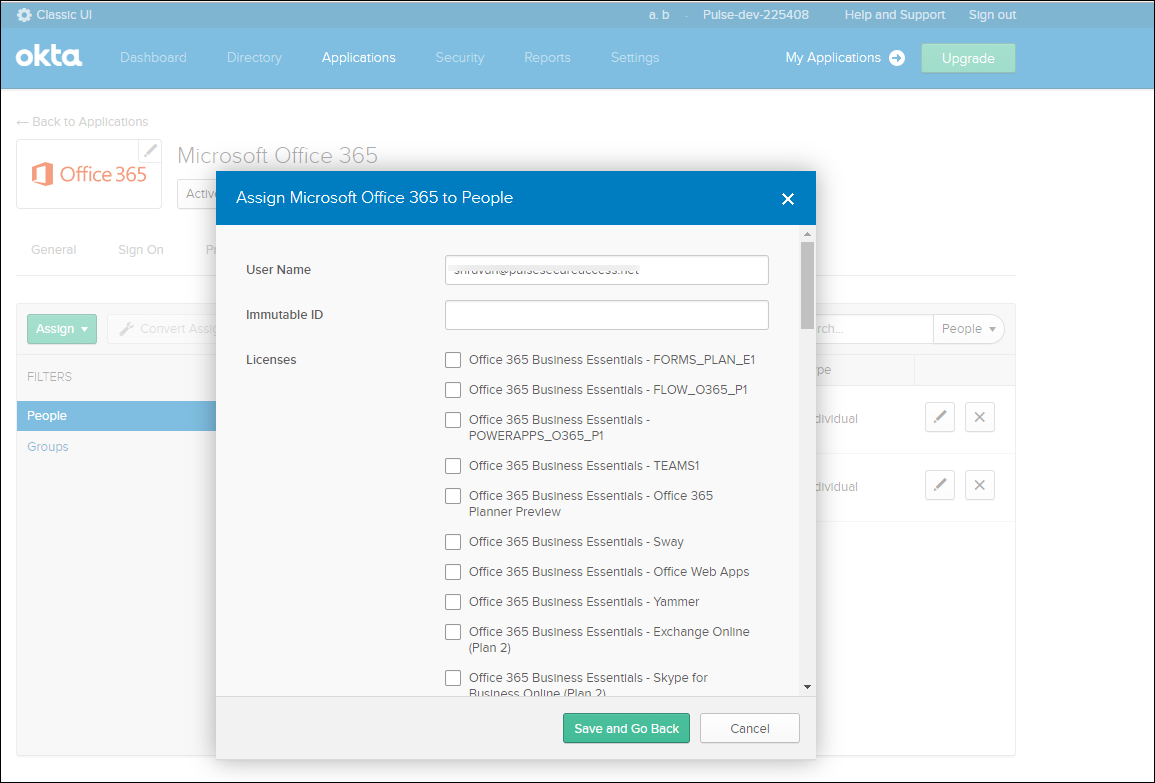
•Click Save and Go Back.
•Click Done to complete the configuration.
To login to Okta developer account as admin without Single Sign-On, use https://<Okta Domain>/login/do-login.