Salesforce Configuration
Salesforce should be enabled as SAML Service Provider for supporting Single Sign-On. For Cloud Secure solution, Salesforce should be configured with:
•Admin account
•Register Domain
•SAML configurations
•Users
Steps to Configure
To configure Salesforce as Service Provider, do the following:
1.Sign up for a new Salesforce account. Register a new Salesforce domain.
2.Once domain is registered, log in to the domain (Example: cloudsecure-dev-ed.my.salesforce.com). Click Setup located on top right corner of the page.
3.Navigate to Security Controls-> Single Sign-On Settings on the left panel. Click on 'Edit', check 'SAML Enabled' and click 'Save'.
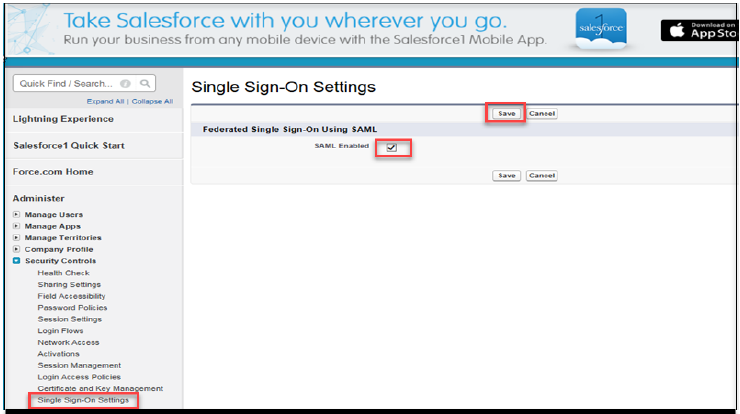
4.Navigate to Security Controls > Single Sign-On Settings.
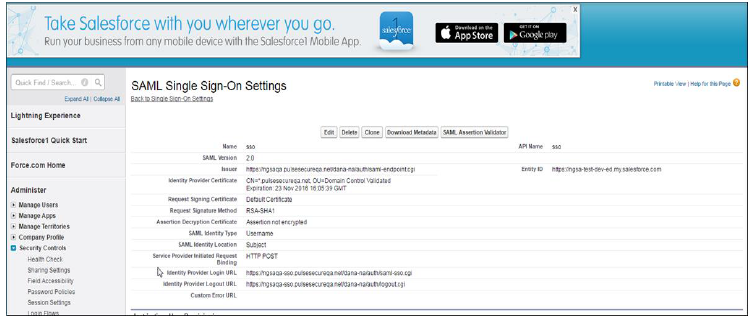
5.Click New under SAML Single Sign-On Settings. Enter the following details:
•Name: <Name>
•API Name: <Name>
•Issuer: https://<Host FQDN for SAML>/dana-na/auth/saml-endpoint.cgi
•Entity ID: <Salesforce Domain>; Example: https://cloudsecure-dev-ed.my.salesforce.com
•Identity Certificate:
•Download PCS Metadata file from Authentication->Signing-in->Sign-in SAML->Metadata Provider. Copy Certificate content out of PCS Metadata to a file, save it, generate X509 Certificate out of it and upload it here (or)
•Choose the IdP Signing Certificate configured under Authentication-> Signing-in-> Sign-in SAML-> Identity Provider page of PCS and upload it here
•Service Provider Initiated Request Binding: HTTP Redirect
•Identity Provider Login URL: https://<Alternate Host FQDN for SAML /dana-na/auth/saml-sso.cgi
•Leave rest of the fields with default values and click Save.
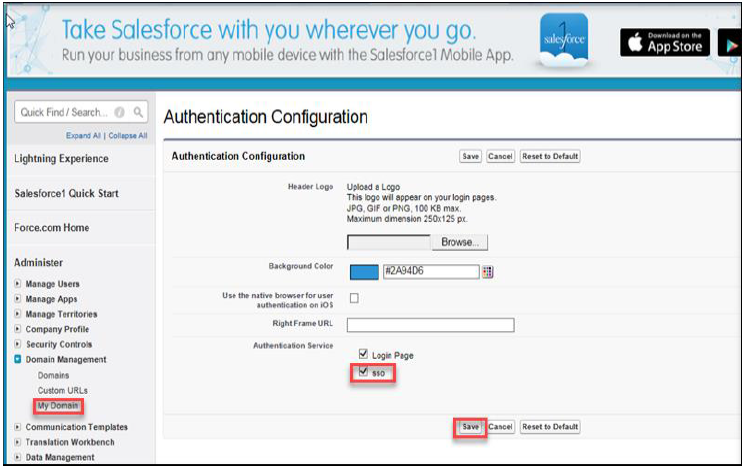
6.Navigate to Domain Management > My Domain on the left panel. Click Edit under the Authentication Configuration section, check '<Name>' (configured in Step 4a) and click Save.
7.Navigate to Security Controls > Single Sign-On Settings. Click Download Metadata and save the metadata xml file.
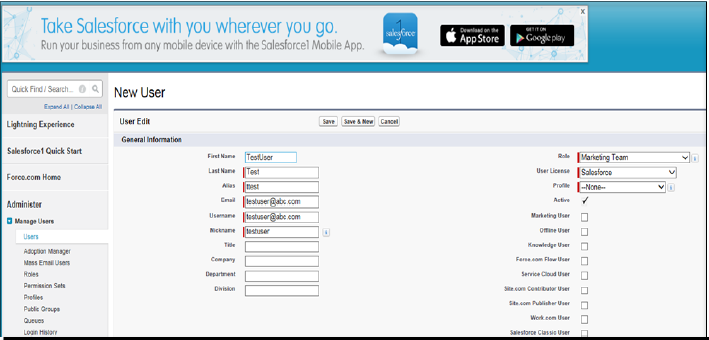
8.Navigate to Administer > Manage Users > Users. Click New User to create a new Salesforce user if user does not exist. Provide the following details:
•Provide First Name.
•Provide Last Name. Alias will get populated automatically.
•Provide Email. Username and Nickname will get populated automatically.
•Select Role for the user.
•Select User License as Salesforce.
•Select Profile for the user.
•Click Save.