WebEx Configuration
WebEx should be enabled as SAML Service Provider for supporting Single Sign-On. For Cloud Secure solution:
•Register with WebEx and enable SSO privileges for the WebEx domain
•Configure SAML
Steps to Configure
To configure WebEx as Service Provider, do the following:
1.Register with WebEx and create a new domain. Enable SSO privileges for the domain.
2.Log in to WebEx domain as admin at https://<WebEx Domain>/admin.
3.Navigate to Configuration > Common Site Settings > SSO Configuration. Configure with the below details:
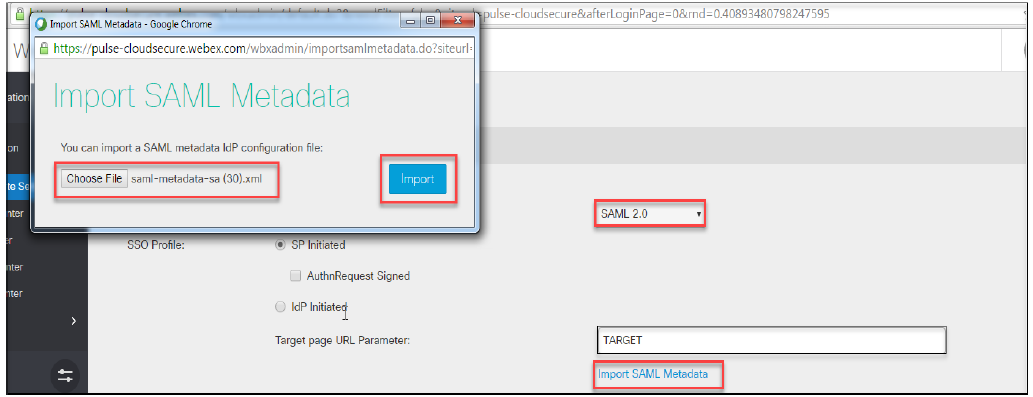
•Federation Protocol = SAML 2.0
•SSO Profile = SP Initiated
•Click Import SAML Metadata.
•Choose PCS SAML Metadata file and click Import (To download PCS Metadata file, navigate to Authentication > Signing-in > Sign-in SAML > Metadata Provider and click Download Metadata on PCS admin console).
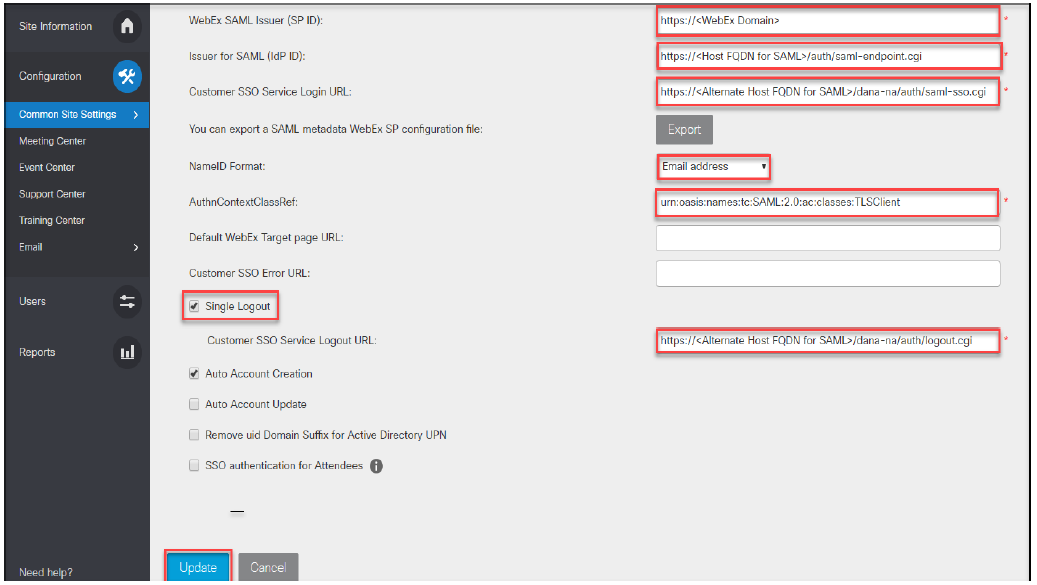
•The Issuer for SAML (IdP ID) and Customer SSO Service Login URL will get populated automatically.
•To configure the values manually, provide following details:
•Issuer for SAML (IdP ID) = https://<Host FQDN for SAML>/dana-na/auth/saml-endpoint.cgi
•Customer SSO Service Login URL = https://<Alternate Host FQDN for SAML>/dana-na/auth/saml-sso.cgi
•Configure following values in rest of the mandatory fields:
•WebEx SAML Issuer (SP ID) = https://<WebEx Domain> (Example: https://pulsesecure.webex.com)
•NameID Format = Email address
•AuthnContextClassRef = urn:oasis:names:tc:SAML:2.0:ac:classes:TLSClient
•Select ‘Single Logout’. Configure Customer SSO Service Logout URL = https://<Alternate Host FQDN for SAML>/dana-na/auth/logout.cgi. This is an optional configuration.
•Click Update.
•Once the configuration is saved, click Export to export WebEx SP Metadata file and save the file.