NDcPP Mode
Prerequisites for PCS/PPS Configurations
1.External DNS Server should be able to resolve the hostnames used in the testing
2.External Syslog server is up and running.
3.External CRL is up and running.
4.If you plan to integrate with Pulse One, Pulse One server is up and running.
Password Minimum Length Configuration
On Administrator Web Console, follow below instruction to set administrator minimum password length to be 15.
1.Set in Admin Realm:
•Navigate to Administrators > Admin Realms
•Click on Admin Users.
•Click on the Authentication Policy tab.
•Click on Password tab
•Click on Only allow users that have passwords of a minimum length.
•Enter 15 as Minimum Length.
2.Set in local auth server configuration:
•Navigate to Authentication > Auth. Servers.Click on Administrators.
•On the Settings tab, click on Password Options section.
•Configure 15 characters as Minimum length.
•Configure Maximum Length greater than or equal to 15 characters set as Minimum Length.
3.Review all previously configured administrator passwords, update to ensure all are at least 15 characters.
Serial Console Access Control Configuration
Configure administrator access control for the local serial console is a two-step process.
1.Enable allow console access for the administrator.
In Administrator Web Console,
•Go to Authentication > Auth. Servers
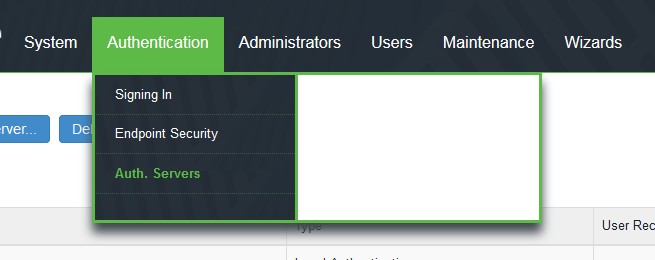
•This screen is shown.

•Select Administrators.
•Click on Users tab.
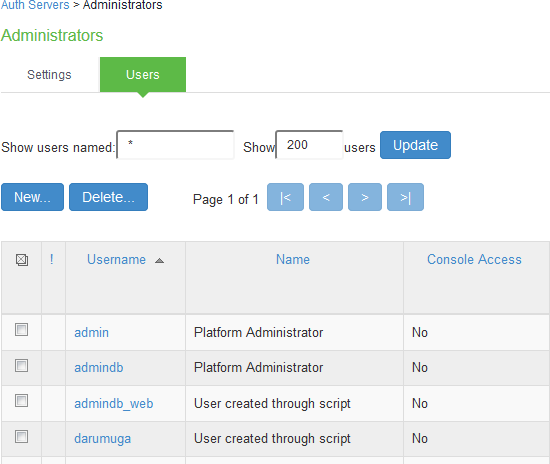
•Click on administrator name configured in Initial Setup
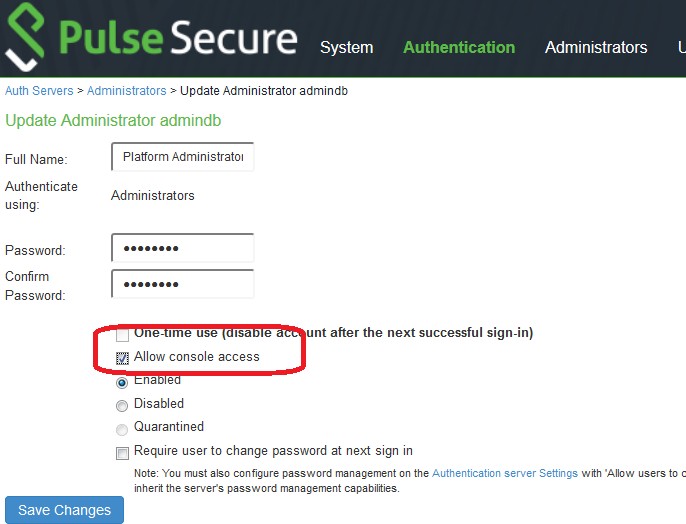
•Click on the Allow console access checkbox
•Click on Save Changes.
2.Enable password protection for the console.
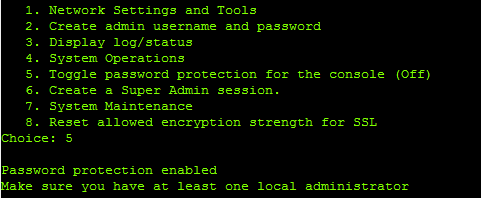
•Connect to the local serial console, the serial console menu is shown as below.
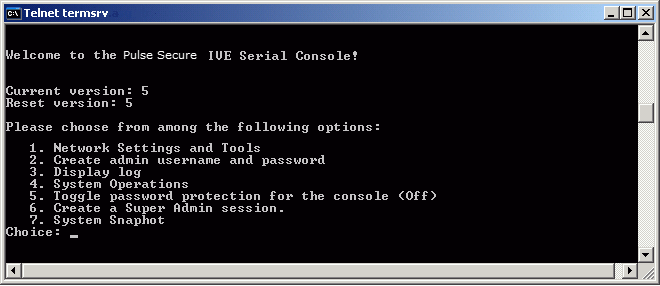
•Choose option 5 on the local serial console. You should see a confirmation: “Password protection enabled, make sure you have at least one local administrator”.
Terminating a Local Console Session
To exit a console session, choose option 11 on the local serial console.

Administrative Banner Configuration
Configuring administrator banner for the Administrator Web Console and the local serial console is a two-step process.
1.Create a Sign-in notification. On Administrator Web Console:
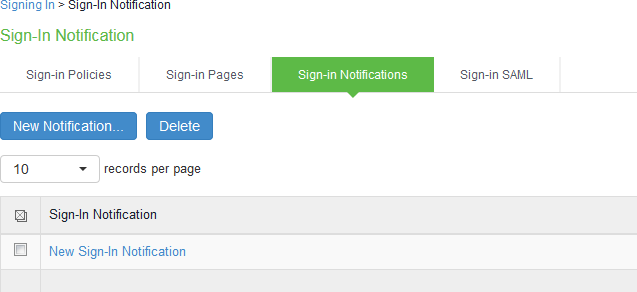
•Navigate to Authentication > Signing In > Sign-in Notifications.
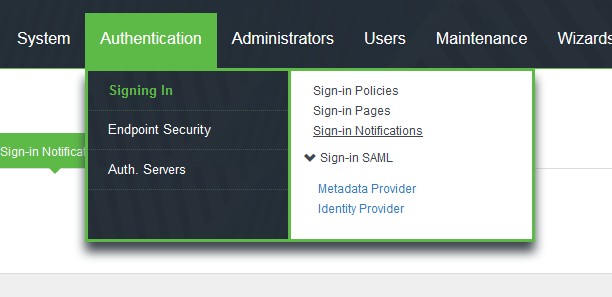
•This screen is shown:
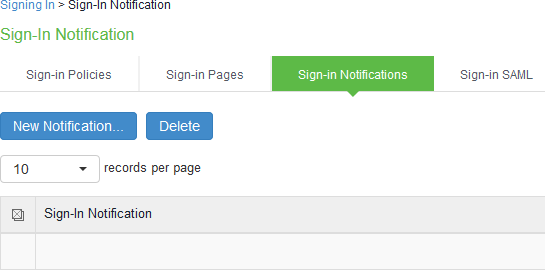
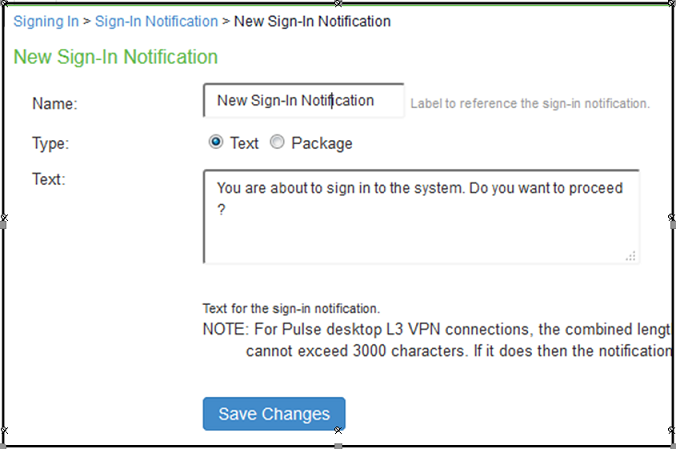
•Click on New Notification
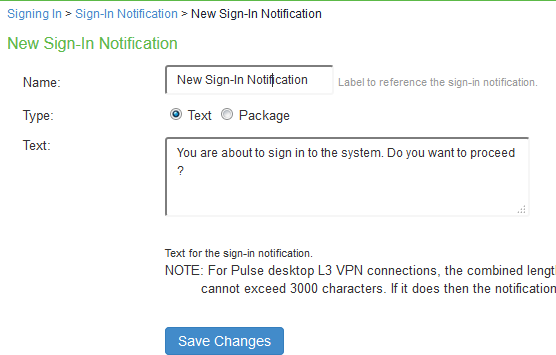
•Enter a name for the new notification in the Name:
•In Type:, select Text
•Enter banner message in the Text:
•Click on Save Changes
2.Associate the notification with an admin URL. On Administrator Web Console,
•Navigate to Authentication > Signing In > Sign-In Policies
•Click on admin URL */admin/
•In the Configure SignIn Notifications section, select the check box Pre-Auth Sign-in Notification.

•A drop down box appears next to Pre-Auth Sign-in Notification once it is selected, in the drop down box, select the notification you created in Step 1 above.
•Click on Save Changes.
Configure GUI Inactivity Timeout Period
1.Navigate to Administrators > Admin Roles > <Role Name> > Session Options
2.Under the ‘Session lifetime’ section, enter the Idle timeout in minutes.
Terminating a GUI Session
To log out of the web administrative session, on any screen click on the “Sign Out” link at the top right of the screen.
Import Trusted Client CA
Trusted Client CA is required in order to validate the client certificate that is used by the PCS/PPS to authenticate to syslog server.
On Administrator Web Console,
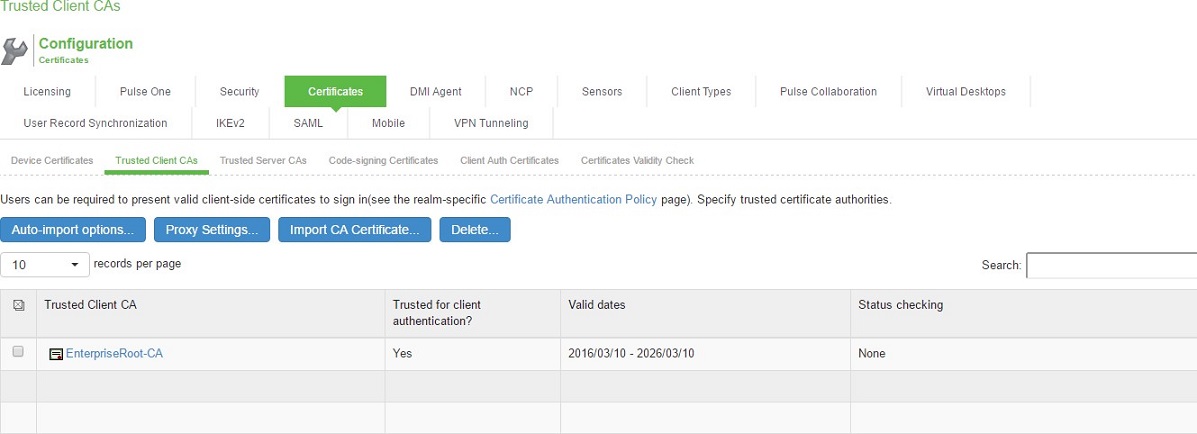
1.Navigate to System > Configuration > Certificates > Trusted Client CAs.
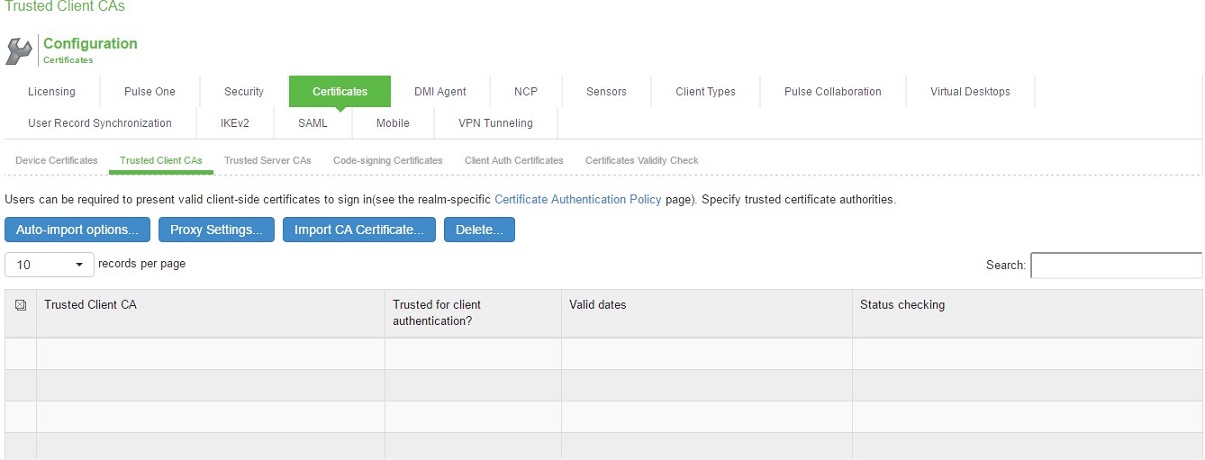
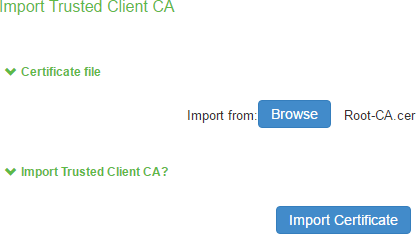
2.Click Import CA Certificates… button to import CA or Chain of CAs one by one as explained below in different Screenshots.
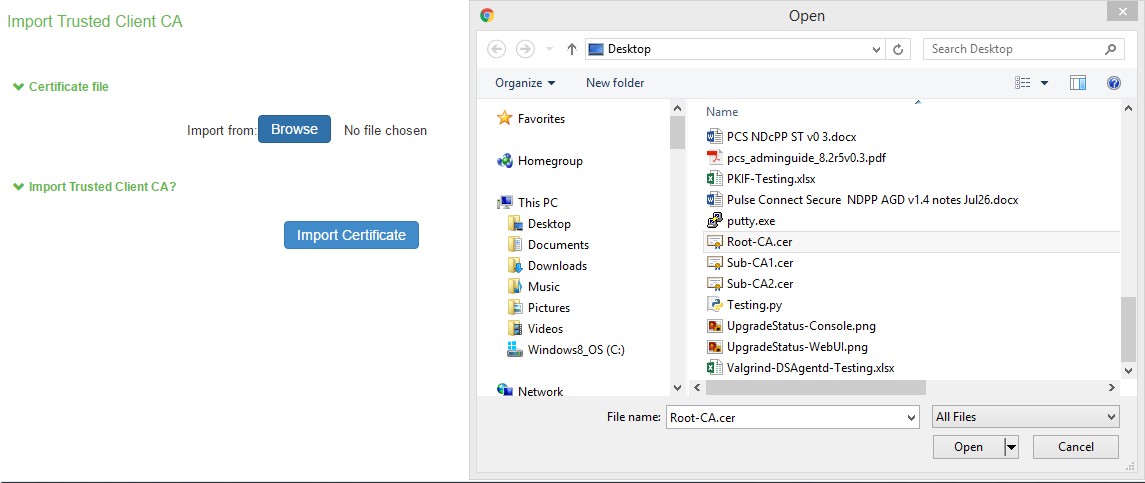
3.Click on Import Certificate.
4.The imported trusted client CA is shown in the Trusted Client CAs table.
Import Trusted Server CA
Trusted Server CA is used in two situations:
•To validate the device certificate that is generated for TLS handshake when a TLS client is connecting to the PCS/PPS.
•To validate the server certificate received in TLS handshake when the PCS/PPS connects to syslog server and Pulse One.
On Administrator Web Console,
1.Navigate to System > Configuration > Certificates > Trusted Server CAs.
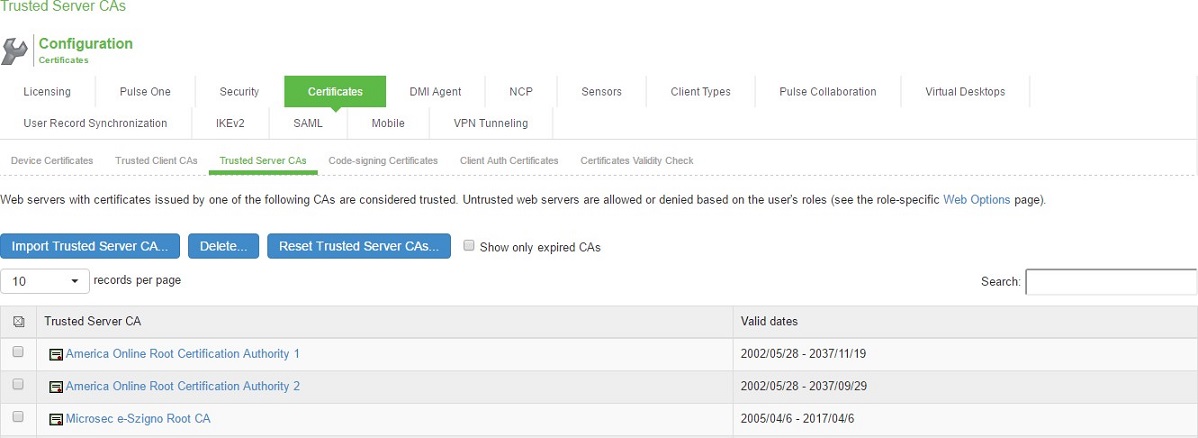
2.Click on Import Trusted Server CA…
3.On the Import Trusted Server CA screen, click on Browser, import the root CA certificate file.
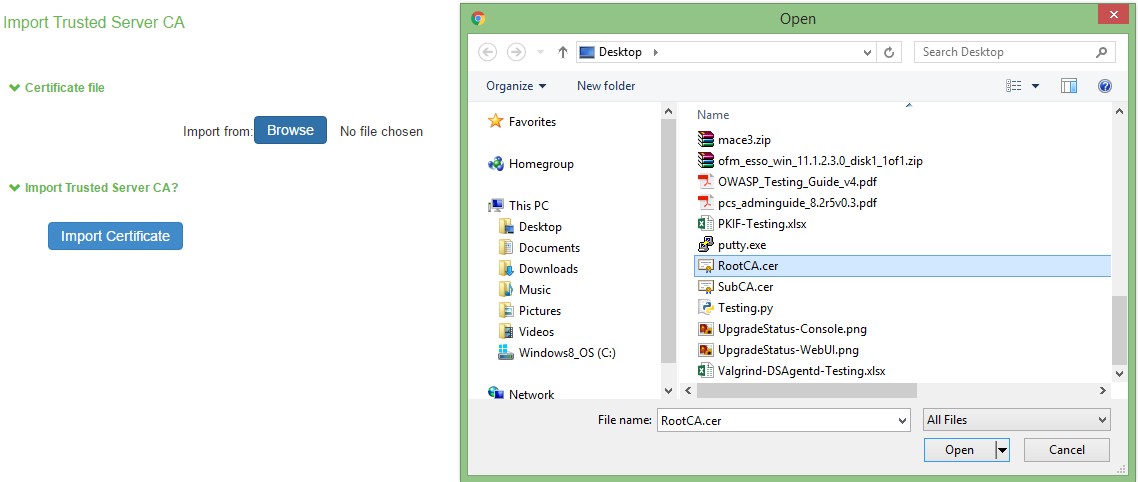
Note: In order to import CA Chain, all Sub CAs must be imported one by one.
4.Once CA or CA Chain is Imported, click Done
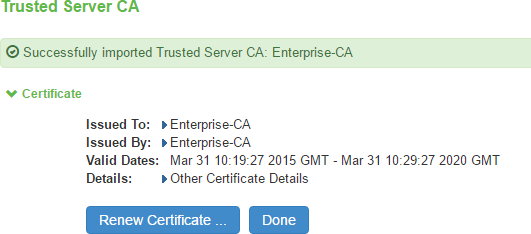
5.The CA Common Name of the imported trusted server CA should be shown in the Trusted Server CA table on screen System > Configuration > Certificates > Trusted Server CAs.
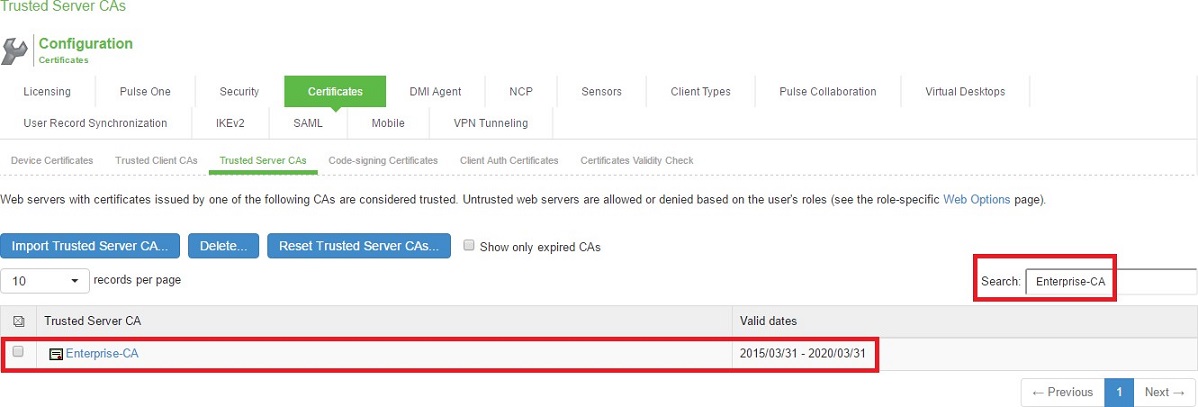
The CRL configured in the certificate is used, thus no additional configuration is required to configure CRL for trusted server certificate.
Software Updates
If a new NDcPP compliant software package is available, follow instructions in this section to update the software package on the PCS/PPS. The verification of the authenticity of the software package is performed by digital signature verification.
1.Download the PCS/PPS software package from Pulse Secure Licensing and Download Center onto a trusted computer system.
2.On Administrator Web Console.
3.Navigate to Maintenance > System > Upgrade/Downgrade.

4.In the expanded Install Server Package section, click on From File option, then click on Browse to select the server package downloaded earlier.
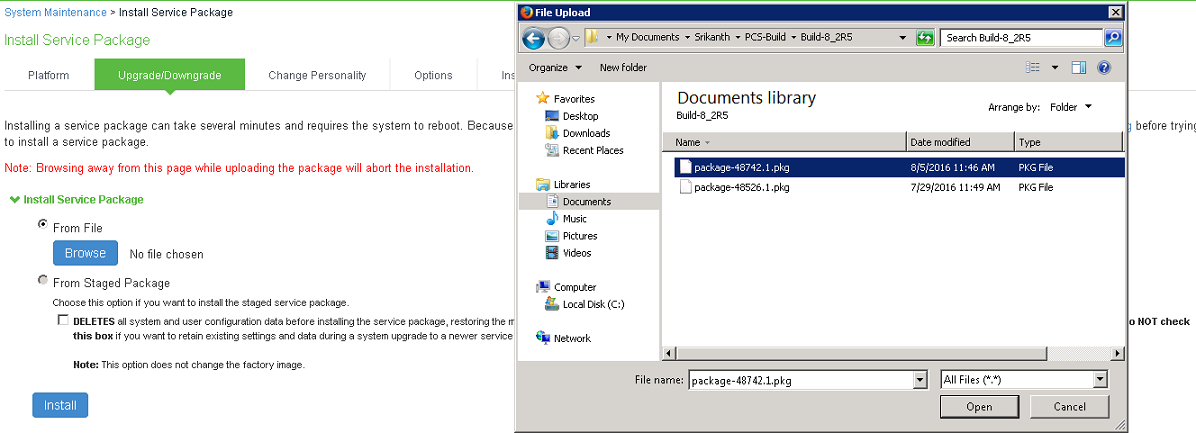
5.Click Install to start the installation process.
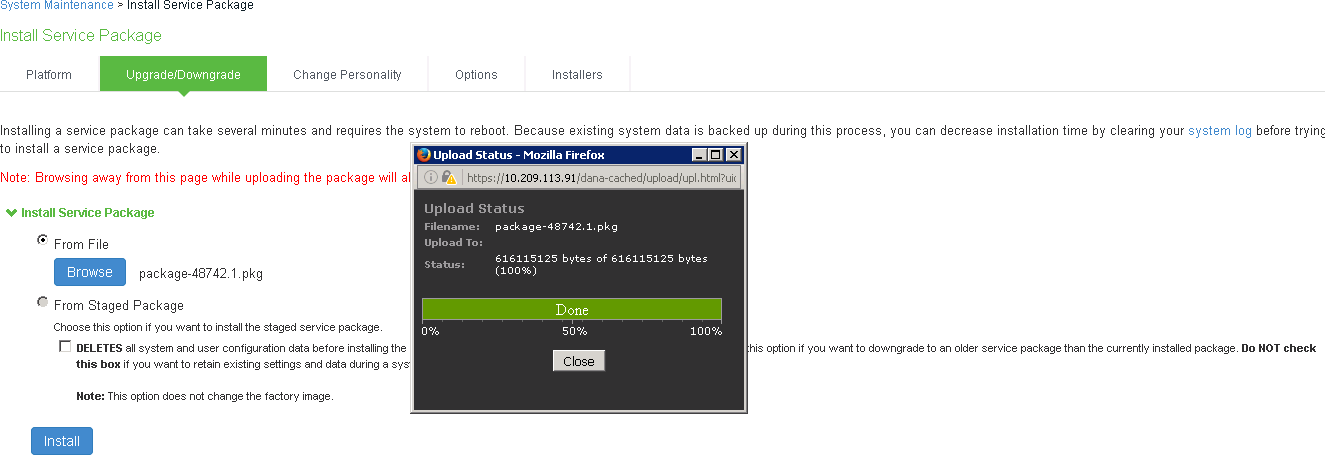
6.Below information is shown during installation.
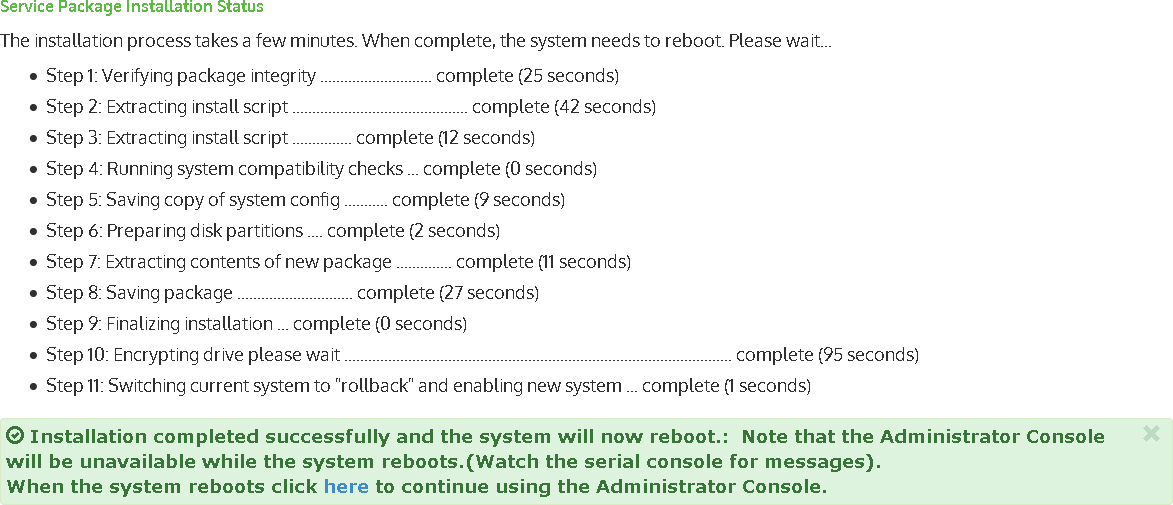
Confirm current software version
After system boot up, go to System Maintenance > Platform screen, verify Current version: displays the correct software version.
Enabling NDcPP Mode
On Administrator Web Console,
1.Navigate to System -> Configuration > Security > Inbound SSL Options.
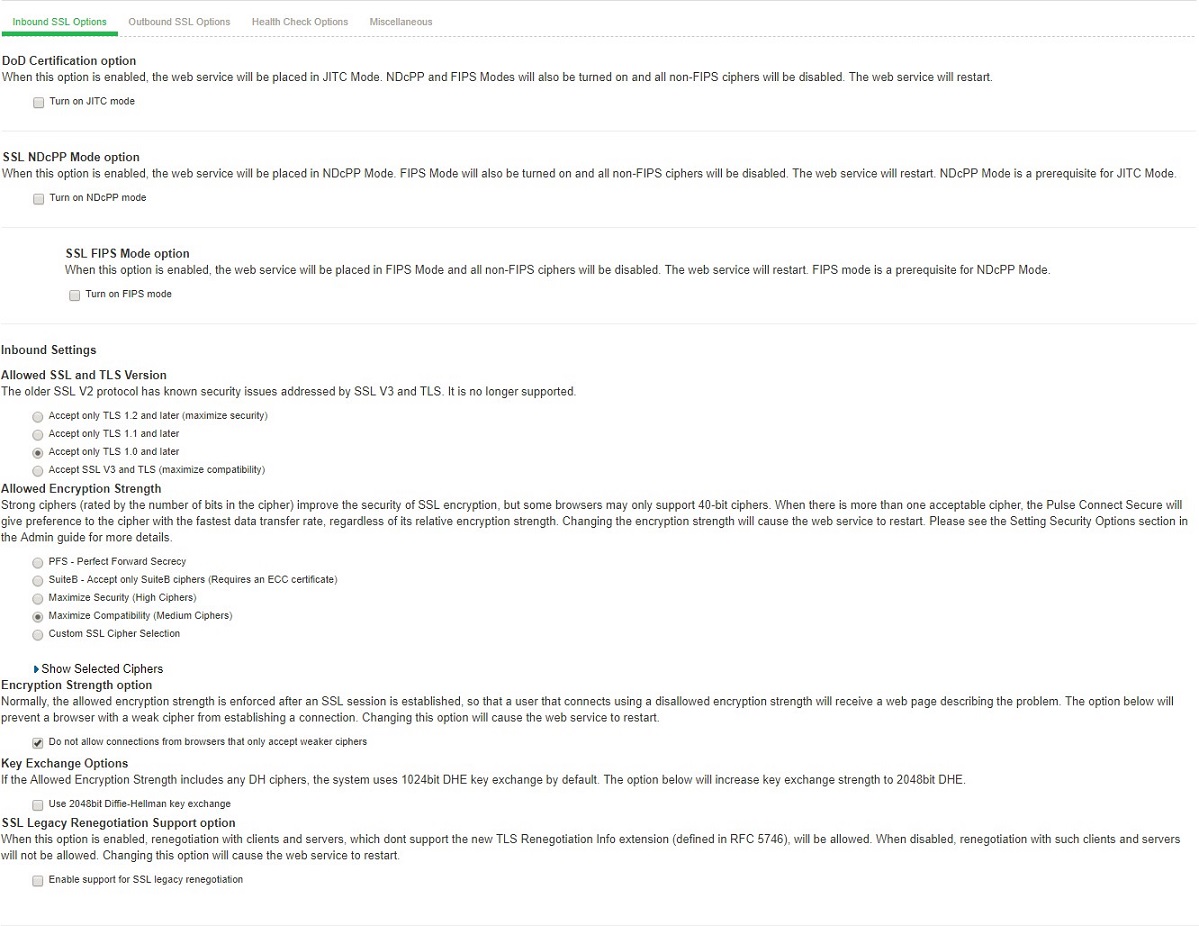
2.Click on the Turn on NDcPP mode checkbox highlighted to make the PCS/PPS common criteria compliant

3.Once Turn on NDcPP mode is enabled, Turn on FIPS mode is also automatically enabled.

4.Enable the Use 2048 bit Diffie-Hellman key exchange checkbox.

5.Uncheck SSL Legacy Renegotiation Support option.

6.Click on Save Changes.
7.At this point, the Turn on NDcPP mode is enabled for both Inbound SSL Options and Outbound SSL Options and the following is shown:
•Accept only TLS1.0 and later and Accept SSL V3 and TLS (maximize compatibility) are disabled in the NDcPP mode. Accept only TLS 1.1 and later is selected by default.

•Custom SSL Cipher Selection Allowed Encryption Strength are automatically selected. Click on Show Selected Ciphers displays below 16 Ciphers in the right panel labelled Selected Cipher.
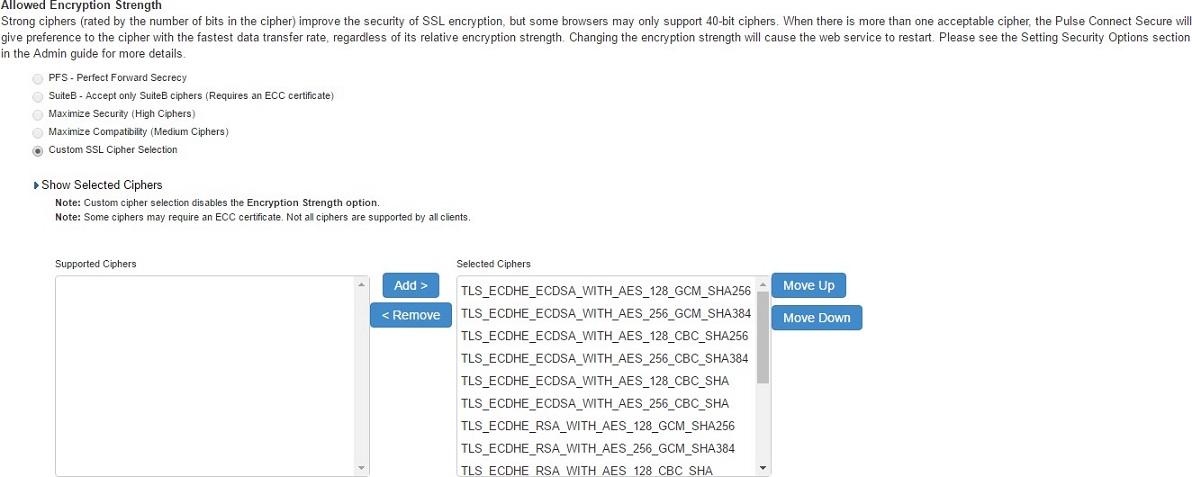
•Select TLS_DHE_RSA_WITH_AES_128_CBC_SHA and TLS_DHE_RSA_WITH_AES_256_CBC_SHA on the right panel, and click “Remove” button to remove it from the “Selected Ciphers”.
•Navigate to System > Configuration > Security > outbound SSL Options
•Custom SSL Cipher Selection Allowed Encryption Strength are automatically selected. Click on Show Selected Ciphers displays below 16 Ciphers in the right panel labelled Selected Cipher.
•Select TLS_DHE_RSA_WITH_AES_128_CBC_SHA and TLS_DHE_RSA_WITH_AES_256_CBC_SHA on the right panel, and click “Remove” button to remove it from the “Selected Ciphers”.
8.Optionally, you may check below log to confirm NDcPP mode is enabled:
Navigate to System > Log/Monitoring > Admin Access > Logs and Check for the Logs mentioned in the section NDcPP Mode Enable Configuration Admin Logs
Optionally, you may check below log to confirm that DHE2048 Key Exchange Option is enabled:
Navigate to System > Log/Monitoring > Admin Access > Logs and Check for the Logs mentioned in the section DH2048 Key Exchange Enable Configuration Admin Logs.
Audit Logs For NDcPP Mode
NDcPP Mode Enable Configuration Admin Logs
Configuration change to enable NDcPP mode on the PCS/PPS.
|
Info |
ADM23434 |
<current timestamp> <node name> <IP Address> <user id><Realm> <Role> – Allowed SSL and TLS changed from ‘TLSv1 and above’ to ‘TLS1.1 and above’. |
|
Info |
ADM31354 |
<current timestamp> <node name> <IP Address> <user id><Realm> <Role> – Changed Allowed Encryption Strength from <ciphersuite> to <ciphersuite>. |
|
Info |
ADM30965 |
<current timestamp> <node name> <IP Address> <user id><Realm> <Role> – FIPS mode is now turned on. The web server will restart. |
|
Info |
ADM31273 |
<current timestamp> <node name> <IP Address> <user id><Realm> <Role> – NDcPP mode is now turned on. The web server will restart. |
NDcPP Mode Disable Configuration Admin Logs
Configuration change to disable NDcPP mode on the PCS/PPS.
|
Info |
ADM31273 |
<current timestamp> <node name> <IP Address> <user id><Realm> <Role> -NDcPP mode is now turned off. The web server will restart. |
DH2048 Key Exchange Enable Configuration Admin Logs
Configuration change to enable DH2048 Key Exchange Option on the PCS/PPS.
|
Info |
ADM31287 |
<current timestamp> <node name> <IP Address> <user id><Realm> <Role> – DHE2048 option is now enabled |