Deploying PCS on New Virtual Network
This section describes deployment with three NIC cards and two NIC cards.
Deployment on VM with Three NIC Cards
To deploy PCS on Azure using the Azure portal, do the following:
1.Select the template file created in section ‘Upload Azure Resource Manager Template to Azure account’ and click Deploy.
Before proceeding with deployment, ensure that the attribute “accept-license-agreement” in pulse-config is set to “y”.
Custom Deployment on VM with Three NIC Cards – New Virtual Network
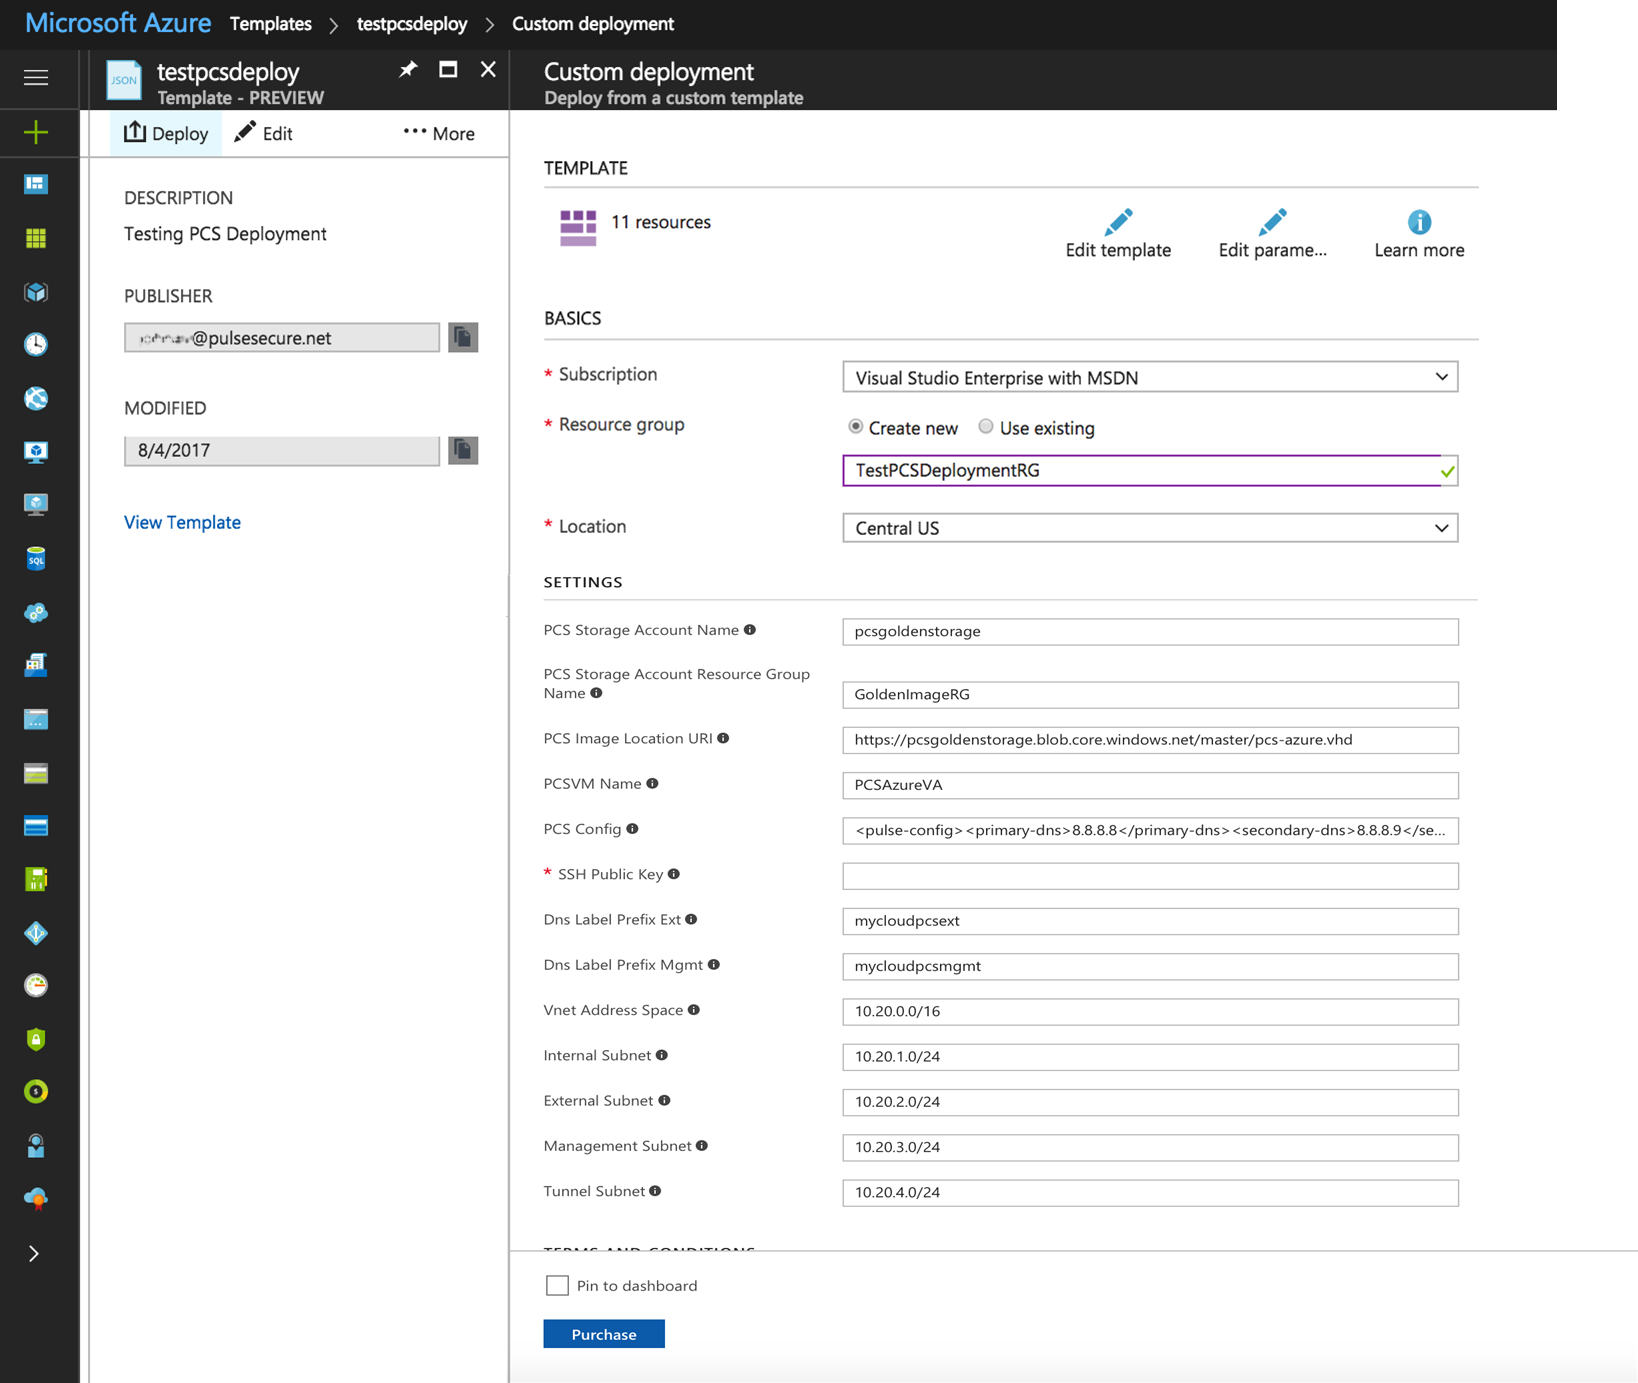
2.Fill or modify the following parameters:
•Resource group: Specify the resource group name in which Pulse Connect Secure needs to be deployed
•Location: Region where resource group needs to be created
•PCS Storage Account Name: Storage account name where the Pulse Connect Secure Virtual Appliance image is available
•PCS Storage Account Resource Group: Resource group of where the Pulse Connect Secure Virtual Appliance image is copied
•PCS Image Location URI: URI to Pulse Connect Secure Virtual Appliance Image
•PCSVM Name: Name of the Pulse Connect Secure Virtual instance
•PCS Config: Provisioning parameters in an XML format. Refer the section ‘Pulse Connect Secure Provisioning Parameters’
•SSH Public Key: This key is used to access PCS via SSH. The SSH keys are generated using ssh-keygen on Linux and OS X, or PuTTyGen on Windows. For details about generating the SSH key pairs, refer:
For Windows: https://docs.microsoft.com/en-us/azure/virtual-machines/linux/ssh-from-windows
For MacOS and Linux: https://docs.microsoft.com/en-us/azure/virtual-machines/linux/mac-create-ssh-keys
•DNS Label Prefix Ext: Prefix for the external interface DNS label
•DNS Label Prefix Mgmt: Prefix for the management interface DNS label
•Vnet Address Space: Virtual network address space
•Internal Subnet: Subnet from which Pulse Connect Secure internal interface needs to lease IP
•External Subnet: Subnet from which Pulse Connect Secure external interface needs to lease IP
•Management Subnet: Subnet from which Pulse Connect Secure management interface needs to lease IP
•Tunnel Subnet: Subnet which will be configured as tunnel IP pool in the Pulse Connect Secure VPN Profile
3.Agree to the Azure licensing terms and click Purchase.
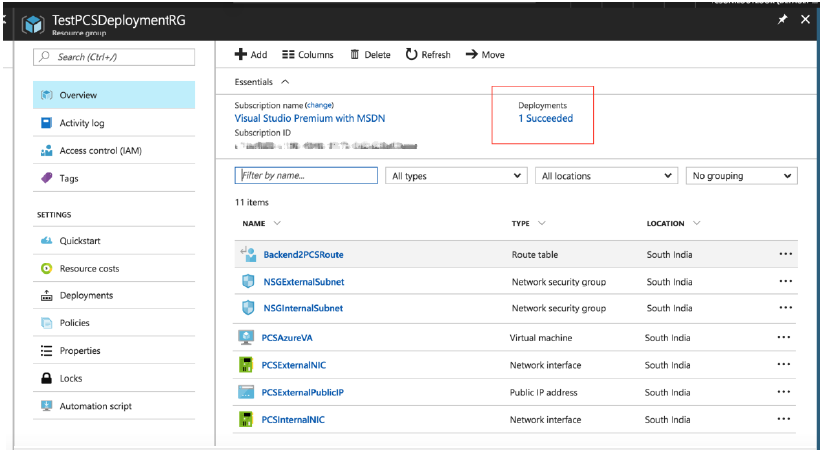
4.Watch for the deployment succeeded message after 3 to 5 minutes.
Deployment Succeeded

5.Go to the resource group in which the Pulse Connect Secure Virtual Appliance was deployed to see the resources created.
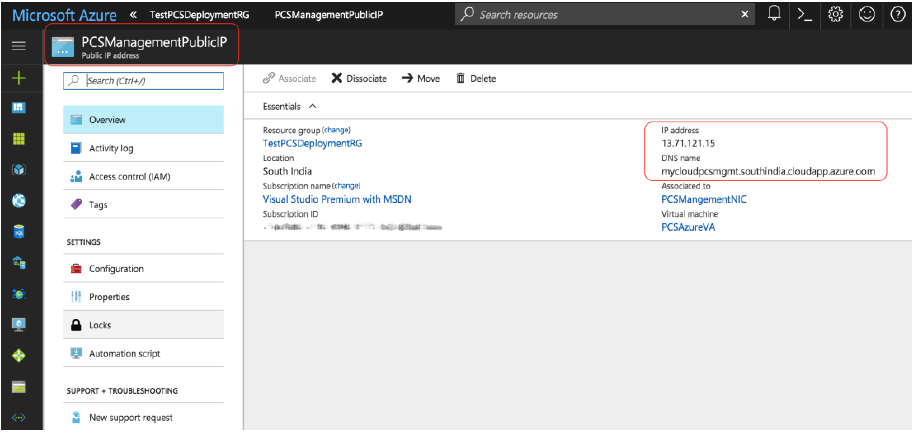
6.Navigate to the resource group and click PCS Management Public IP. Make a note of the PCS Management Public IP and DNS name (FQDN) to access PCS for admin page.
PCS Management Public IP
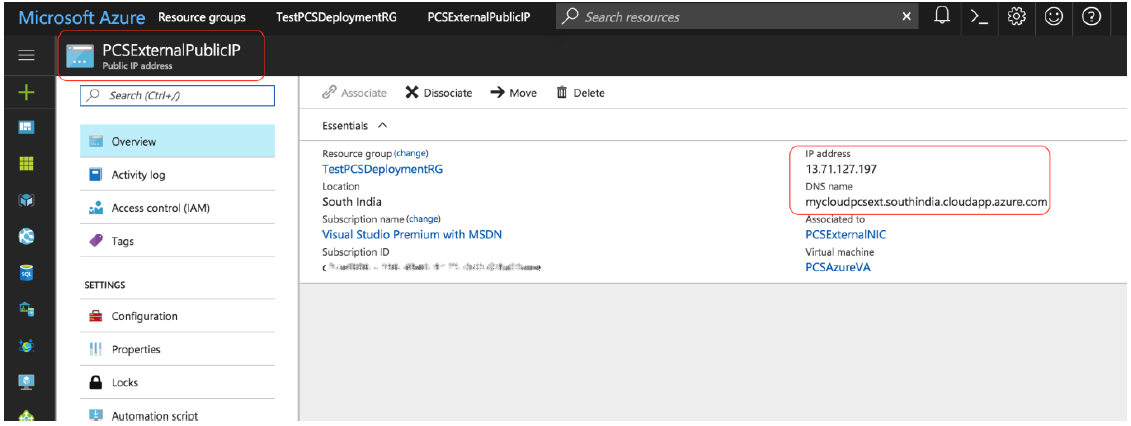
7.Click PCS External Public IP and note down the PCS External Public IP and DNS name (FQDN) to access PCS for end user page.
PCS External Public IP
Azure allows static as well as dynamic assignment of IP addresses to the network interfaces. The mode of IP assignment (static/dynamic) can be mentioned in the Azure Resource Manage template file. The current JSON template uses the dynamic method of allotting IP addresses to the network interfaces.
Deployment on VM with Two NIC Cards
To deploy Pulse Connect Secure on Azure using the Azure portal, do the following:
1.Select the template file created in section ‘Upload Azure Resource Manager Template to Azure account’ and click Deploy.
Before proceeding with deployment, ensure that the attribute “accept-license-agreement” in pulse-config is set to “y”.
Custom Deployment on VM with Two NIC Cards – New Virtual Network
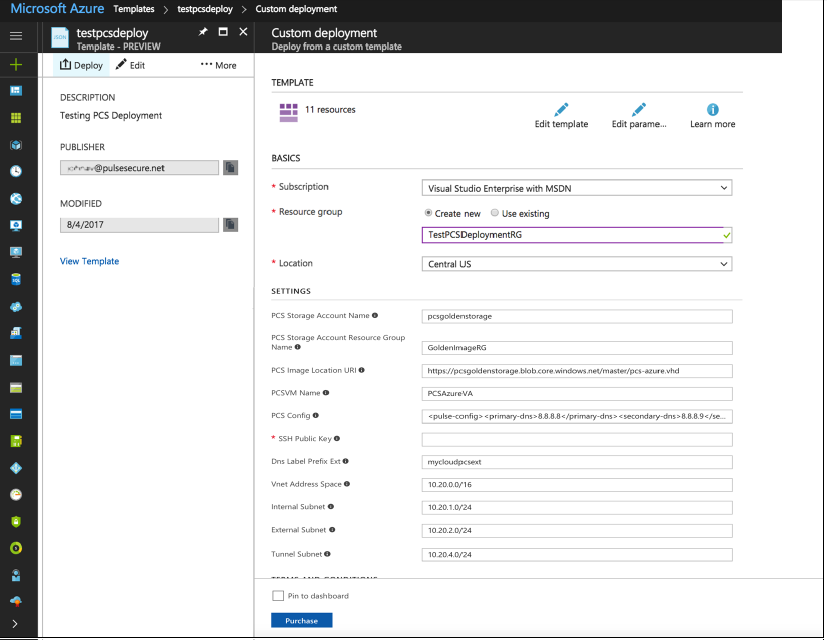
2.Fill or modify the following parameters:
•Resource group: Specify the resource group name in which Pulse Connect Secure needs to be deployed
•Location: Region where resource group needs to be created
•PCS Storage Account Name: Storage account name where the Pulse Connect Secure Virtual Appliance image is available
•PCS Storage Account Resource Group: Resource group of where the Pulse Connect Secure Virtual Appliance image is copied
•PCS Image Location URI: URI to Pulse Connect Secure Virtual Appliance Image
•PCSVM Name: Name of the Pulse Connect Secure Virtual instance
•PCS Config: Provisioning parameters in an XML format. Refer the section ‘Pulse Connect Secure Provisioning Parameters’
•SSH Public Key: This key is used to access PCS via SSH. The SSH keys are generated using ssh-keygen on Linux and OS X, or PuTTyGen on Windows. For details about generating the SSH key pairs, refer:
For Windows: https://docs.microsoft.com/en-us/azure/virtual-machines/linux/ssh-from-windows
For MacOS and Linux: https://docs.microsoft.com/en-us/azure/virtual-machines/linux/mac-create-ssh-keys
•DNS Label Prefix Ext: Prefix for the external interface DNS label
•Vnet Address Space: Virtual network address space
•Internal Subnet: Subnet from which Pulse Connect Secure internal interface needs to lease IP
•External Subnet: Subnet from which Pulse Connect Secure external interface needs to lease IP
•Tunnel Subnet: Subnet which will be configured as tunnel IP pool in the Pulse Connect Secure VPN Profile
3.Agree to the Azure licensing terms and click Purchase.
4.Watch for the deployment succeeded message after 3 to 5 minutes.
Deployment Succeeded
5.Go to the resource group in which the Pulse Connect Secure Virtual Appliance was deployed to see the resources created.
6.Click PCS External Public IP and note down the PCS External Public IP and DNS name (FQDN) to access PCS for end user page.
PCS External Public IP
Azure allows static as well as dynamic assignment of IP addresses to the network interfaces. The mode of IP assignment (static/dynamic) can be mentioned in the Azure Resource Manage template file. The current JSON template uses the dynamic method of allotting IP addresses to the network interfaces.