Deploying Alibaba Cloud PCS using Alibaba Cloud Portal
This section describes Alibaba Cloud PCS deployment with two NIC cards.
Steps to Deploy Pulse Connect Secure on Alibaba Cloud
•Creating Alibaba Cloud PCS Image
•Creating Virtual Private Cloud
Creating Alibaba Cloud PCS Image
To create Alibaba Cloud PCS image, do the following:
1.Download Alibaba Cloud PCS image, which is in the zip format, from the Pulse Secure Support site.
2.Unzip the file.
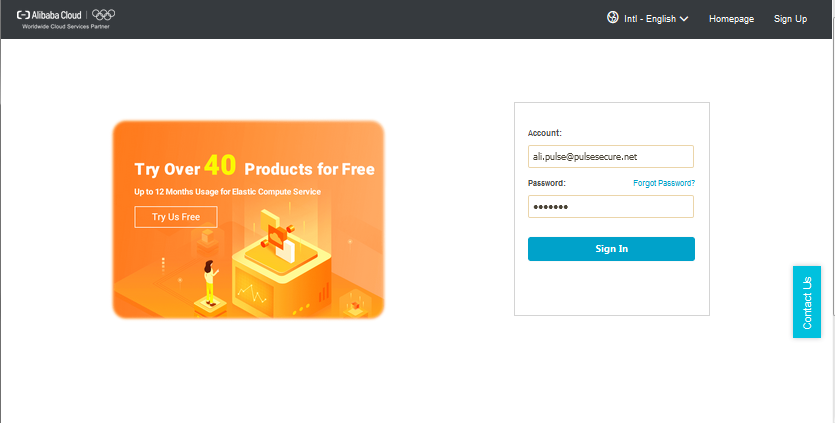
3.Log in to Alibaba Cloud with your account and credentials.
The following figure depicts the Alibaba Cloud Account Login Page:
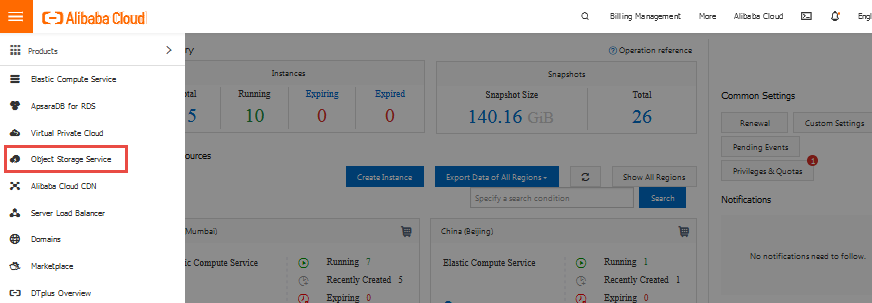
4.In the ECS Console displayed, select Object Storage Service. The Object Storage Service page allows OSS bucket management such as store and retrieve a variety of unstructured data files, including text files, images, audio files, and video files, over the network at any time.
The following figure depicts the Object Storage Service Option screen:
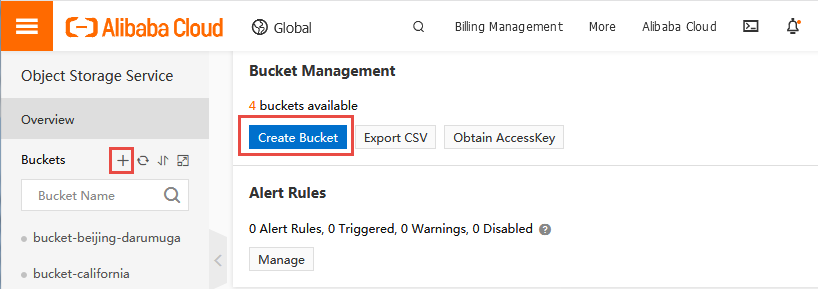
5.Sign up for OSS and create one or more OSS buckets. For details, refer to Alibaba Cloud Documentation.
The following figure depicts the Bucket Management screen:
6.From the buckets list, click on the name of the created bucket.
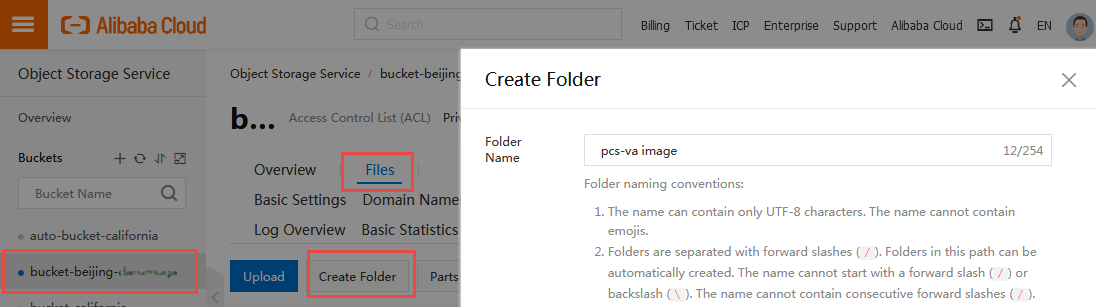
7.In the window displayed, select the Files tab and then click Create Folder to create a folder for the Alibaba Cloud PCS-VA image.
The following figure depicts the Create Folder screen:
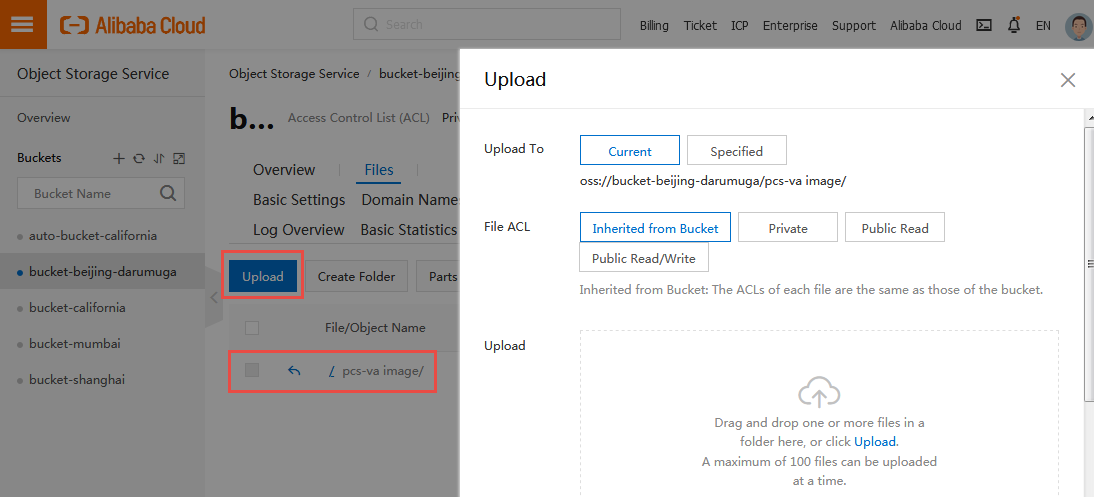
8.After creating the folder, change to the newly created folder and then click Upload.
9.In the Upload section, drag and drop one or more Alibaba Cloud PCS-VA images.
The following figure depicts the Upload Alibaba Cloud PCS VA Image screen:
10.Wait for the upload to complete.
The following figure depicts the Upload Tasks screen:

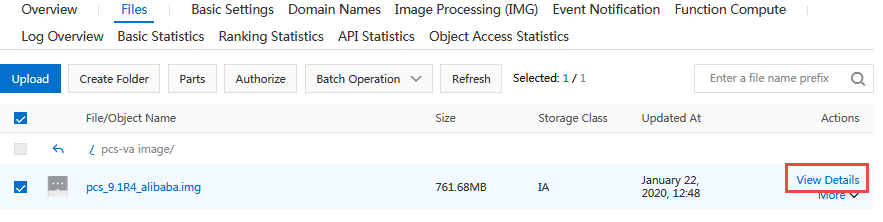
11.Click on the View Details link corresponding to the uploaded file.
The following figure depicts the View Details screen:
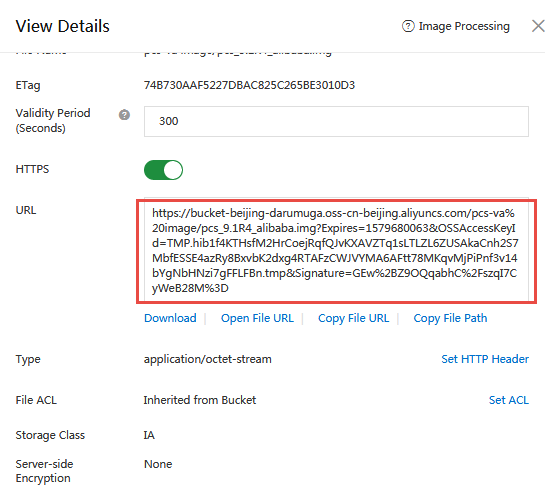
12.Make note of the URL of the image. You need to enter this URL when importing the image.
The following figure depicts the Image URL screen:
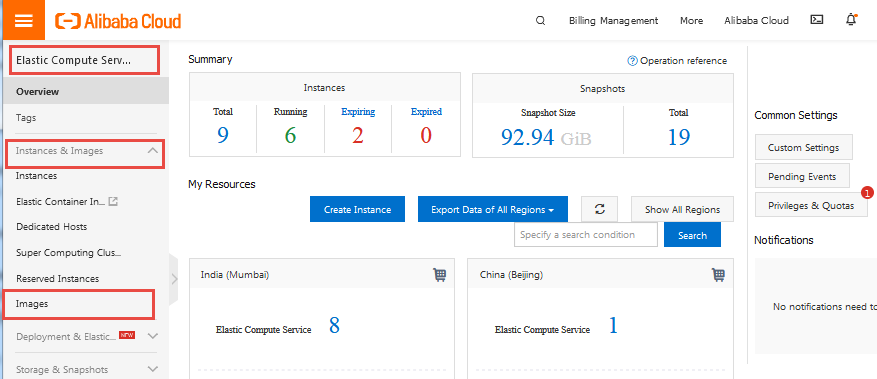
13.In the ECS Console, select Elastic Compute Service > Instances & Images > Images.
The following figure depicts the Images Option screen:
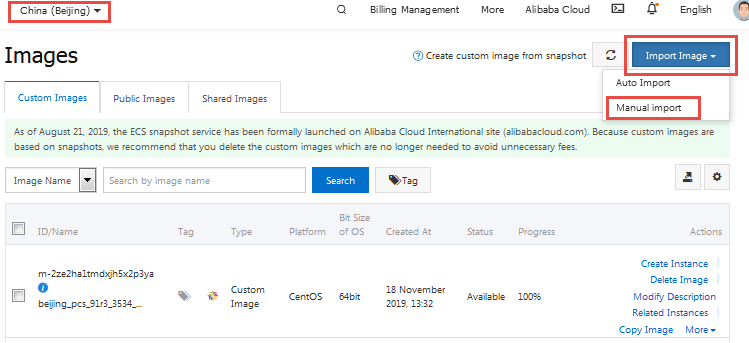
14.In the Images page displayed, select the region from the drop-down list located at the top-left corner of the page.
15.Click the Import Image button located at the top-right corner of the page and select Manual Import.
The following figure depicts the Images Page – Manual Import Image screen:
16.In the Import Image page displayed, enter the following details and click OK.
The following figure depicts the Import Image Page screen:
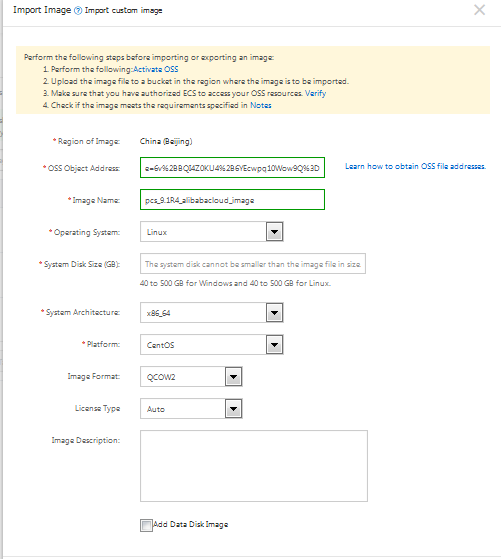
•OSS Object Address: Type the URL of the Alibaba Cloud PCS image that was uploaded to OSS bucket.
•Image Name: Type a unique name for the image.
•Operating System: Linux
•System Disk Size (GB): 40
•System Architecture: Select an appropriate value from the drop-down list.
•Platform: CentOS
•Image Format: QCOW2
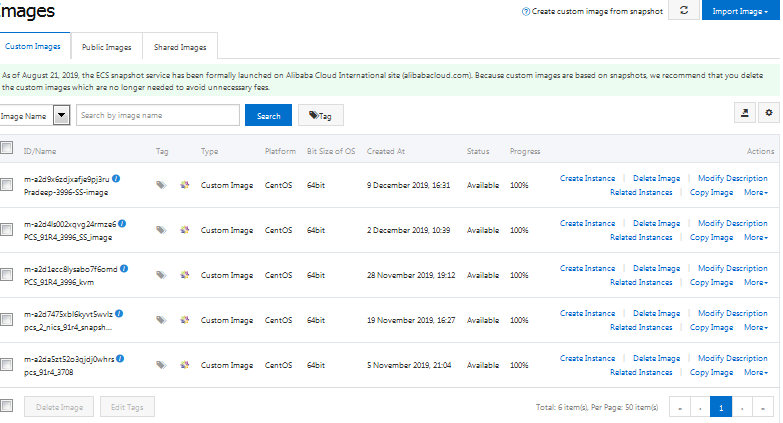
The imported image is listed in the Images page.
The following figure depicts the Images List screen:
Creating Virtual Private Cloud
To create Virtual Private Cloud (VPC), do the following:
1.Select Elastic Compute Service > Network & Security > VPC.
The following figure depicts the VPC Option screen:

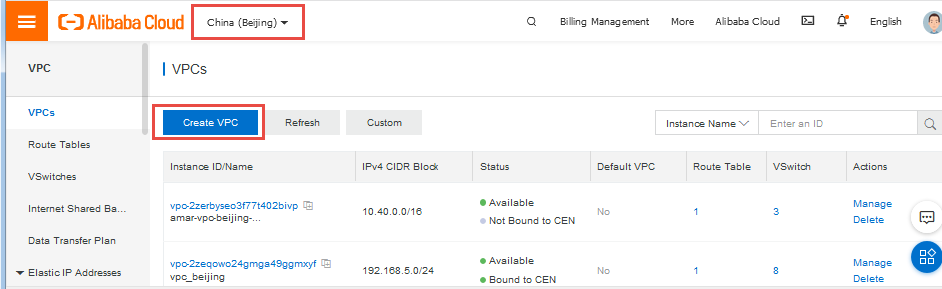
2.In the VPCs page, select the required region from the drop-down list located at the top-left corner of the page and click Create VPC.
The following figure depicts the VPCs Page:
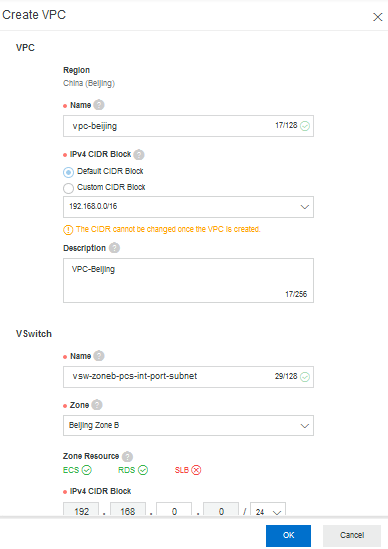
3.In the Create VPC page displayed, enter the VPC and VSwitch (Internal Port) details and click OK.
The following figure depicts the Create VPC Page:
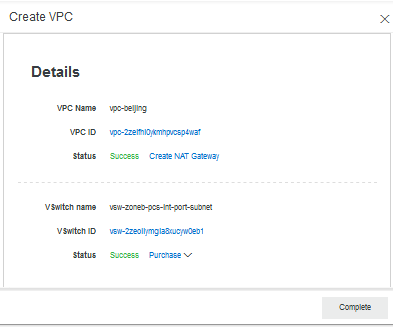
4.In the Create VPC - Details page, verify Status and click Complete. The created VPC is listed in the VPCs page.
The following figure depicts the Create VPC – Details Page:
Creating VSwitches
While creating VPC, you created VSwitch for Internal Port. You need to create VSwitches for External and Management ports.
To create VSwitches, do the following:
1.Select Elastic Compute Service > Network & Security > VPC > VSwitches.
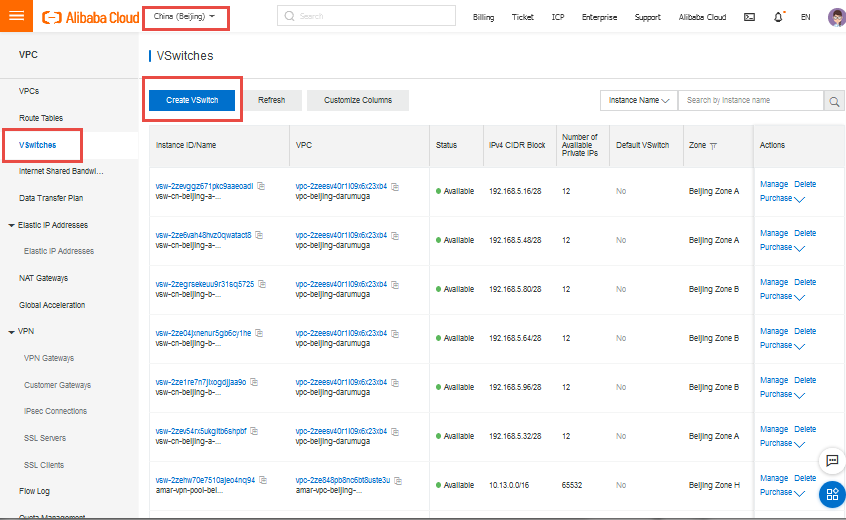
2.In the VSwitches page displayed, select the required region from the drop-down list located at the top-left corner of the page and click Create VSwitch.
The following figure depicts the VSwitches Page:
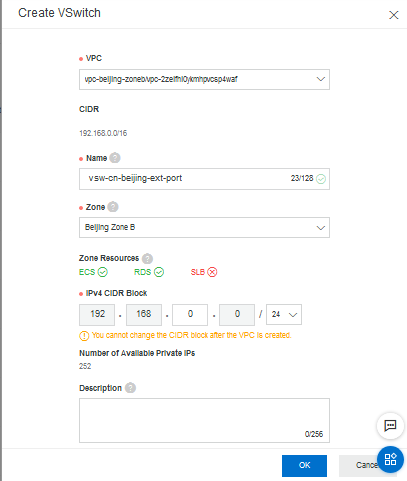
3.In the Create VSwitch window displayed, do the following:
•Select VPC from the drop-down list.
•Enter a unique name for VSwitch for External port.
•Select Zone from the drop-down list.
•Click OK. The created VSwitch is listed in the VSwitches page.
The following figure depicts the Create VSwitch Window screen:
4.Repeat the procedure to create VSwitch for Management Port.
Creating Security Groups
Security groups are groups of VPC instances that are located within the same region and share the same security requirements.
To create a security group, do the following:
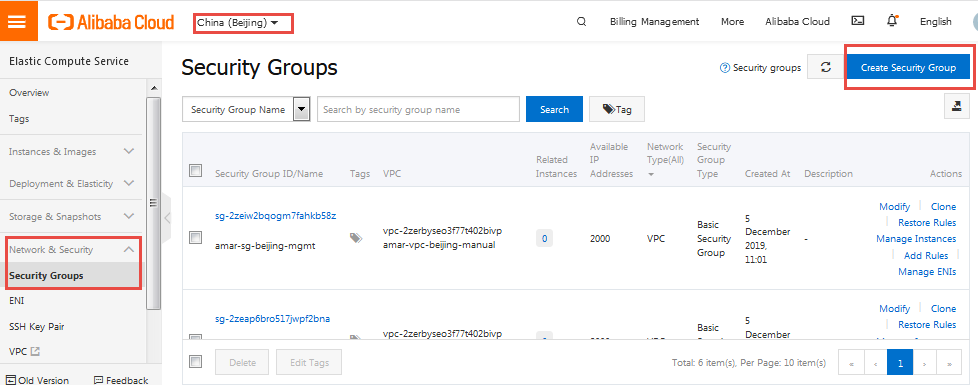
1.Select Elastic Compute Service > Network & Security > Security Groups.
2.In the Security Groups page, select the region from the drop-down list located at the top-right corner of the page and click Create Security Group.
The following figure depicts the Security Groups Page screen:
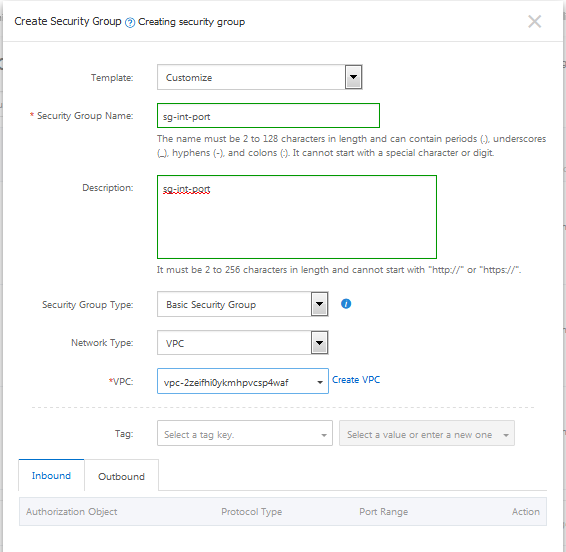
3.In the Create Security Group window, select a template from the drop-down list.
4.Enter a name for the Security Group.
5.Select Security Group Type from the drop-down list.
6.Select Network Type as VPC.
7.Select VPC from the drop-down list.
8.Click OK.
The following figure depicts the Create Security Group Window screen:
9.In the Notes dialog that is displayed, click Create Rules Now.
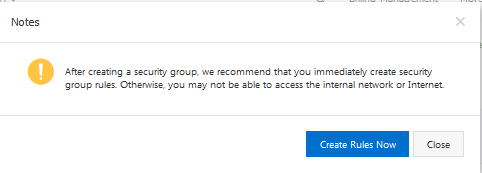
10.In the page that is displayed, click Add Security Group Rule to create the Inbound rules.
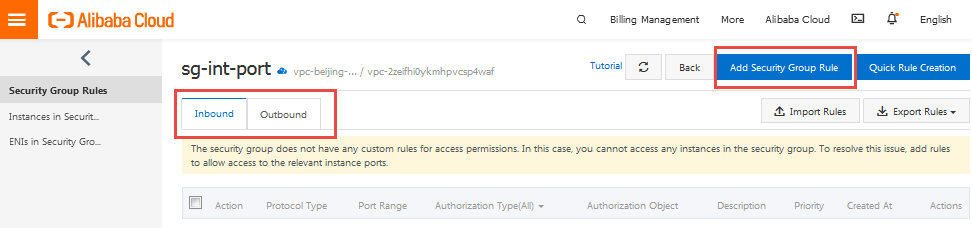
For details about Inbound rules, see Appendix A: Security Group (SG). This completes creation of Security Group.
Creating PCS-VA Instance
To create PCS-VA instance, do the following:
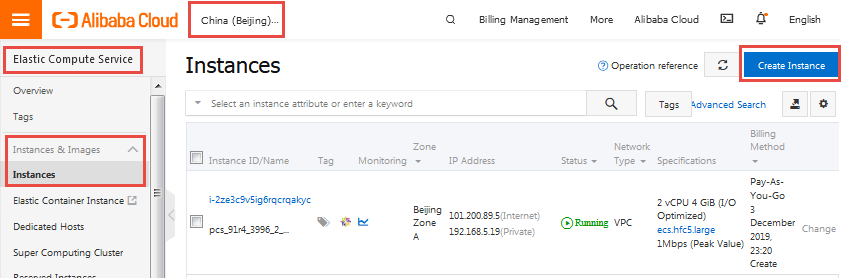
1.Select Elastic Compute Service > Instances and Images > Instances.
2.In the Instances page, select the region from the drop-down list located at the top-left corner of the page and click Create Instance.
The following figure depicts the Instances Page – Create Instance Option screen:
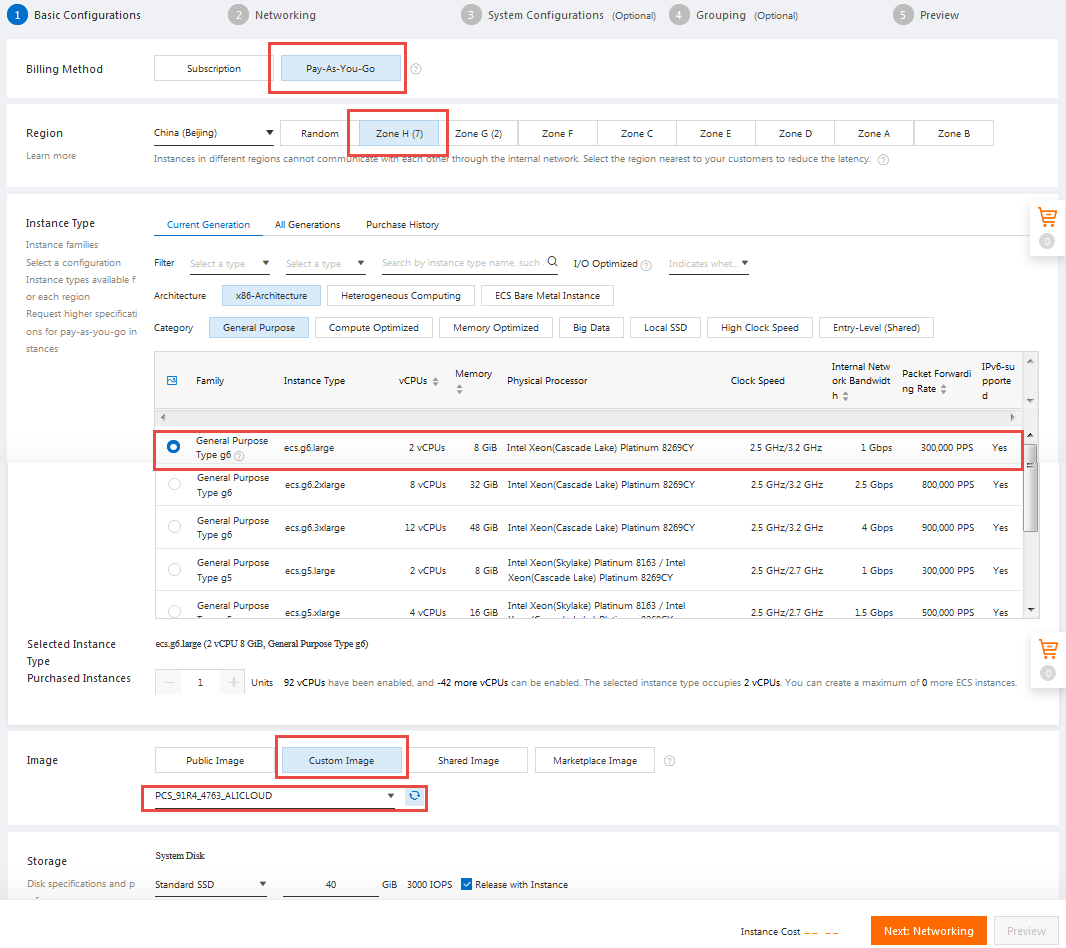
3.In the Basic Configurations page, select the Custom Launch tab.
4.Select the Billing Method as Pay-As-You-Go
5.Select the appropriate zone in Region.
6.In Instance Type, type ecs.ic5.large.
The Selected Instance Type displays the details of the instance type.
7.In the Image section, select the Custom Image tab.
8.From the drop-down list, select the required Alibaba Cloud PCS image that you want to deploy. For details about Alibaba Cloud PCS image, see “Creating Alibaba Cloud PCS Image”.
The following figure depicts the Basic Configurations Page:
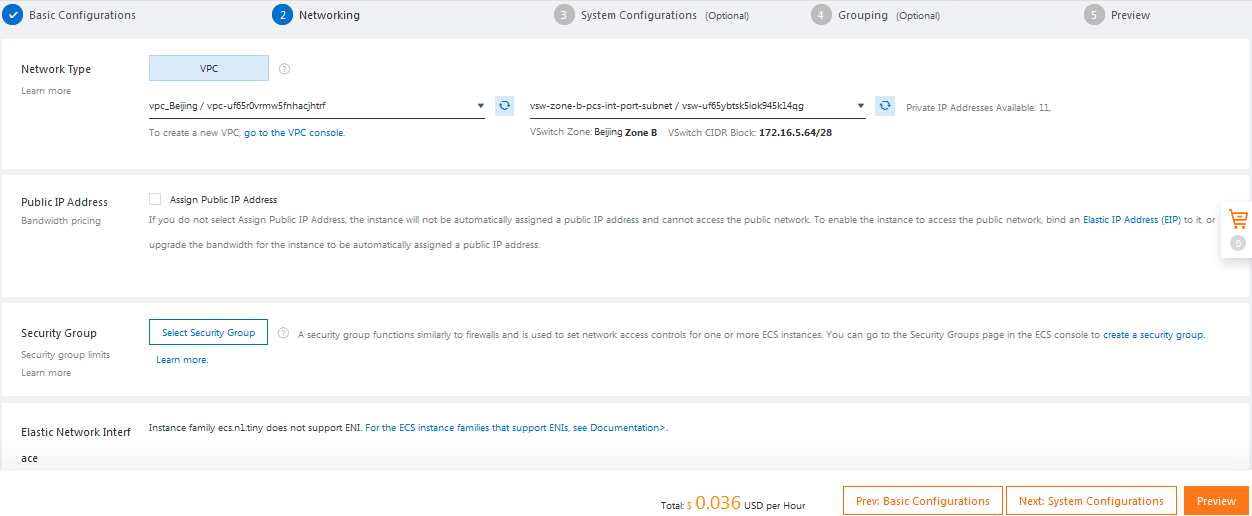
9.Click Next Networking to proceed to networking configuration.
10.In the Networking page, go to the Network Type section and select the required VPC and VSwitch from the drop-down lists. For details about creating VPC and VSwitch, see “Creating Virtual Private Cloud”.
11.In the Public IP Address section, select the Assign Public IP Address check box to select an IP address for the Internal Port.
The following figure depicts the: Networking Page:
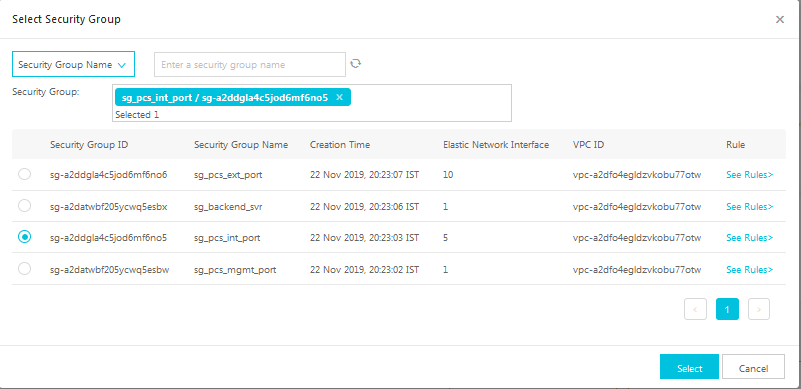
12.In the Security Group section, click Select Security Group. In the Select Secure Group window displayed, select the security group assigned to the Internal Port and click Save. For details about creating Security Group, see “Creating Security Groups”.
The following figure depicts the Select Security Group Window:
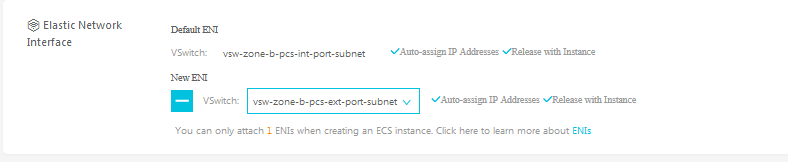
13.In the Elastic Network Interface section, click Add ENI and select the External Port.
The following figure depicts the Elastic Network Interface Section:
14.Click Next System Configuration to proceed to system configuration.
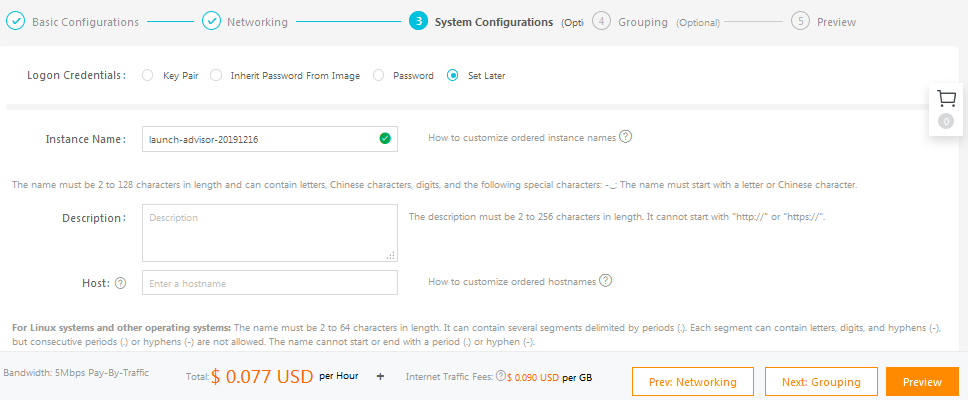
15.In the System Configurations page, for Logon Credentials, select Set Later.
16.For Instance Name, enter the name of the virtual appliance.
17.In the User Data section, provide Provisioning Parameters in the XML format.
The following figure depicts the System Configurations Page:
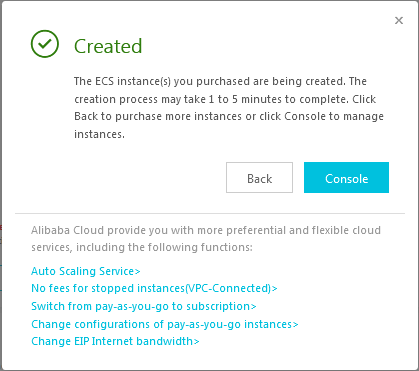
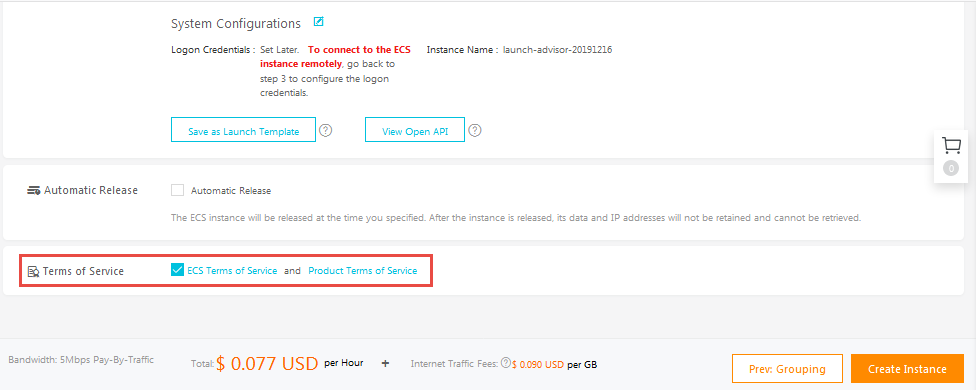
18.Click Preview. In the Summary page, accept Terms of Service and click Create Instance.
The following figure depicts the Terms of Service page:
The instance will be created.