Using Pulse Secure Desktop Client Interface
To launch Pulse Secure Desktop Client from Desktop
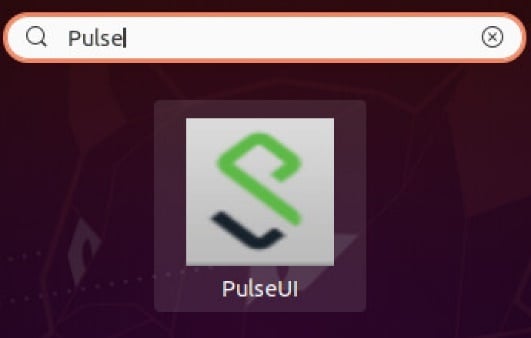
Launch Pulse Secure Desktop Client by searching for Pulse Secure Icon under Applications List.
To launch Pulse Secure Desktop Client from the Terminal
Launch the UI by executing the below command
/opt/pulsesecure/bin/pulseUI
Adding VPN Connections
To create a Pulse Secure VPN connection on a device:
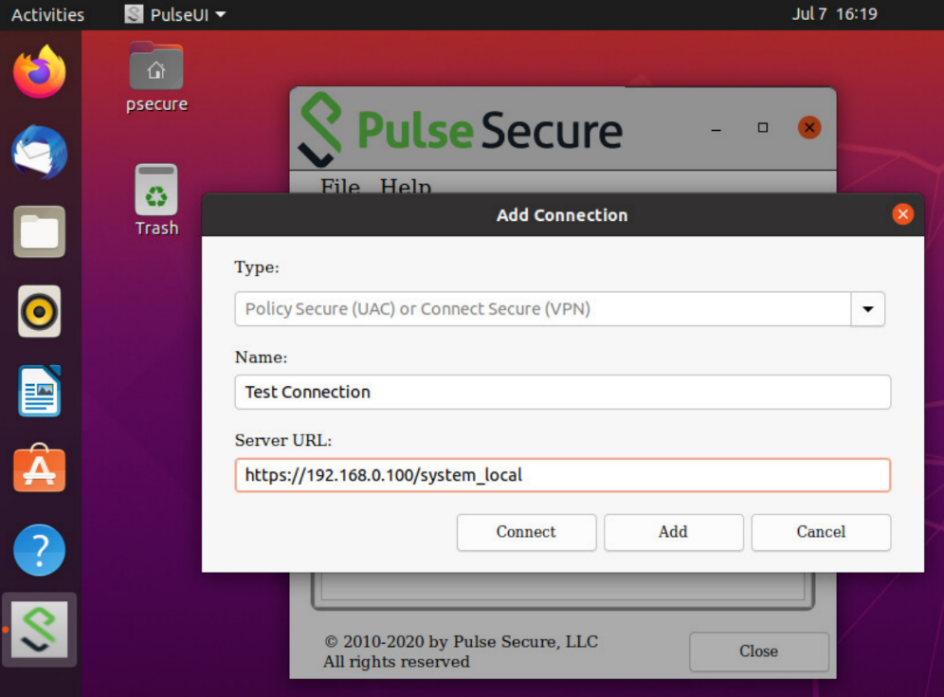
Click Add icon on the top-right-hand corner of the main Unified Pulse Secure client screen.
1.In the Name field, specify the name for the Pulse Connect Secure gateway.
2.In the Server URL field, specify the URL for the Pulse Connect Secure gateway.
You can identify the server using the server IP address, the hostname, or a URL that optionally specifies the port the connection uses and the specific sign-in page. To specify an URL, use the following format: https://hostname[:port][/][sign-in page]
The brackets indicate options. If you specify a specific sign-in page, make sure that the name you specify matches what is defined on the Pulse Connect Secure gateway. (Authentication > Signing in > Sign-in pages.)
3.Click Save. The new VPN connection appears in the VPN list.
Click Connect to initiate a VPN connection. The VPN connection state is indicated in the VPN dropdown menu on the VPN list.
Use “JamCommand” tool to import connections to client store using CLI.
/opt/pulsesecure/bin/jamCommand /ImportFile ~/Downloads/pulsepreconfig
Modifying VPN Connection
To modify a Pulse Secure VPN connection on a device:
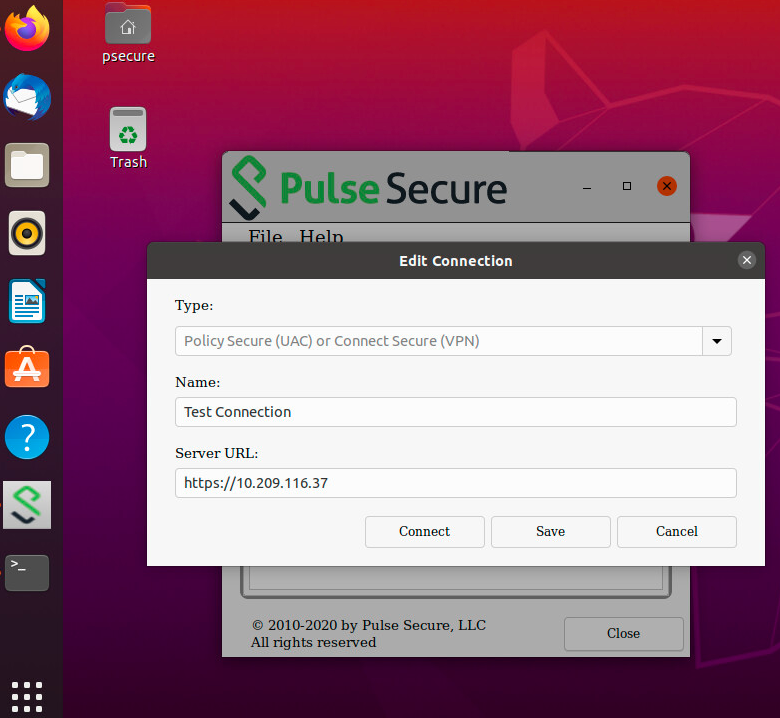
1.Select the VPN connection and click the edit icon on the top-right-hand corner of the main Pulse Secure Desktop Client screen.
2.In the Name field, specify the name for the Pulse Connect Secure gateway.
3.In the Server URL field, specify the URL for the Pulse Connect Secure gateway.
You can identify the server using the server IP address, the hostname, or a URL that optionally specifies the port the connection uses and the specific sign-in page. To specify an URL, use the following format: https://hostname[:port][/][sign-in page]
The brackets indicate options. If you specify a specific sign-in page, make sure that the name you specify matches what is defined on the Pulse Connect Secure gateway. (Authentication > Signing in > Sign-in pages.)
4.Click Save, modified VPN connection appears in the VPN list.
Tap Connect to initiate a VPN connection. The VPN connection state is indicated in the VPN dropdown menu on the VPN list.
Deleting VPN Connection
To delete a Pulse Secure VPN connection on a device:
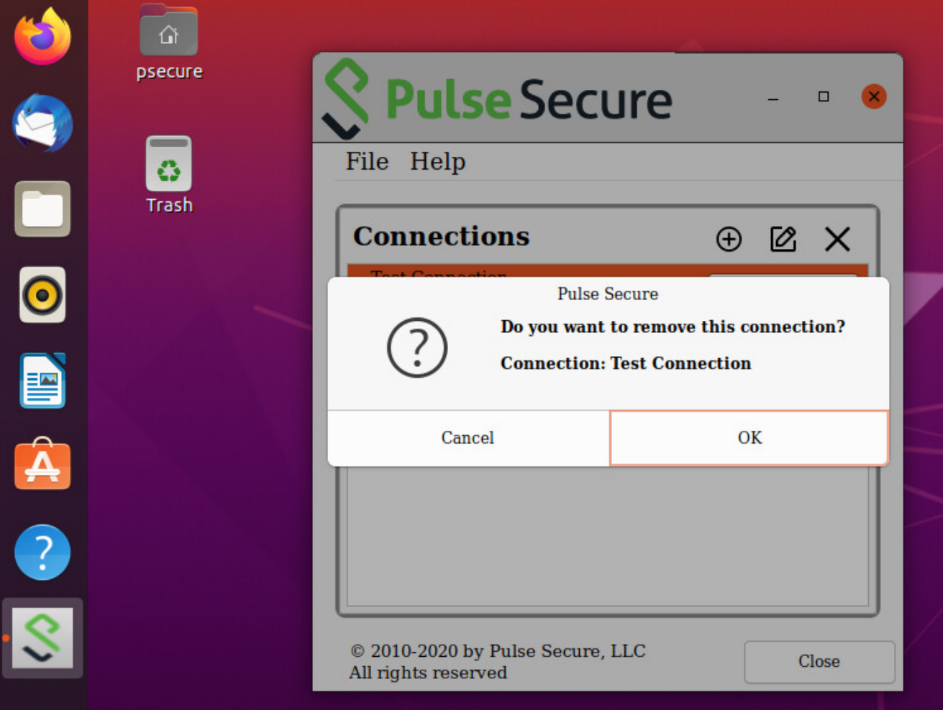
1.Select the VPN connection and click on the delete icon on the top-right-hand corner of the main Pulse Secure Desktop Client screen.
2.VPN connection is removed from the VPN list after user click the OK button on the above screen.
Initiating VPN Connection
To initiate a Pulse Secure VPN connection on a device:

1.Select the VPN connection and click Connect on the main screen.
2.New window opens to continue authentication process based on the authentication method configured for the realm.
Terminating VPN Connection
To terminate a Pulse Secure VPN connection on a device:
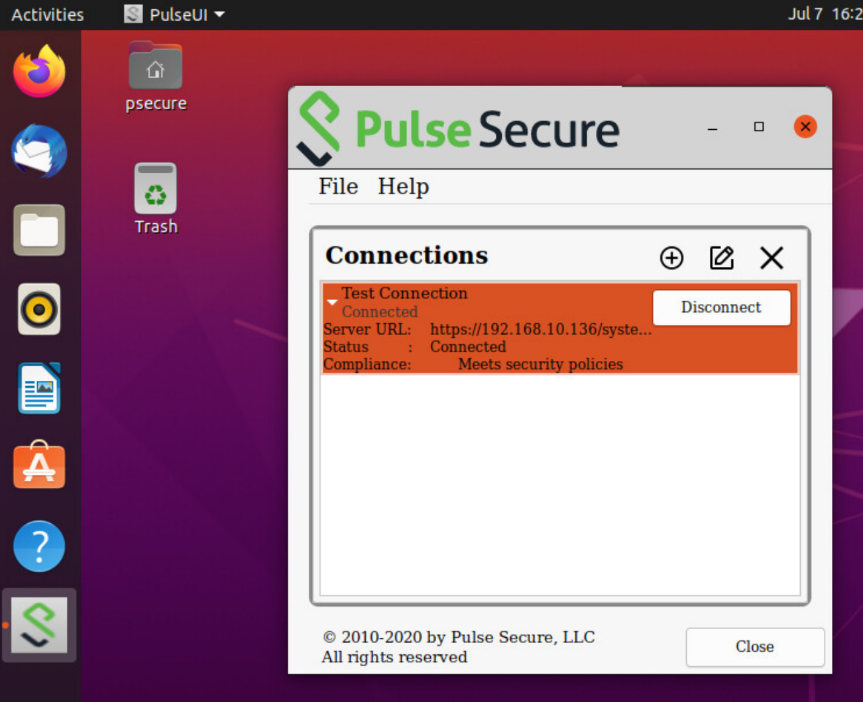
Select the VPN connection and click Disconnect on the main screen.
Pulse Secure Desktop Client automatically attempts to reconnect in case of an interrupted connection, such as temporarily losing the Wi-Fi link.
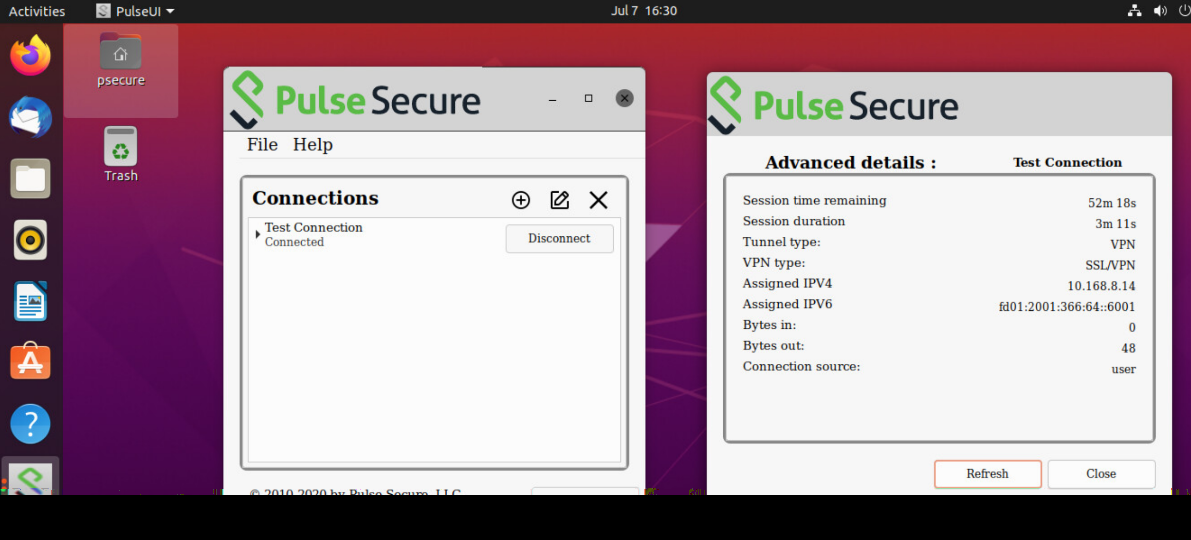
Advanced Connection Details
Advanced connection details page shows the status of the selected VPN connection from the list.
To view advanced connection details, navigate to File > Connections > Advanced Status Details.
: To upload logs to the VPN server, the user needs to be authenticated with an active session.
About Pulse Linux Client
To view Pulse Linux client details:
1.Click About button on main Pulse Secure Desktop Client UI.
