PPS Migration Wizard
PPS Migration wizard enables seamless migration of RADIUS and TACACS+ configuration, and also automatically creates basic PPS configuration needed for these use cases to work right after migration is complete.
Prerequisites
Before proceeding with the PPS Migration wizard, export the RADIUS/TACACS+ clients’ details in the form of CSV file from Cisco ACS.
Follow the below steps to export the RADIUS/TACACS+ clients’ details:
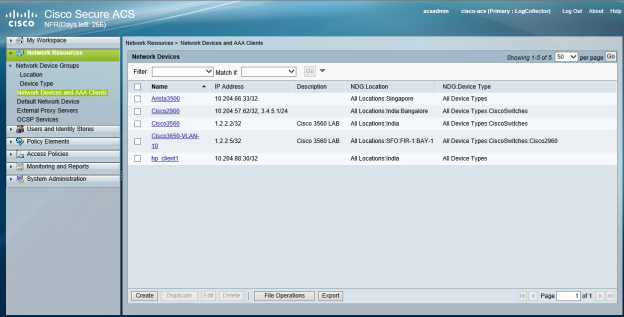
1.Log in to Cisco ACS GUI.
2.Navigate to Network Resources > Network Devices and AAA Clients.
3.Select all the clients.
4.Click Export.
Configuring RADIUS and TACACS+ Migration using PPS Migration Wizard
The PPS Migration wizard helps administrators in creating RADIUS and TACACS+ configuration using the CSV file exported from Cisco ACS.
To configure RADIUS and TACACS+ migration using PPS Wizard:
1.Log in to the PPS Admin console.
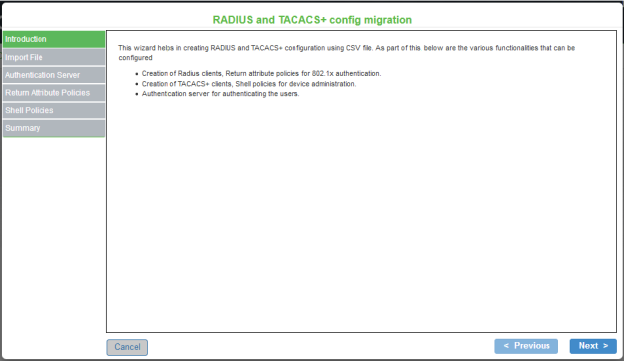
2.Select Wizards > Migration > RADIUS and TACACS+ config migration.The Introduction window lists the configuration steps.
3.Click Next.
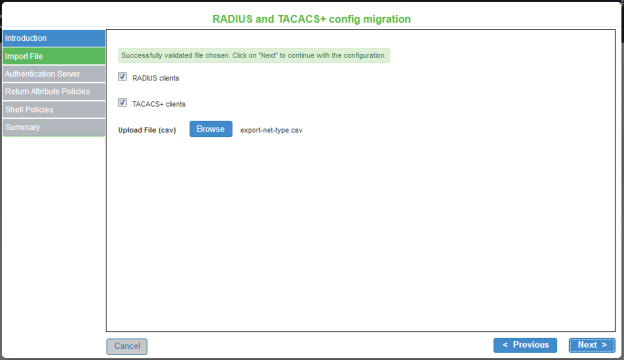
4.In the Import File window, choose the use cases for configuration import – the RADIUS clients check box or TACACS+ clients check box or both. Based on these selections, migration wizard provides steps to create the Radius policies followed by the Shell policies.
5.Click Browse and select the CSV file that is exported from Cisco ACS.
6.Click Next. After receiving confirmation for successful upload, click Next.
At any stage of the migration wizard, you can click Previous to go back to the previous window or click Cancel to cancel the migration.
7.Next step is to configure the Active Directory server. You can select one from the existing list of AD servers or add a new AD server.
•To select from the existing list, click Select existing server and choose the required AD server from the list.
•To add a new AD server, click Add new AD server. Enter the name, domain name, Kerberos realm, user name, password that matches with the ACS configurations.
8.Click Test to validate the Active Directory configuration. This will take a few seconds to complete.
9.Once the validation is successful, click Next.
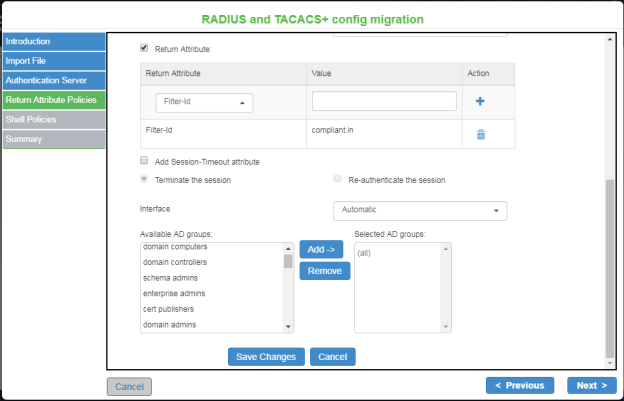
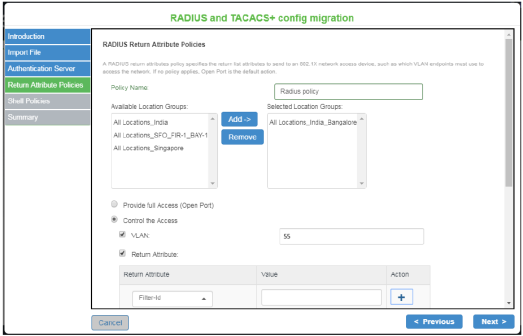
10.In the RADIUS Return Attribute Policies window, click New Policy and enter a name to the Radius policy.
11.Select Location Groups.
PPS supports single location group; nested location groups are not supported. The subgroups created on ACS have to be configured as individual groups in PPS.
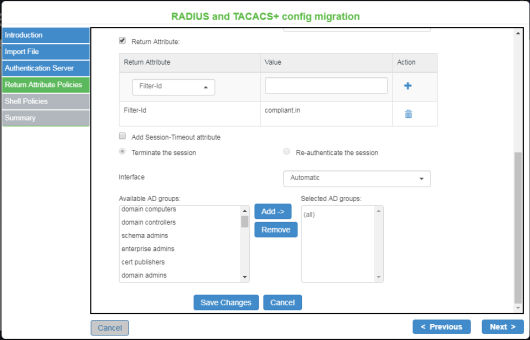
12.Select the Return Attribute check box. Select appropriate Vendor Specific Attribute as Return Attribute. In the Value field, define the ACL/Firewall Filter. For example, Return Attribute is Filter-Id and Value is compliant.in.
13.Click Save Changes to save the configuration.
14.Click Next.
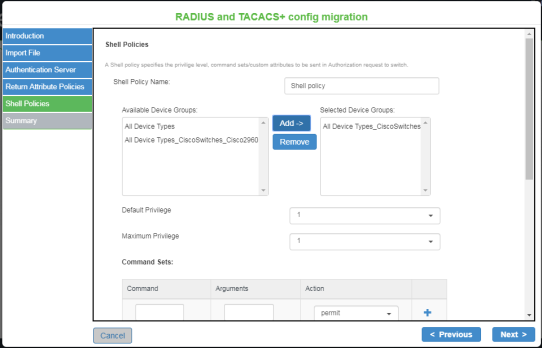
15.In the Shell Policies window, click New Policy and enter a name to the Shell policy.
16.Define external group, device type, shell profile and the command set.
17.Click Save Changes to save the configuration.
18.Click Next.

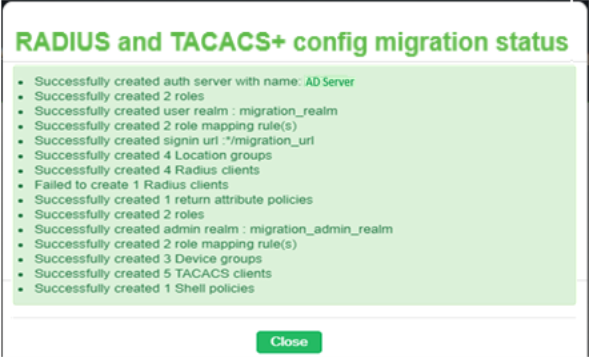
19.In the Summary window, verify the details and click Finish to complete the RADIUS and TACACS+ configuration migration.

For more information on 802.1X authentication and troubleshooting, see 802.1X Authentication with Cisco Switch cook book