Configuration
Configuring Admin Role
Admin role enables you to define granular administrative access privileges. For example, an organization would require multiple admin roles with different privilege levels to ensure protection from sensitive company information.
To create an Admin role for TACACS+:
1.Select Administrators > Admin Roles > New Admin Role. Enter a role name. You can create multiple admin roles with different privilege levels. For example, tac_admin_role
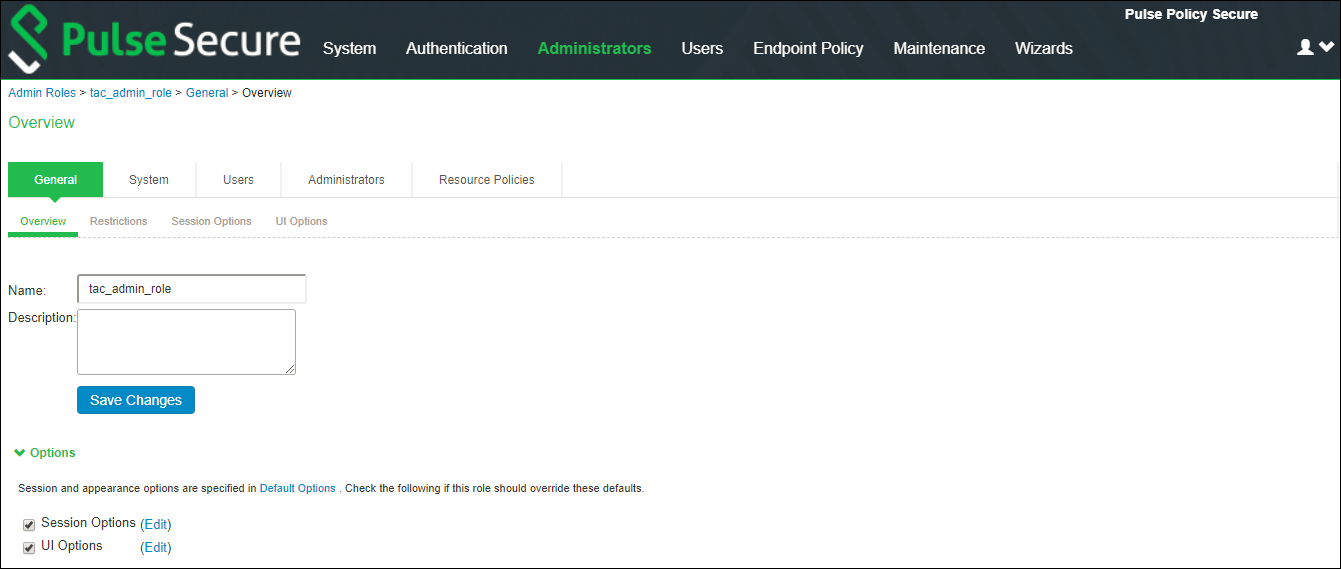
2.Under Session Options, specify the following attributes:
•Idle Time-out - If no input is received or sent in the period specified, the session is disconnected.
•Max session length- It specifies the maximum length of time that the session can exist. After this value has expired, the session gets disconnected.

Configuring Admin Realm
An authentication realm defines the authentication server with which end user is authenticated and the list of restrictions that must be satisfied on the client machine during sign-in. It also provides role mapping option to administrators for configuring the list of roles that needs to be assigned to the user. Role mapping provides flexibility to administrators in configuring how different set of roles need to be assigned to the user.
An admin can configure multiple admin realms when different authentication servers are required for authentication for different devices. Admin’s can also use different backend servers for managing different device groups.
Create an Authentication realm and then associate the authentication server to it.
1.Select Administrators > Admin Realms > New Authentication Realm.
2.Under Servers, specify the Authentication server (AD, LDAP, Local, or RSA (ACE Server). For more information, see AAA Servers.
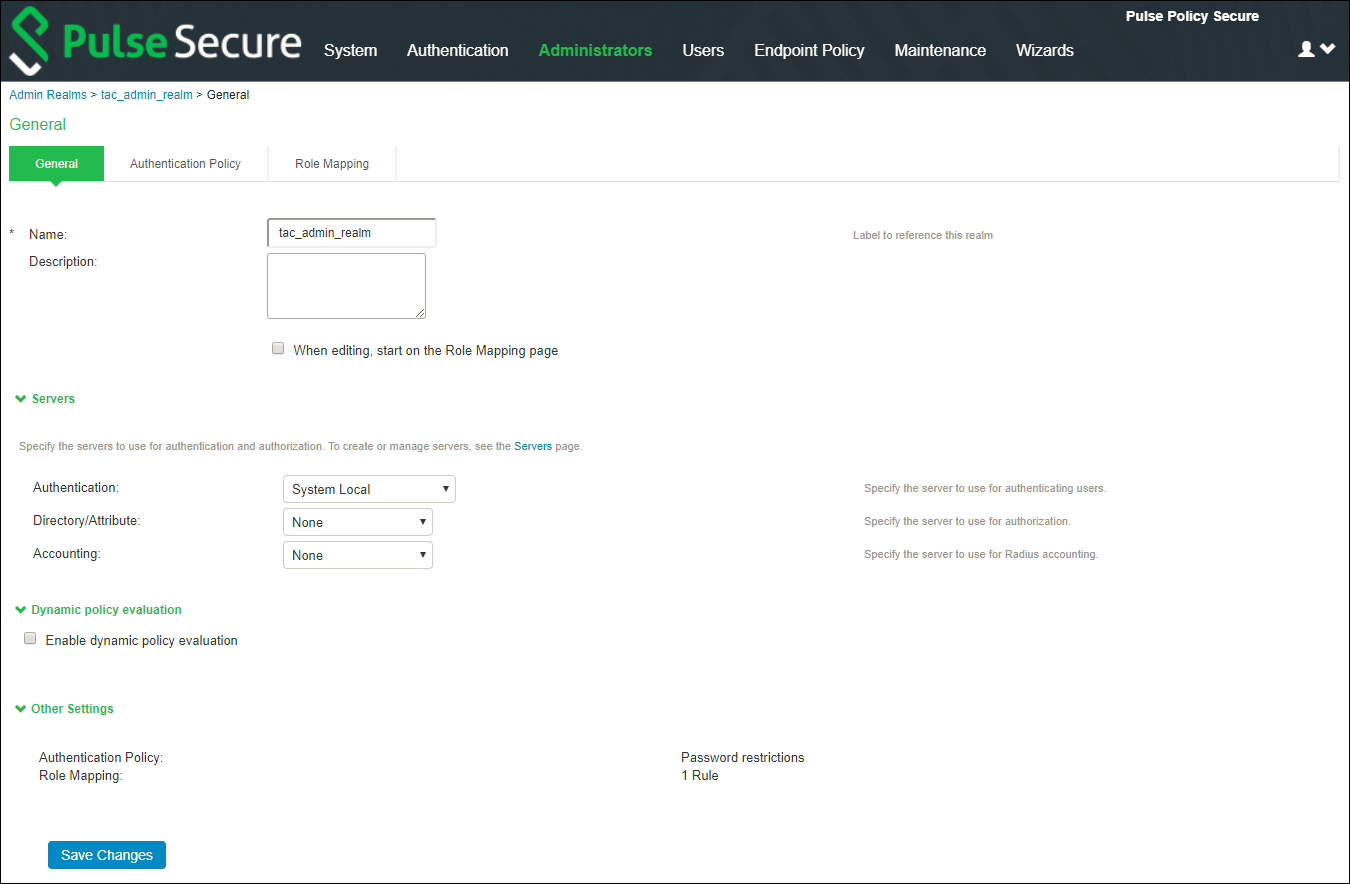
3.Configure any Admin role restrictions. For example, Source IP restriction.
Browser, Host Checker, Certificate restrictions are not supported with TACACS+.
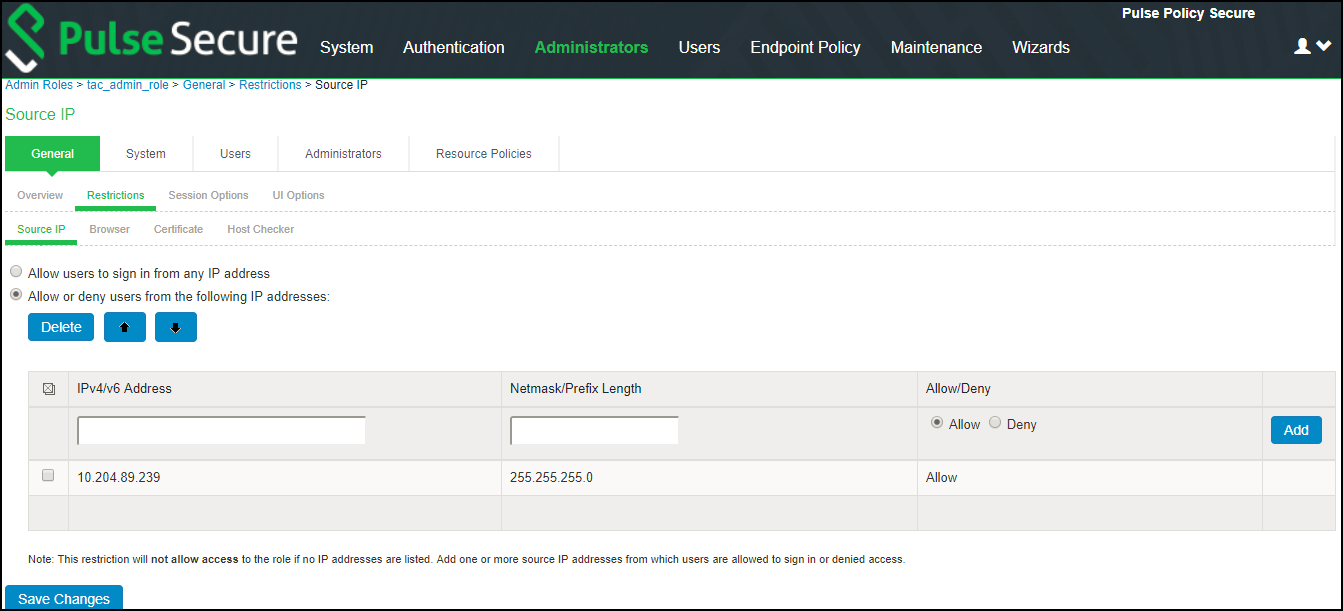
4.Set the role mapping rules. For example, create a rule to assign all users with username as tac_user to tac_admin_role.
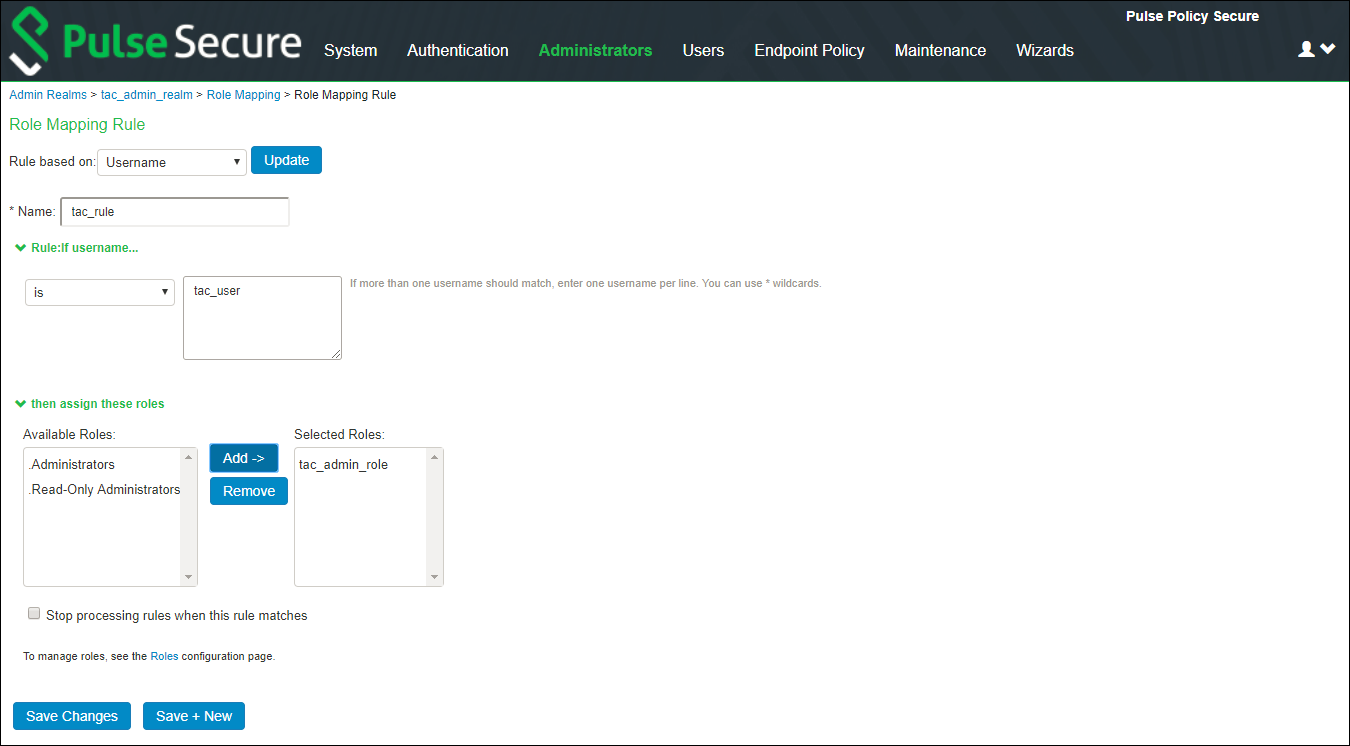
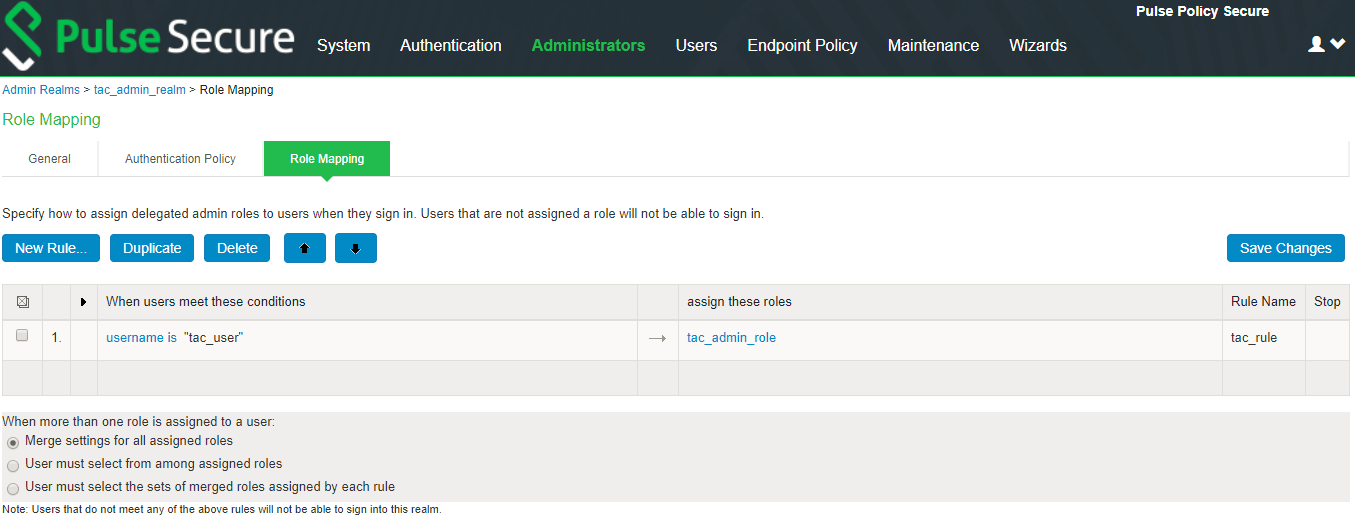
Role mapping rule execution is based on the order of the rules.
Configuring Device Group
The device groups are created in a heterogeneous network where there are devices from multiple vendors with different command set. Devices with same command syntax are grouped so that it is easy to manage. PPS considers each group as a single unit while applying the shell policies.
For example, if your deployment has devices from multiple vendors, you can group them into multiple device groups based on their command syntax. Similarly, you can also create different device groups based on whether the device is a WLC/Switch.
To create a device group:
1.Select Endpoint Policy > Network Device Administration > Device Group.
2.Enter the name and description of the device group
3.Associate the previously created Admin Realm with the device group.
4.A device group policy logically groups network devices by associating the devices with specific admin realm.
5.Click Save Changes.

Configuring TACACS+ Client
A TACACS+ client policy specifies the information required for the device to connect to Pulse Policy Secure for admin access control. You can add the network devices as TACACS+ clients for the administrator to manage. PPS allows you to configure an IP address range for TACACS+ clients.
To create a TACACS+ client:
1.Select Endpoint Policy > Network Device Administration > TACACS+ Clients > New TACACS+ Client.
2.Enter a name for the TACACS+ client.
3.Enter a description.
4.Enter the IP address of the client.
5.Enter the IP address range for the TACACS+ clients.
6.Enter the shared secret.
7.Select the device group from the drop down.
8.Under TACACS+ Advance Settings, enable/disable allow authorization without authentication.
9.Click Save Changes.
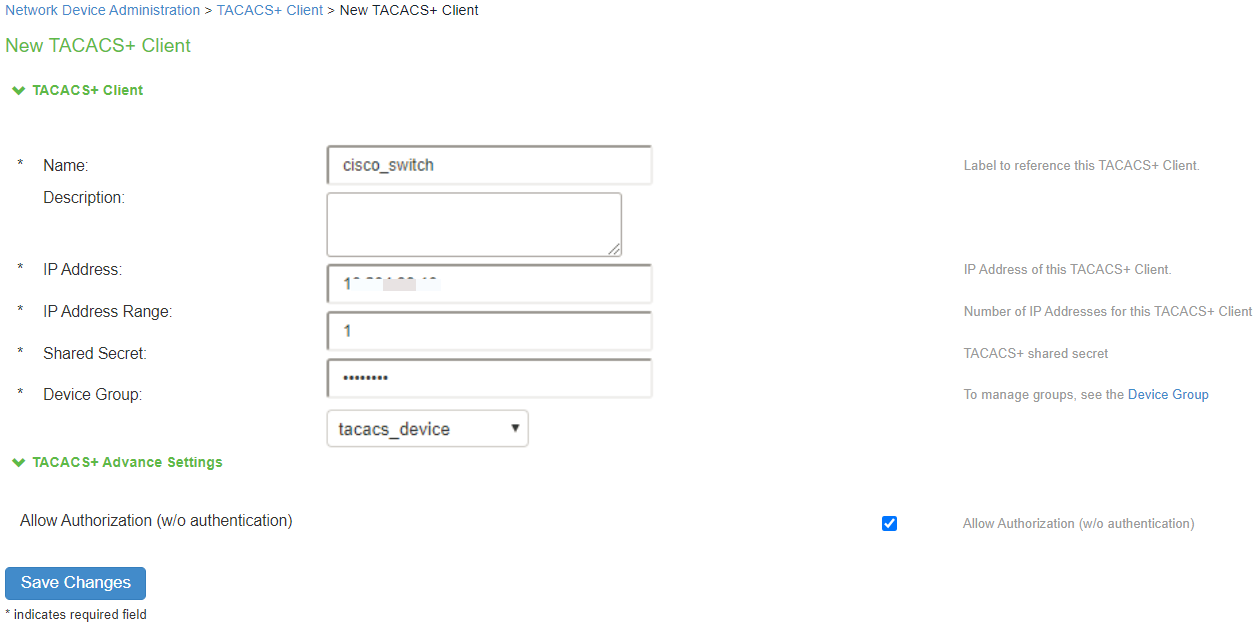
Pulse Policy Secure(PPS) does not support adding IPv6 TACACS+ clients.
Configuring Shell Policies
Define the Policies for the Admin Role and the corresponding Device Group. The Policies should be mapped with the selected Admin Roles and the Device Group.
To configure shell policies:
1.Select Endpoint Policy > Network Device Administration > Shell Policies.
2.Enter the name of the policy.
3.Enter the description.
4.Under Device Group, select the Device Group.
•Policy Applies to all groups- If you select this option, the shell policy is applied to all the device groups.
•Policy Applies to selected groups- If you select this option, the shell policy is applied only to the selected device group.
5.Under Shell Policy, specify the following:
•Enter the Default Privilege level.
•Maximum Privilege level (1-15).
•(Optional) Service- The default value is “shell”. Admin can explicitly configure specific service type.
6.Under Command Set, Enter the command, arguments, and the action (permit/deny) for the Admin. If it doesn’t match any rule it takes the default action:
•Deny any command that does not hit any of the rule
•Permit any command that does not hit any of the rule
7.Command authorization is supported on most of the switches such as HP and Cisco.
However, devices such as F5 and Juniper does not support individual command authorization with TACACS+ server due to the delay in command execution. For F5 and Juniper devices the required set of commands are mapped to different roles locally as the roles are predefined. The TACACS+ server sends the desired role through the custom attributes during user authentication.
Under Custom Attributes, enter the Attribute name, value, and specify the requirement as either mandatory or optional. Click Add.
Mandatory arguments require that the client must understand the attribute and act upon it otherwise the authentication fails.
8.Under Roles, select the Admin Role.
•Policy Applies to all roles- If you select this option, the shell policy is applied to all the admin roles.
•Policy Applies to selected roles- If you select this option, the shell policy is applied only to the selected admin role.
•Policy Applies to all roles other than the selected role- If you select this option, the shell policy is applied to all the admin roles other than the selected role.
9.Click Save Changes.
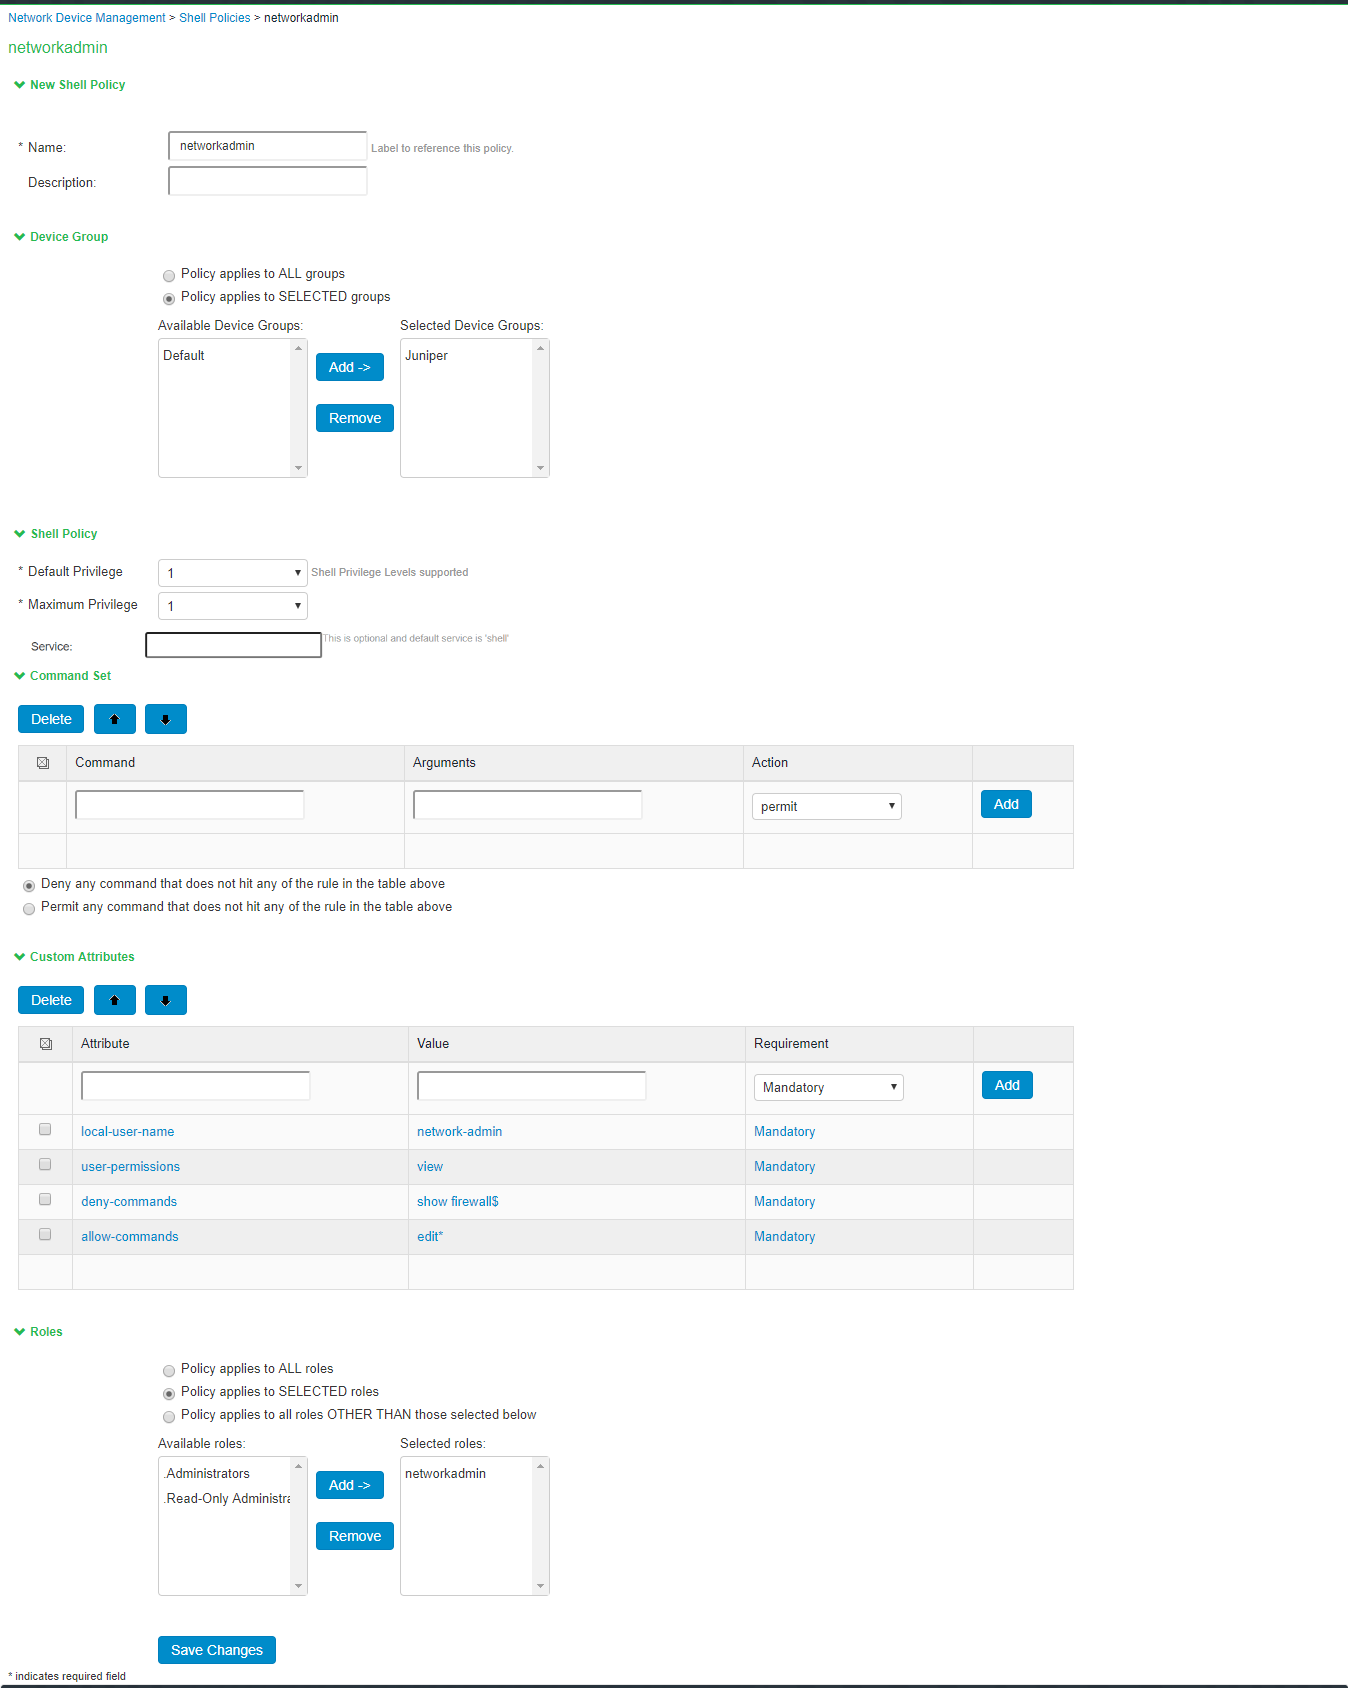
The below page is displayed after configuring the shell policy using command set.
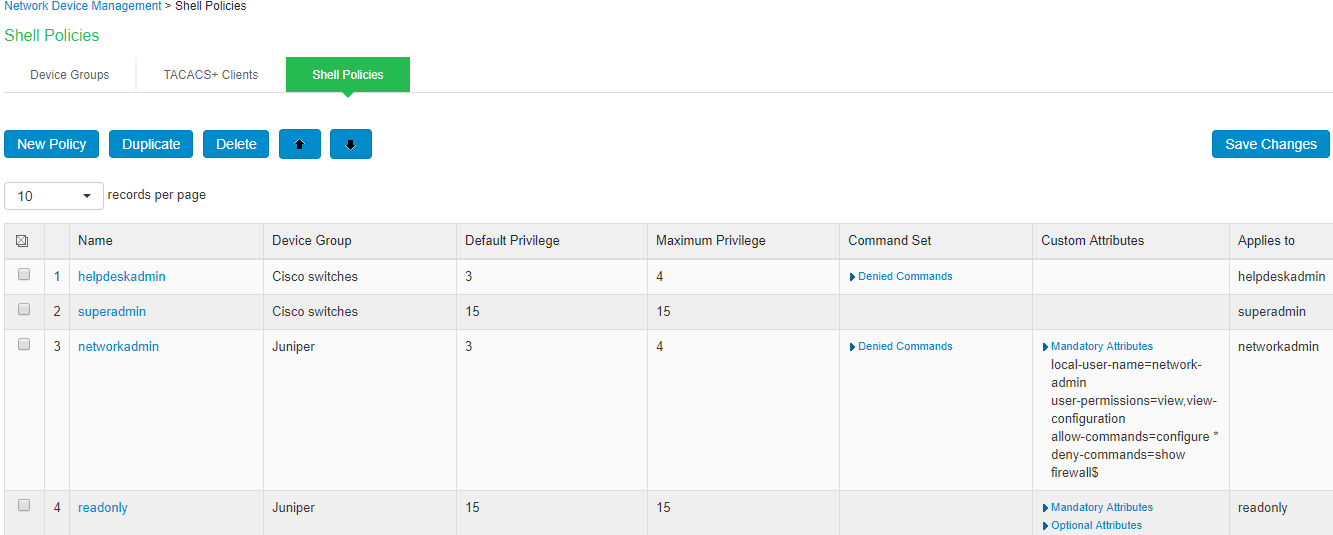
TACACS+ Command Sets
Command sets consists of a specific list of commands that can be executed by a network device administrator. PPS determines whether the administrator is authorized to execute these commands based on the privilege level configuration.
Regex (Wildcards)
A command line comprises the command and zero or more arguments. When PPS receives a command line (request), it handles the command and its arguments in different ways. It matches the command in the request with the command specified.
For example, Show device-[a-z]* st[a-z]*us
This command has 2 arguments.
•Argument 1 – device-[a-z]*
•Argument 2 – st[a-z]*us
The command arguments in the request are taken based on the order. After the command and arguments match to any of the command set based on the order corresponding action (permit/deny) is taken by PPS.
If command doesn’t match with the any of the command set configured then default action will be taken. The default action taken can be:
•Deny any command that does not hit any of the rule
•Permit any command that does not hit any of the rule
Multiple command Sets
Pulse Policy Secure(PPS) checks all the commands in the command set sequentially for the first match.
It compares the command name from the network device with the exact command configured in the command set.
If the command matches and there are no arguments from device group
1.There are no arguments to match from device as well as no arguments configured, then the command set is considered as match
2.There are no arguments from device group but arguments are configured, then it’s a no match
3.If arguments are sent by device group, then it is compared with regex pattern configured in arguments of the command set.
If argument is matched, then command set is considered as a match, and corresponding action is taken.
1.If the first match has action as Permit, PPS designates the command set as Permit.
2. If the first match has Deny, PPS designates the command set as Deny.
If the command doesn’t match with any of the command set configured one of the below default action is taken.
Pulse Policy Secure(PPS) checks all the commands in the command set sequentially for the first match.
1.Deny any command that does not hit any of the rule.
2.Permit any command that does not hit any of the rule.
If there are many profiles then the first matching profile is applied.