Configuring Native Supplicant for 802.1X Authentication
Example: Configuring Windows 7 Native Supplicant for PPS 802.1X Authentication
The 802.1X wired LAN Authentication gives you the possibility to connect your device using the cable network (wired). You can use the windows native supplicant for 802.1X authentication.
Requirements
•Your device must be equipped with a LAN interface and meet the standards for connecting to enterprise networks requiring 802.1X authentication.
•Local admin privileges are required on the endpoint.
•The OS security updates are installed and an Antivirus Software is present and up-to-date.?
•It is recommended to disable all third-party connection management tools so that the native Windows tool is used
Configuring the Windows Native Supplicant
To configure the native supplicant:
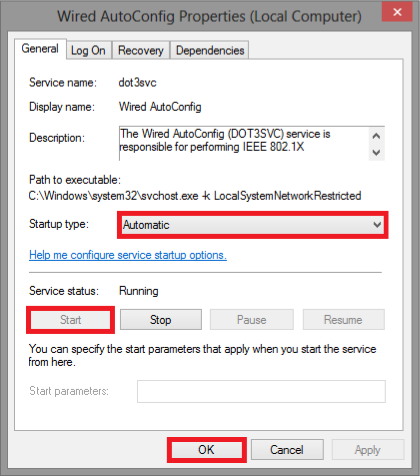
1.Select Control Panel > System and Security > Administrative Tools and access the Services tool.
•In the services window locate the service named Wired Autoconfig and double click the service.

2.Select the Startup type Automatic and click Start.
3.Click Start > Control Panel > Network and Internet > Network and Sharing Center.
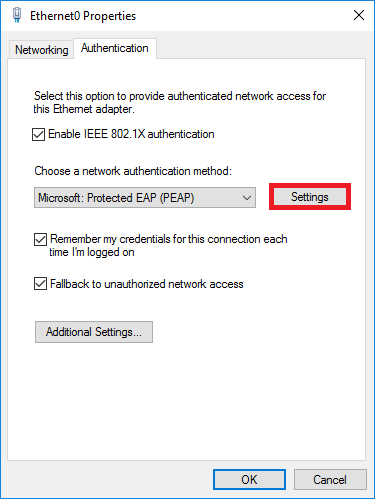
4.Select Change adapter settings and then right click on the LAN adapter, Ethernet or Local Area Connection and select Properties.
5.Click the Authentication tab at the top of the window. Select Enable IEEE 802.1X authentication and Fallback to unauthorized network access. From the dropdown list about the network authentication, choose Microsoft: Protected EAP (PEAP).
6.Click Settings to choose the authentication method and then click OK to proceed.
If you choose Remember my credentials for this connection each time I'm logged on the user credentials are not prompted for every log in. Don't use this option if multiple people are using the device.
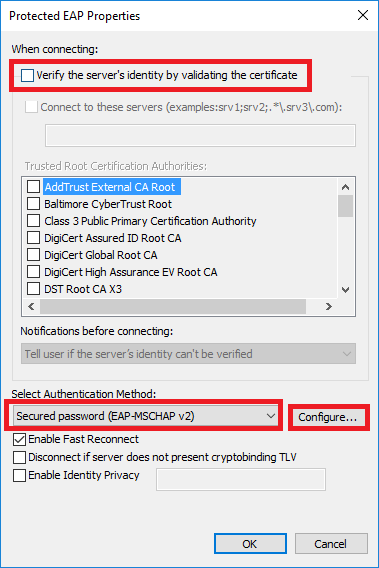
7.Uncheck Verify the server's identity by validating the certificate and select the Enable Fast Reconnect option. Click Configure to continue.
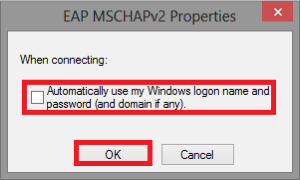
8.Uncheck Automatically use my Windows logon name and password and click OK to confirm.
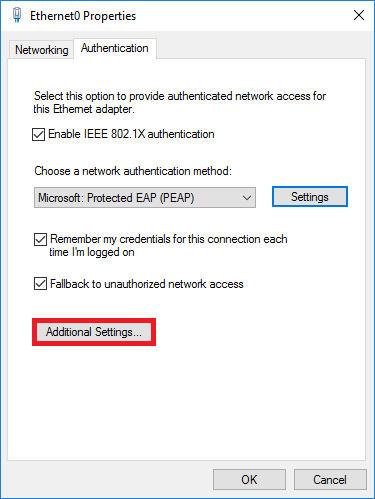
9.Click Additional Settings.
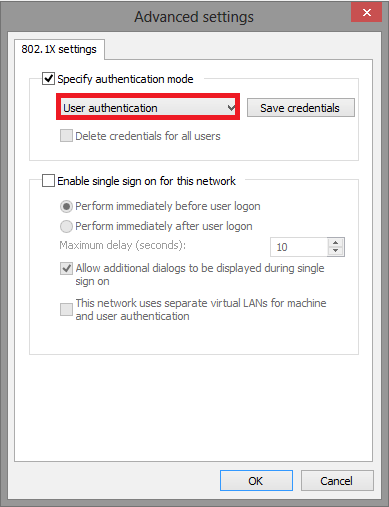
10.Select Specify authentication mode and choose User authentication from the list.
11.If you are using Cisco switch/WLC then you can use Save credentials to save the user credentials.
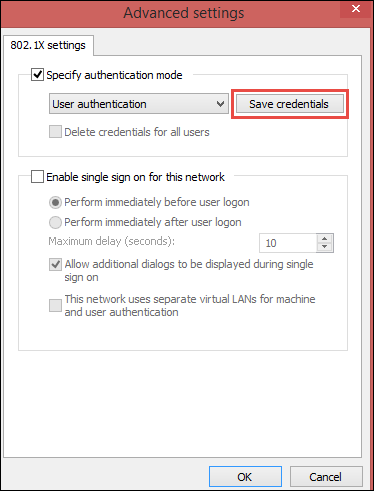
12.Click Additional Settings and choose User authentication and then Click OK.
13.Plug the network cable and If already inserted, unplug it and attach it again.
14.A log in window pops to enter Username and Password.
Example: Configuring Mac OSX Native Supplicant for PPS 802.1X Authentication
This section details the procedure for configuring native Mac OSX supplicant for PPS 802.1X authentication.
Requirements:
•Apple Mac OSX endpoint
•iPhone Configuration utility
Configuring MAC OSX Native Supplicant
Authentication to a PPS 802.1X server in MAC OSX endpoints is achieved using Apple Configurator. This tool allows you to easily create, maintain, and install configuration profiles, track and install provisioning profiles, and capture device information including console logs.
The latest MAC OSX endpoints can be configured using Apple Configurator 2 tool.
Configuring 802.1x profile
You can create various profiles (TTLS/PAP, TTLS/MS-CHAP-V2, and PEAP/MS-CHAP-V2) required for PPS 802.1x authentication using Apple Configurator. The generated configuration profiles can be exported to a Mac OSX endpoint. To create profiles, install the profiles (by double clicking on the exported files) on their OSX endpoints and that will provision Layer 2 access when connected to 802.1x enabled switch port.
Configuring 802.1x profiles -TTLS/PAP, TTLS/MS-CHAP-V2, and PEAP/MS-CHAP-V2 applies only for General and Wi-Fi settings. If the authentication server is LDAP, use TTLS-PAP for LDAP servers. If the authentication server is Active Directory or local, use TTLS-MSChapV2 or PEAP-MSChapV2.
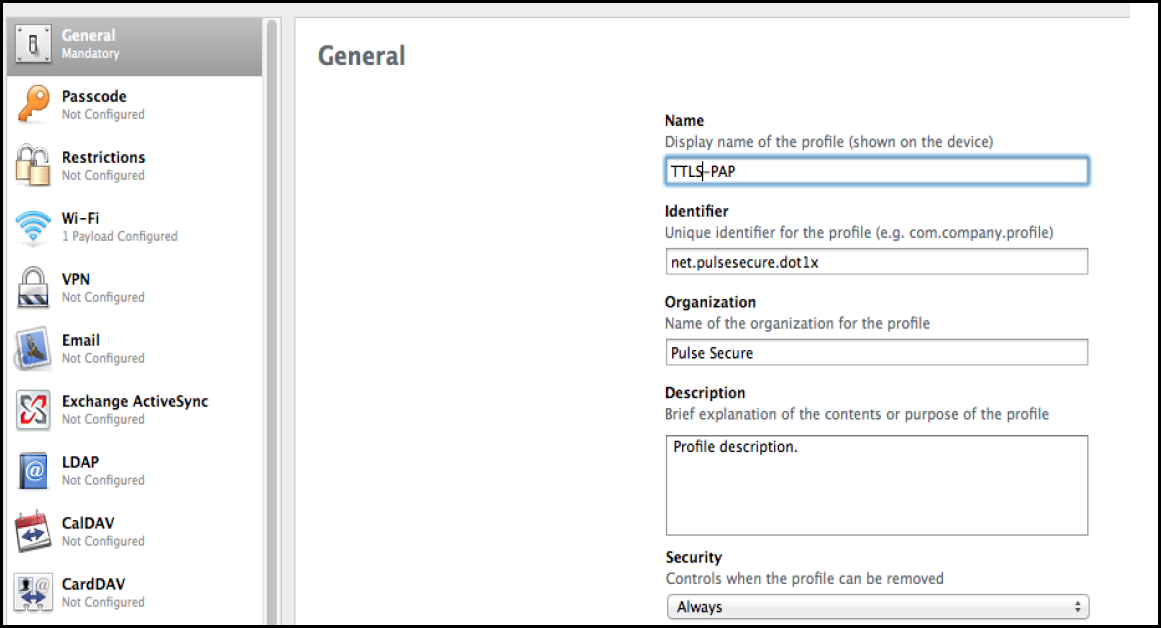
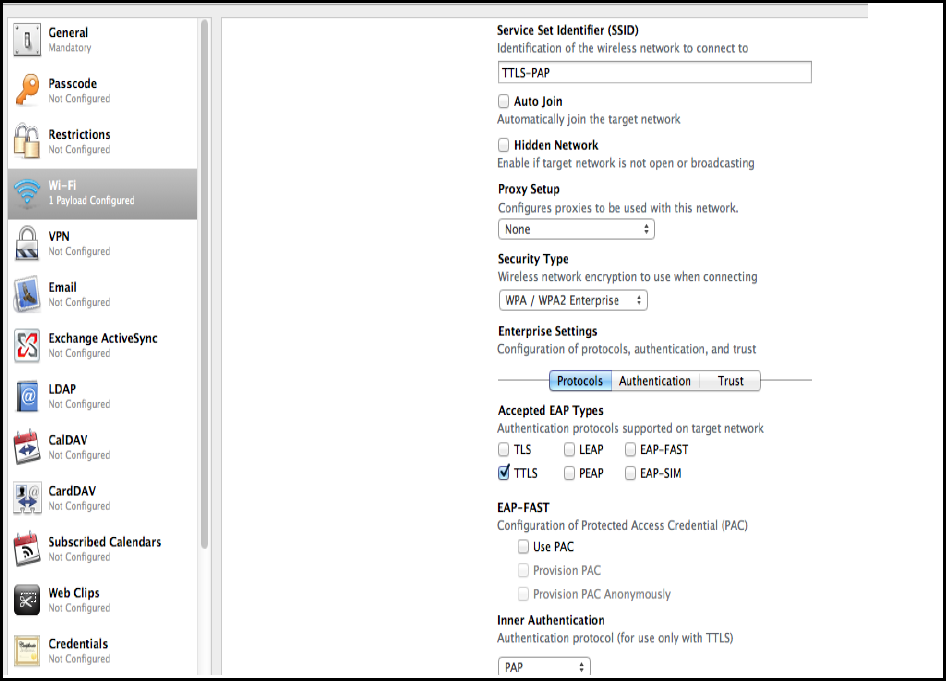
Configuring TTLS-PAP Authentication Profile
To configure TTLS-PAP profile, perform the following:
1.On the iPhone configuration utility (IPCU) navigate to Configuration Profiles tab.
2.On configuration Profiles page, select General and enter the required values.
3.Select Wi-Fi and enter the required values.
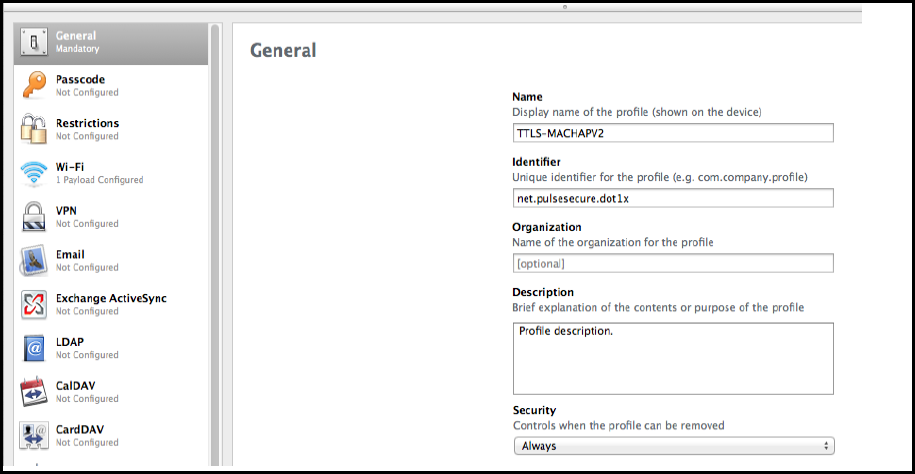
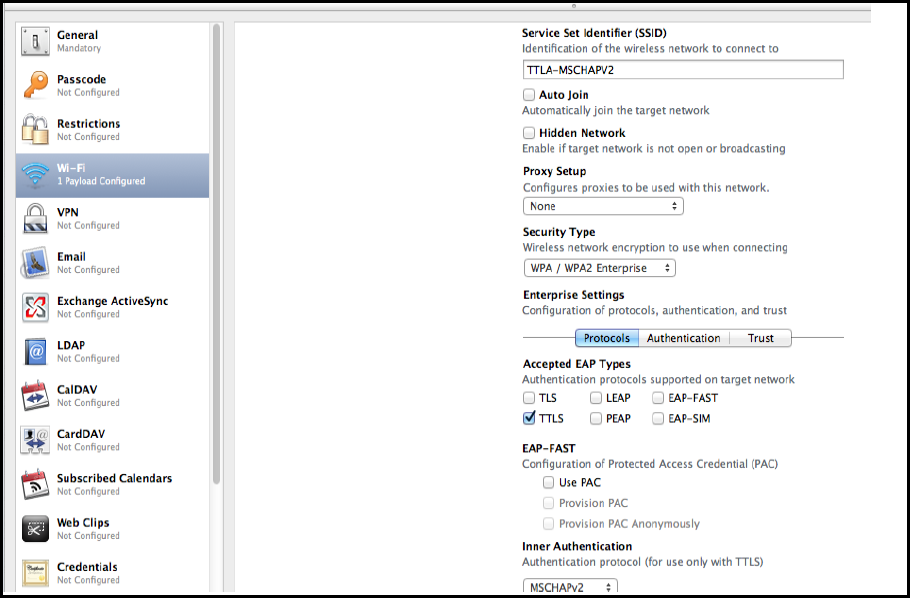
Configuring TTLS/MS-CHAP-V2 Authentication Profile
To configure TTLS/MS-CHAP-V2, perform the following:
1.On the iPhone configuration utility (IPCU) navigate to Configuration Profiles tab.
2.On configuration Profiles page, select General and enter the required values.
3.Select Wi-Fi and enter the required values.
Configuring PEAP Authentication Profile
To configure PEAP, perform the following:
1.On the iPhone configuration utility (IPCU) navigate to Configuration Profiles tab.
2.On configuration Profiles page, select General and enter the required values.
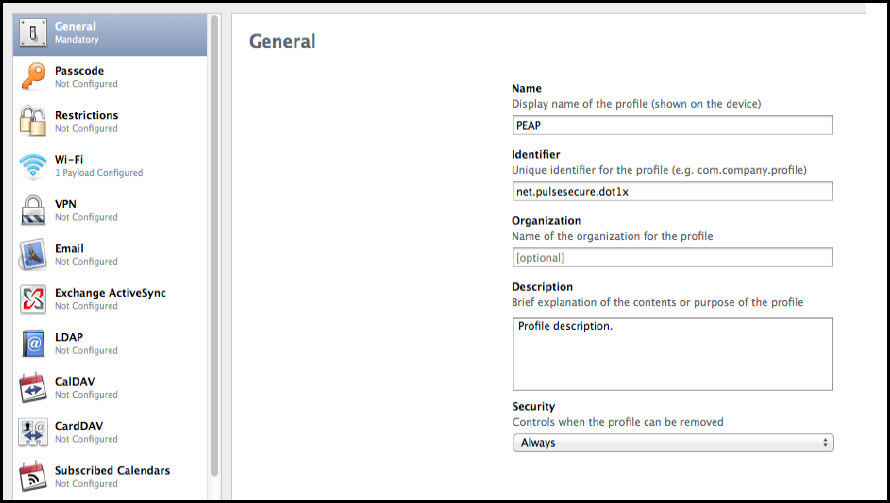
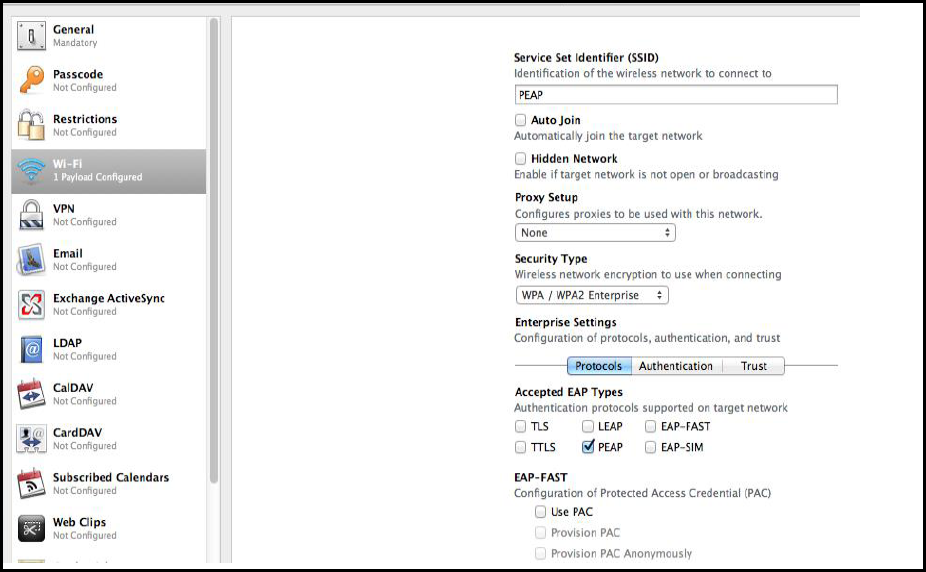
3.Select Wi-Fi and enter the required values.
