Accessing the Pulse Policy Secure Virtual Appliance
The Pulse Policy Secure virtual appliance can be accessed:
Accessing the Pulse Policy Secure Virtual Appliance as an Administrator
In the AWS portal, navigate to CloudFormation section. Select the stack where PPS is deployed and then click on the ‘Outputs’ tab. Note down the PPS management, internal and external address from the table as shown in figure.

Use the credentials provided in the provisioning parameters to log in as the administrator https://<PPS-IP>/admin. The default PPS admin UI user configured in the CloudFormation config file is: user ‘admin’ and password ‘password1234’.
The administrator can configure Active Directory located in the corporate network for user authentication. The Pulse Policy Secure Virtual Appliance administrator can check troubleshooting tools provided in the Pulse Policy Secure admin UI (System->Maintenance->Troubleshooting), to verify whether Pulse Policy Secure is able to reach other cloud resources as well as corporate resources. For this, AWS network administrator needs to ensure that all other resources have Pulse Policy Secure Internal interface as its default gateway.
Accessing the Pulse Policy Secure Virtual Appliance as an End User
After successfully deploying PPS on AWS, go to the Outputs section and copy the Pulse External Interface details.

Accessing the Pulse Policy Secure Virtual Appliance using SSH Console
To access the Pulse Policy Secure Virtual Appliance using the SSH console, copy the Public IP address from the PPSManagementPublicIP resource.
On Linux and Mac OSX
Execute the following command:
ssh -i <rsa-public-key-file> <PPS-Management-Interface-PublicIP> -p 6667
On Windows
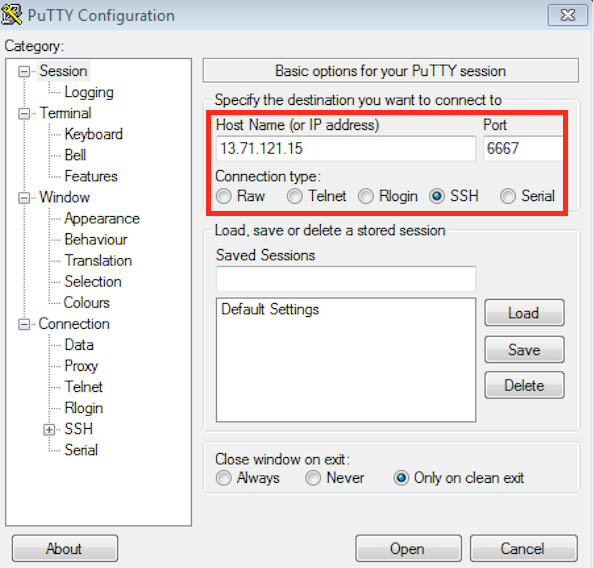
1.Launch the Putty terminal emulator.
2.In the Session category:
•Enter the host name or IP address.
•Enter the port number.
•Select the connection type as SSH.

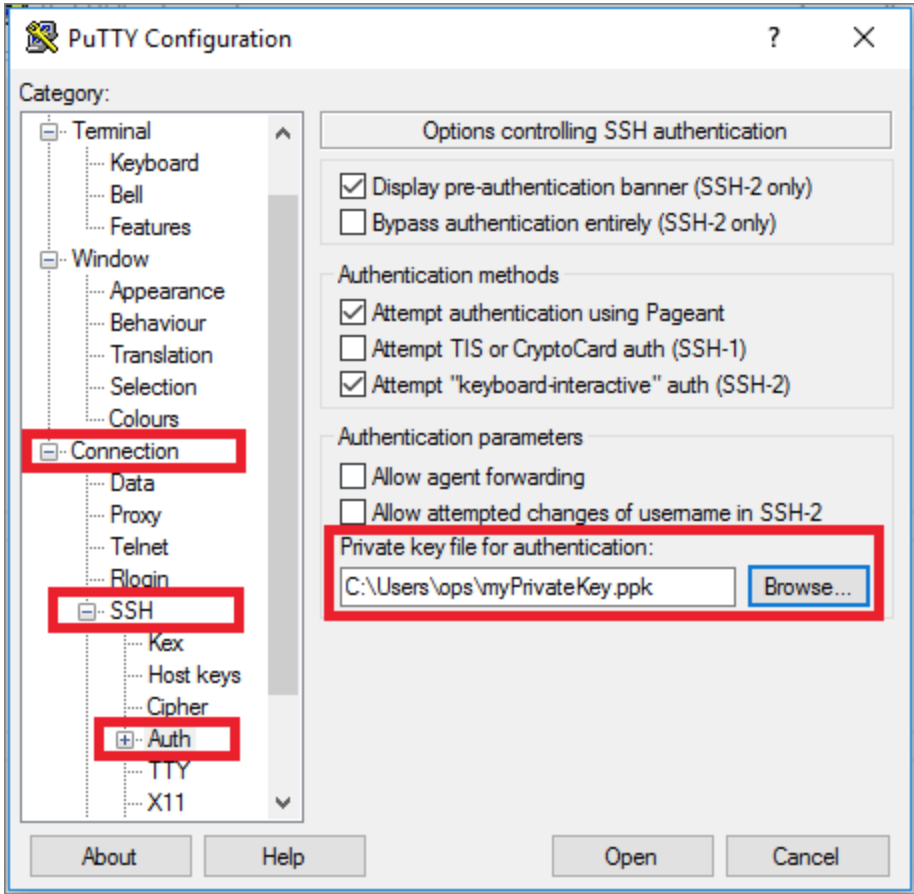
3.Select Connection > SSH > Auth. Click Browse and select the private key file for authentication.
