Step 2: Configuring PPS
The following steps are involved in the Pulse Policy Secure configuration.
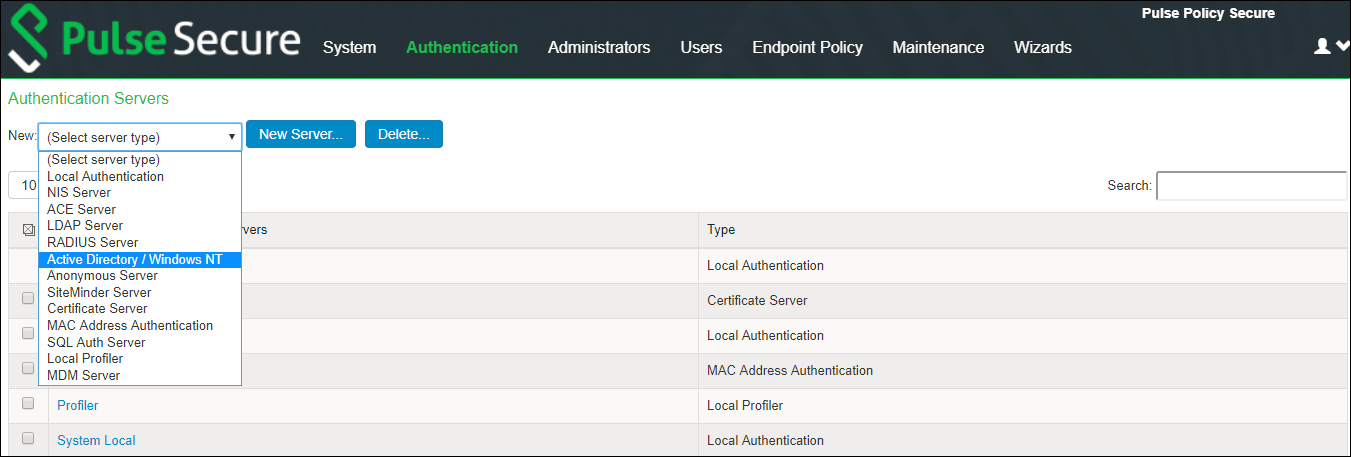
1.To create an Active Directory Standard Mode configuration, navigate to Authentication > Auth. Servers and complete the configuration.
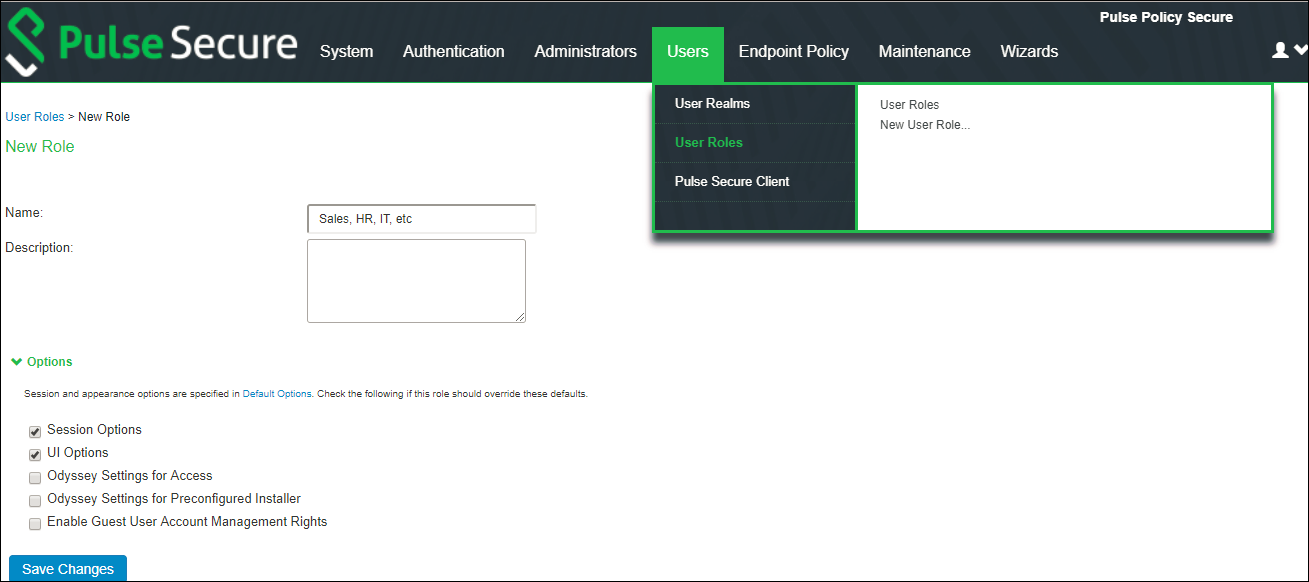
2.To configure user role, navigate to Users > User Roles > New Role and create a new role.
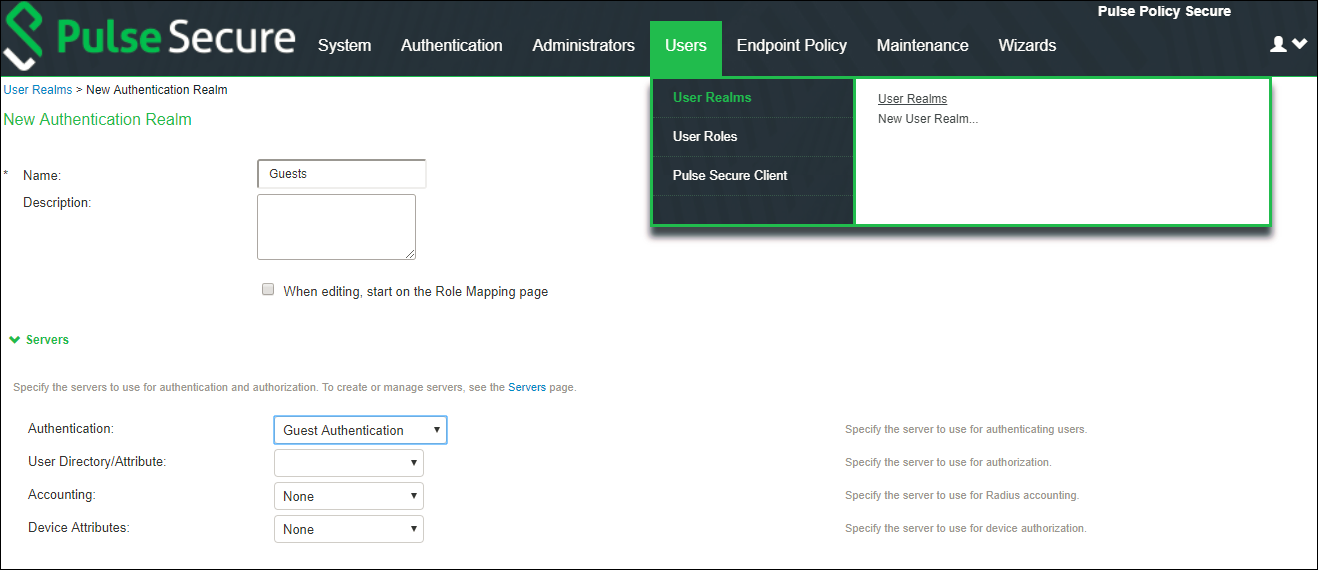
3.To configure user realm, navigate to Users > User Realms and create a new realm or edit a realm you have already created.
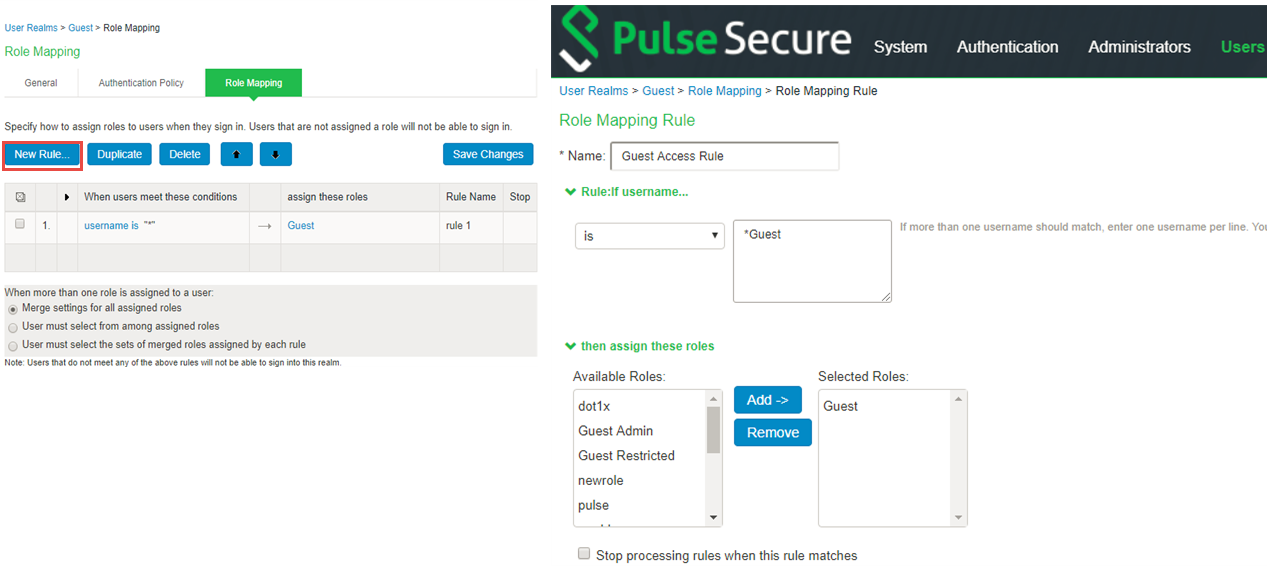
4.To create role mapping rule, navigate to Users > User Realms > <select user> > Role Mapping and complete the configuration.
Role-mapping rules can be defined to place users in Roles based on many different attributes, such as username, certificate, device attributes from Profiler or a batch of custom expressions. The Roles will define the level of access to different features and resources available on the network.
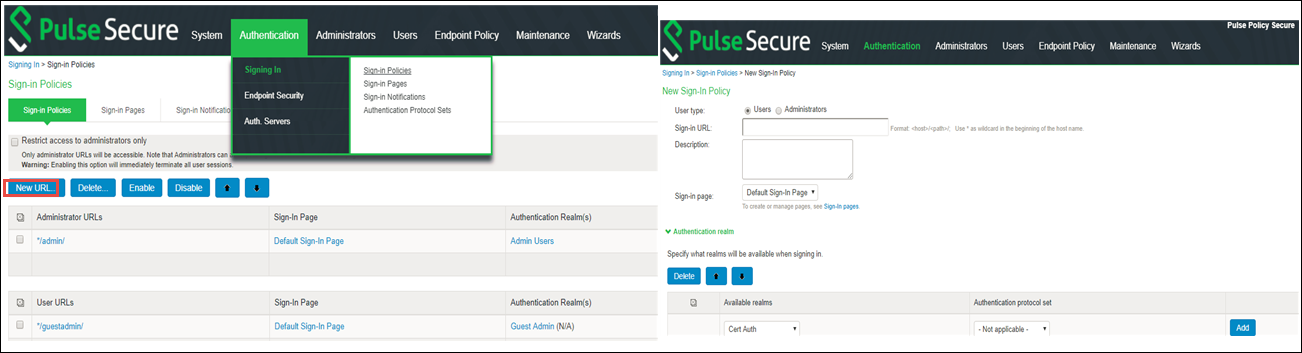
5.To configure sign-in policy, navigate to Authentication > Signing In > Sign-In Policies and complete the configuration.
Once you complete the basic configurations, you can explore more on PPS functionality.
For example:
•PPS can be used as a standalone RADIUS server.
•It can also be used for SNMP enforcement , MAC address authentication along with 802.1X.
•Layer 3 enforcement with a Juniper Network SRX, Palo Alto Networks next generation firewall, Check Point firewall, or Fortinet Firewall.
Refer the Pulse Policy Secure Administration Guide for more details.