IF-MAP Configuration
The IF-MAP configuration involves configuring the IPS device as an IF-MAP client or an IF-MAP server. You can configure the ICS device as an IF-MAP client for an IF-MAP server. A device configured as an IF-MAP server is automatically a client of itself. An IF-MAP server can function as a fully functional IPS device and any endpoint sessions with an IP address created on an IF-MAP server are automatically published to that IF-MAP server.
Configuring IF-MAP Server
An IF-MAP server is a repository for IF-MAP clients, which is used for publishing information regarding an activity on the network. To deploy IPS as an IF-MAP server, you must configure IPS as an IF-MAP server and then add IPS/ICS as IF-MAP clients. A IPS device can be deployed as a dedicated IF-MAP server for better scale and performance. If you opt for this configuration it consumes most of the virtual memory available on appliance, which results in performance degradation of other IPS services.
Currently, only Active/Passive cluster mode for IF-MAP server is supported.
To configure IF-MAP server on the IPS:
- Select System > IF-MAP Federation > Overview.
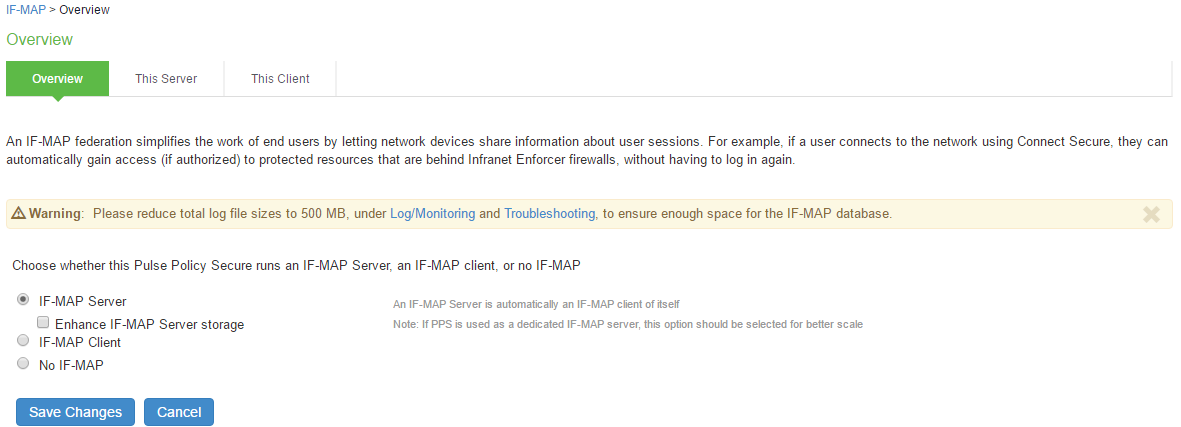
- Select IF-MAP Server option
(Optional) Select Enhance IF-MAP server storage for using the appliance as a dedicated federation server for high scalability. - Click Save Changes.
Adding IF-MAP Clients
The IF-MAP client must be added for subscribing the session information on an IF-MAP server. You configure an entry for each IF-MAP client on the IF-MAP server.
To add IF-MAP client:
- Select System > IF-MAP Federation > This Server > Clients.
- Click New IF-MAP Client.
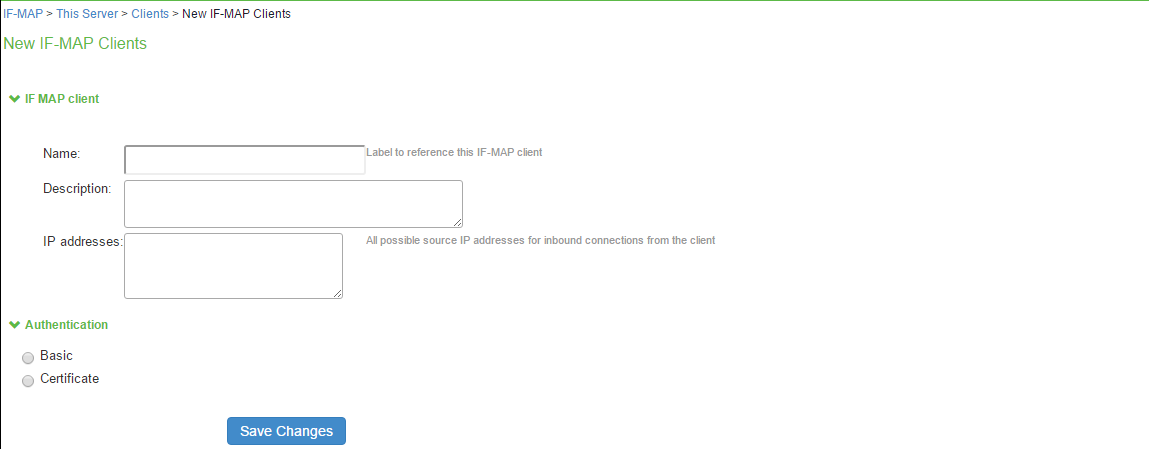
- Under IF-MAP Client,
- Enter name and optionally a description for client.
- Enter one or more IP addresses of the client.
- If the client is connected to multiple data links on the same network or different network, then list all of its physical network interfaces.
- If the client is a IPS cluster, then list the internal and external network interfaces of all nodes. You must enter all of the IP addresses for all of the interfaces because equipment failures may cause traffic between the IF-MAP client and the IF-MAP server to be re-routed through a different network interface. Listing all of the IP addresses maximizes the probability that IF-MAP Federation still works in the event of a failure.
- Under Authentication, select the Client Authentication Method: Basic or Certificate.
- If you select Basic, enter a Username and Password. The same information should be added to the IF-MAP server.
- If you select Certificate, choose which Certificate Authority (CA) to use to verify the certificate for this client. Optionally, specify certificate attributes or restrictions to require values for certain client certificate attributes.
- Click Save Changes.
Configuring IF-MAP Client
The IF-MAP client publishes the basic session information, which includes IP address, usernames, and roles. The IF-MAP server stores the information as metadata. Other IF-MAP clients in the network can poll the server for metadata information when the endpoint tries to access the protected resource. A ICS or IPS device can be deployed as an IF-MAP client. The IPS device connected to firewall is always added as an IF-MAP client. You must import the trusted root CA certificate of the federation sever device certificate issuing cert store in to IF-MAP client for secure connection. You can trust the certificate issued by CA of server's device certificate by importing the root certificate of the issuing authority.
To configure the IF-MAP client:
- Select System > IF-MAP Federation > Overview.
- Select IF-MAP Client.

- Enter IF-MAP server IP address or complete IF-MAP server URL. For IF-MAP server in cluster mode use the virtual IP address (VIP).
- Select the Client Authentication Method: Basic or Certificate.
- Select Basic authentication, and enter the username and password. This is the same as the information that you entered on the IF-MAP server.
- Select Certificate, select the Device Certificate to use.
- Ensure that the certificate of the CA that signed the IF-MAP server certificate is added from the System > Configuration > Certificates > Trusted Server CA page.
- Ensure that the hostname in the IF-MAP URL on the client machine matches the hostname of the server certificate on the IF-MAP server and that the CA that signed the server certificate is configured as trusted server CA on the IF-MAP client.
- Click Save Changes.
The status light on the server's IF-MAP Federation > This Server > Clients page is green when the client and server are successfully connected.
Configuring IF MAP Policies
The IF-MAP policies allows you to perform the data synchronization operations between the?IF-MAP server and IF-MAP clients.
Session Export Policies
The session export policy specifies how to transform Pulse Client session data into IF-MAP standard data. It allows IF-MAP clients to translate outgoing session information into IF-MAP data and incoming IF-MAP data into session information. These translations enable sessions to be shared between ICS and IPS even if the devices sharing sessions have different role configurations.
To configure a session export policy:
- Select System > IF-MAP Federation > Session-Export Policies.
- Click New to create a new policy.
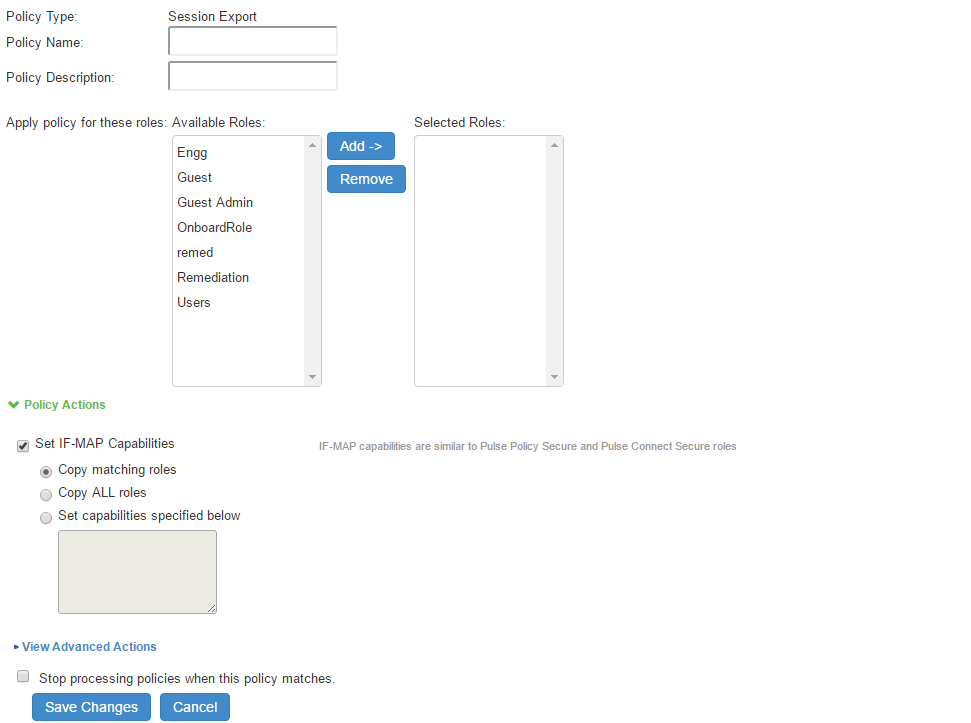
- Enter a policy name and, optionally, a description.
- Select role and add if the policy needs to be applied to selected roles only, otherwise by default is to apply policy for all roles.
- Under Policy Actions, select Set IF-MAP Capabilities and select the applicable option:
- Copy Matching Roles-Copies all of the user roles that match the roles specified in the Roles section of this policy into the IF-MAP capabilities data.
- Copy all Roles-Copies all of the roles from the user session to the IF-MAP capabilities data.
- Set capabilities specified below-Enter capabilities, one per line.
To configure advanced options:
- Select the View Advanced Actions link to display additional options.
- Select Set IF-MAP Identity and configure identity settings:
- Identity Type -Select an element used to specify identity. Options include aik-name, distinguished-name, dns-name, email-address, kerberos-principal, trusted-platform-model, username, sip-uri, tel-uri, and other. For example, for a regular employee named Bob Smith you can select username as the Identity Type and enter the Identity as username bsmith.
- Identity-Identity is normally specified as <NAME>, which assigns the user's log in name. Any combination of literal text and context variables may be specified. If you select other for Identity Type, enter a unique Identity Type in the text box.
- Administrative Domain-This optional information is applied to identity and MAC address data. One example for using this field is in a large network environment with several domains in which a username could be duplicated. By supplying the domain, you ensure that the correct user is identified.
- Other-This field is provided for advanced use cases when none of the predefined options are applicable.
- Select Set IF-MAP Roles and select the applicable option:
- Copy Matching Roles-Copies all of the user roles that match the roles specified in the Roles section of this policy into the IF-MAP capabilities data.
- Copy all Roles-Copies all of the roles from the user session to the IF-MAP capabilities data.
- Set capabilities specified below-Enter capabilities, one per line.
- Select Set IF-MAP Device Attributes. Device attributes represent a passed Host Checker policy on PIPSPS or ICS. Select the applicable option:
- Copy Host Checker policy names-The name of each Host Checker policy that passed for the session is copied to a device attribute.
- Set Device Attributes-Enter device attributes, one per line.
- Select Stop processing policies when this policy matches to specify that when this policy is matched, no more Session-Export policies should be applied.
- Select Save Changes or continue to configure advanced actions.
Session Import Policies
The session import policies specify how the device derives a username and a set of roles based on IF-MAP data that it receives from the IF-MAP server. The import policies are similar to role mapping rules on a realm. You must be precise when you configure Import policies, otherwise roles cannot be assigned properly.
To configure session-import policies:
- Select System > IF-MAP > Session-Import Policies.
- Click New to create a new policy.
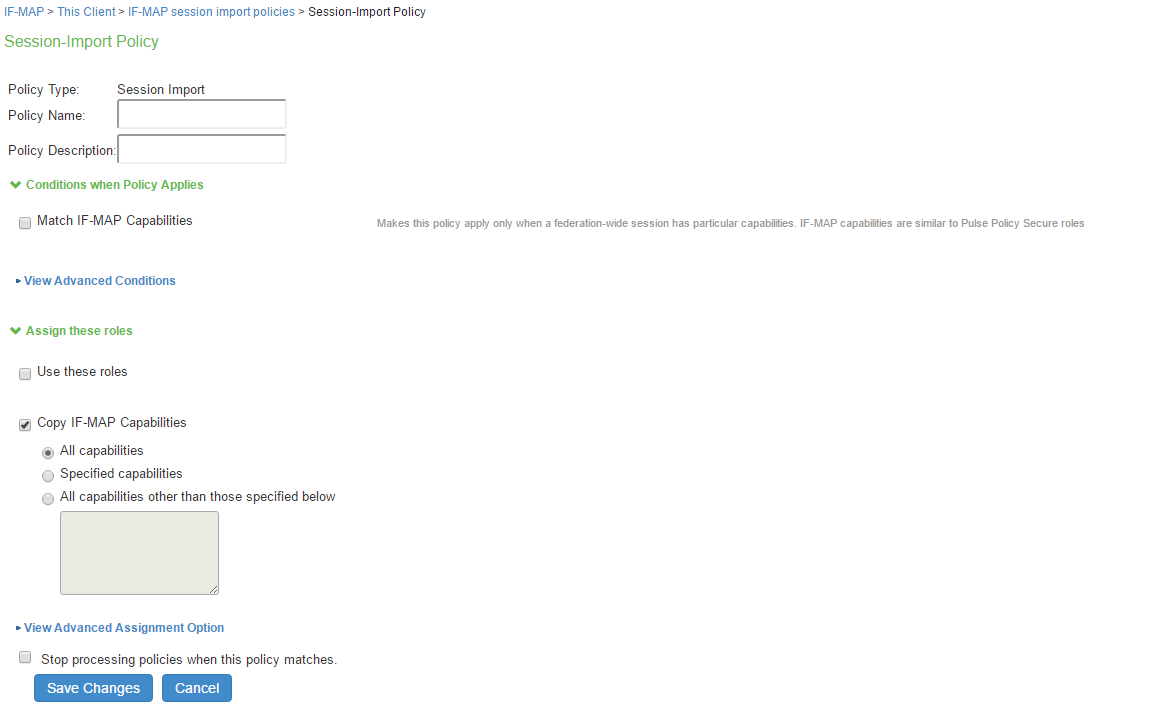
- Type a policy name and, optionally, a description.
- Under Conditions when Policy Applies, select Match IF-MAP Capabilities.
You can use the wildcard characters * and % to match IF-MAP capabilities. - Enter IF-MAP capabilities exactly as they appear in the corresponding session-export policy. For example, if you assigned the value “engineering” to an IF-MAP capability in the session-export policy, enter “engineering” here.
- Under “Assign these roles,” select Use these roles and select the roles for which the policy applies.
- Alternatively, select Copy IF-MAP Capabilities. If you select this check box, IF-MAP session capabilities on the IF-MAP server are converted to IPS roles with the same name. You can use this option if IPS roles and IF-MAP capabilities have the same name. This option is typically not required for IPS deployments.
- Select Stop processing policies when this policy matches to specify that when this policy is matched, no more Session-Export policies should be applied.
- Select Save Changes, or continue to configure Advanced Conditions.
You can configure advanced options that would further require that Identity, Role, or Device Attributes in the IF-MAP data for a session must match before applying the role matching. The advanced options are not required for most IPS IF-MAP deployments.
To configure advanced options:
- Select the View Advanced Conditions link to additional options.
- Select one or more of the following check boxes to specify which IF-MAP criteria to use for assigning roles:
You can use the wildcard characters * and % to match IF-MAP capabilities.- If you select Match IF-MAP Identity, complete the following settings:
- Identity Type-Select an element used to specify identity. Options include aik-name, distinguished-name, dns-name, email-address, kerberos-principal, trusted-platform-model, username, sip-uri, tel-uri, and other. For example, for a regular employee named Bob Smith you can select username as the Identity Type and enter the Identity as username bsmith.
- Identity-Identity is normally specified as <NAME>, which assigns the user's log in name. Any combination of literal text and context variables may be specified. If you select other for Identity Type, enter a unique Identity Type in the text box.
- Administrative Domain-This optional information is applied to identity and MAC address data. One example for using this field is in a large network environment with several domains in which a username could be duplicated. By supplying the domain, you ensure that the correct user is identified.
- Other-This field is provided for advanced use cases when none of the predefined options are applicable.
- Match IF-MAP Roles-Enter individual roles in the provided text box.
- Match IF-MAP Device Attributes-Enter individual device attributes in the provided text box.
- If you select Match IF-MAP Identity, complete the following settings:
- Click Save Changes.