Configuration
Setting Up Locations
Locations are listed and modified from the Catalog > Locations page. You can also find them through the System > Traffic Managers page, by clicking on the Manage Locations link. Your defined locations are listed here, with the opportunity to add to, and remove from, the list.
For product variants that include Global Load Balancing, a separate additional section is shown for “GLB Locations”. For more details, see The Traffic Manager DNS Server.
Each location is simply defined by its name. Clicking on the location name or associated Edit link allows you to modify its settings or delete the location altogether.
Adding a new location can be achieved using the “Add new Location” section under the main list. All new locations are created using an existing location as a template (excluding the case where there are no existing locations).
ATTENTION
This “Based on” mechanism copies any location-specific configuration for the template location to your new location.
Locations can be deleted from the section at the bottom of the associated Edit page. Note however that locations in use by one or more Traffic Managers cannot be renamed or deleted. You must first disassociate your Traffic Managers with this location before such operations can be performed.
Setting Traffic Manager Locations
On the System > Traffic Managers page, each Traffic Manager listed in your cluster has two new configurable settings:
•Location: Select this Traffic Manager’s configuration location from the drop-down list.
•External IP: When your Traffic Manager’s host name is not globally resolvable, you will need to specify an externally available IP address for communications between your cluster members.
Any changes to these settings must first be confirmed by clicking the checkbox next to the Update button.
Location-Specific Configuration
A significant change to the way the Traffic Manager handles configuration settings while in multi-site mode can be seen by the addition of a new icon next to each individual setting.
The Location icon

Clicking this icon separates out the setting into multiple instances, one for each configuration location. Clicking the icon again will revert the setting back to being a singular instance - which is used by all locations.
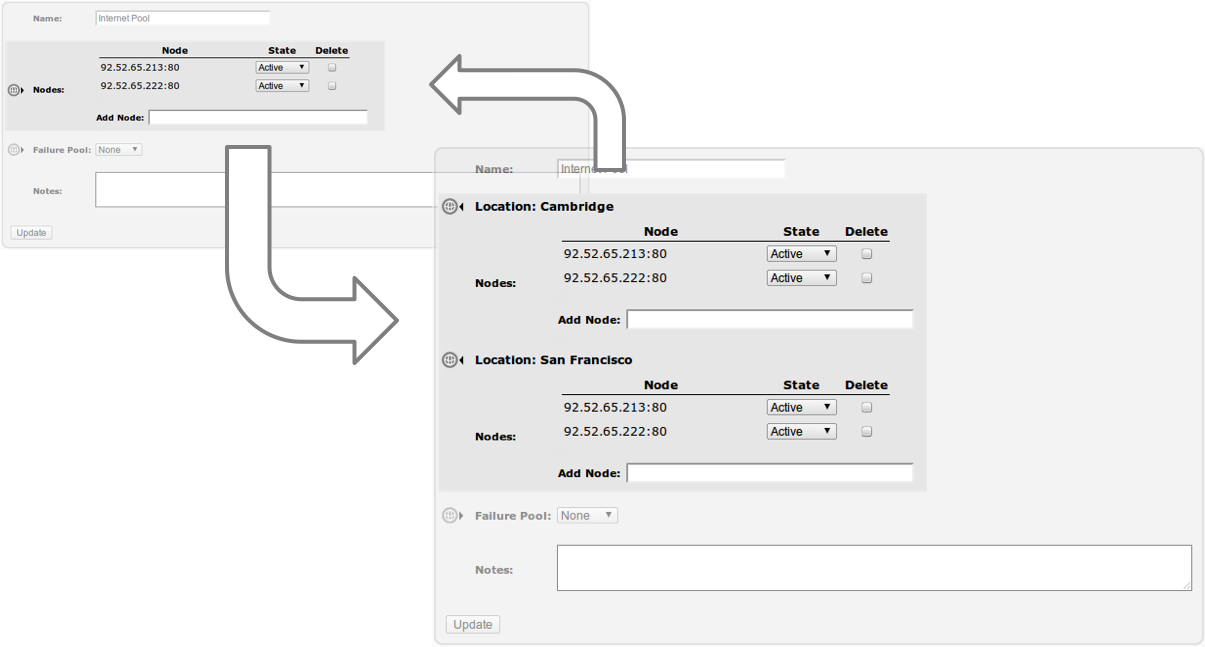
This mechanism allows you to specify individual configuration settings on a per-location basis, while maintaining some global settings that apply to all cluster members.
Home Page Changes
When multi-site cluster functionality is enabled, a modified admin UI home page is presented. The new style is more suited to the environment within which the Traffic Manager is expected to operate. It now shows a number of distinct sections as listed below:
•Locations: Your Traffic Manager configuration locations are shown here. Locations defined but not in use will not be shown. Click the location name to view the Catalogs > Locations > Edit page for that location.
•Services: This shows the list of services marked as enabled and managed by this Traffic Manager installation. A service can be considered as a combination of virtual server, rules, pools and other associated objects. Click the service name to view the Services > Virtual Servers > Edit page for that service.
•Event Log: This is a quick summary of the event log. It is written-to by all Traffic Managers with the name of the machine in question alongside each entry. The full logs can be viewed by clicking the Examine Logs link.
Each of the locations and services are displayed with a suitable status indicator:

Warnings are non-critical problems that mean the location or service is still running, but with impaired performance. Errors require action to rectify a problem that is preventing your locations or services from operating. The status applet will reflect these conditions. In the case of warnings or errors, clicking on the location/service name takes you to the Diagnose page, where you will see a full explanation of the problem.
The World Map
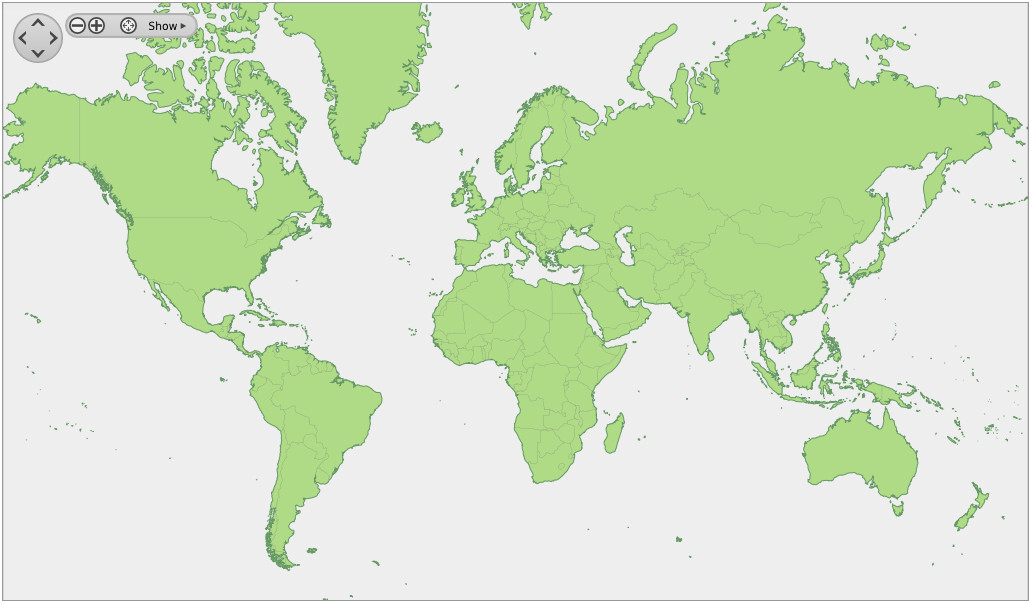
Click Activity > Map to show a world map for enhanced visualization of your locations and services. You can also view the map via the View traffic on World Map link from the Services > Virtual Servers > Edit page. This provides a global overview of the locations defined on your system.
The map is designed to be interactive and tools are provided to move around and zoom into a level of detail required for your infrastructure. You can center the map on a geographic location of your choice by holding down the left-hand mouse button and dragging the map to your required destination. You can show traffic for a specific virtual server using the drop-down control at the bottom. The default is for all virtual servers.
Each colored target represents a location, and each small dot that appears on the map represents a user who has issued a request for a particular service. Each user is colored according to the location at which the requested service is hosted. In order to show meaningful information, you will need to enable “Connection Archiving” (also required for viewing advanced connection analytics). If this is currently disabled, you can click the connection archiving is disabled link at the bottom to enable it. This link takes you to the System > Global Settings page where you will need to provide a suitable value (for example, 500) for the recent_conns setting (the default of 0 disables connection archiving).
To enable the map to show activity corresponding to user locations, the Traffic Manager requires access to a GeoIP database. For more information, see Using a GeoIP Database.
Traffic Visualization
As with Global Load Balancing, activating multi-cluster management functionality on your system automatically enables additional options into the Traffic Manager’s existing diagnostic and visualization tools. For more details, refer to Traffic Visualization.