Installing the Virtual Appliance XVA Package
Ivanti recommends using Citrix XenCenter for managing your XenServer virtual infrastructure. These instructions refer to importing the Traffic Manager virtual appliance using this method.
For a full list of the supported platforms and versions, see the release notes included with your virtual appliance package.
ATTENTION
A newly-created, but un-configured, Traffic Manager virtual appliance can be vulnerable to hijacking or malicious use if not deployed in a secure environment. For pre-deployment security considerations, see Network Architecture.
To install the Traffic Manager, obtain the appropriate Traffic Manager virtual appliance package in XVA format. If the virtual appliance is delivered in a compressed archive format (for example, ZIP) unpack this archive to your local hard disk before starting the installation procedure.
To install the Traffic Manager using XenCenter
1.Log in to XenCenter and connect to your designated XenServer.
2.Click File > Import to launch the Import wizard. The individual steps to follow are shown on the left of the wizard window, with the current step displayed in the main section. Click Previous and Next to navigate between steps, and Cancel to exit the wizard without deploying the virtual appliance.
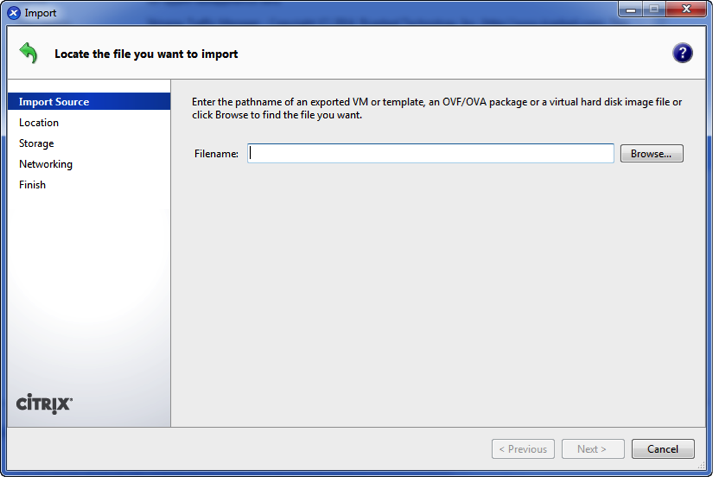
3.Import source: Type the full name and path of the .xva file from your unpacked virtual appliance archive package into the Filename box, or click Browse… to locate the file on your hard disk. Click Next to proceed.
4.Home server: Click the XenServer name you want to install the virtual appliance on, or click Add New Server to add a new XenServer. Click Next to proceed.
5.Storage: Select the storage repository you want XenCenter to use for the Traffic Manager's virtual disk. Click Import to proceed.
6.Networking: Use this step to create one or more network connections between the interfaces in your Xen virtual infrastructure and the interface on the Traffic Manager virtual appliance. Click Add to create a new connection, and under the Network column select the XenServer interface from the drop-down list you want this connection to use. Click Delete to remove connections as necessary. Click Next to proceed.
7.Finish: Check the configuration summary of your virtual appliance deployment and click Finish to proceed. Click Previous to go back and modify any step of the wizard. Click Start VM(s) after import to instruct XenCenter to start the virtual appliance automatically upon completion.