Editing Application Mapping
You can only edit application mapping if you belong to the zeusafm Administrator user group, or if you belong to another user group that has the appropriate user rights.
Applications and their Rulesets aren’t used until you’ve mapped them to the customer keys, hosts, and prefixes of requests. Essentially, application mapping determines which request is processed by which rulesets. The following sections describe the configuration process. For general information on what application mapping is and how it works, see Application Mapping, Paths, Preconditions.
For further information regarding setting up vWAF, see Guide: Recommended Work Sequence.
Opening application mapping
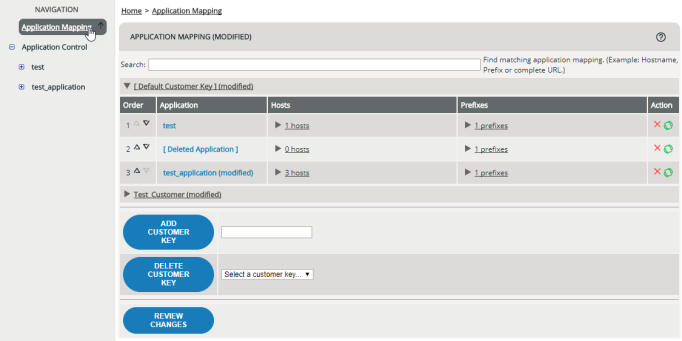
To access the Application Mapping page, click the entry Application Mapping in the navigation area.
Adding a customer key
When using vWAF integrated in Virtual Traffic Manager, you typically don’t have any other customer keys than the empty “[Default Customer Key]” because typically there is only one cluster and all enforcers (your Traffic Managers) are identical.
To add a customer key:
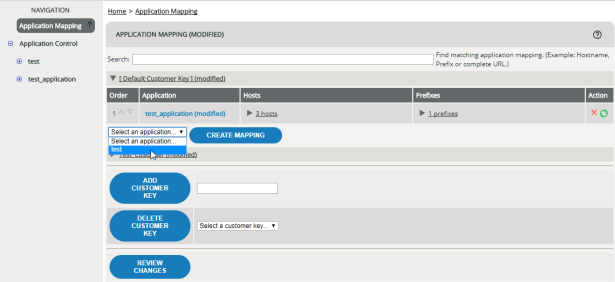
Adding a mapping
To add a mapping:
- Below the table, choose an application from the drop-down list, and then click the Create Mapping button.
The new mapping appears in the table
Editing hosts
To add hosts to a mapping:
- Click
Add hostnames.
A popup window with an edit field and some check boxes appears.
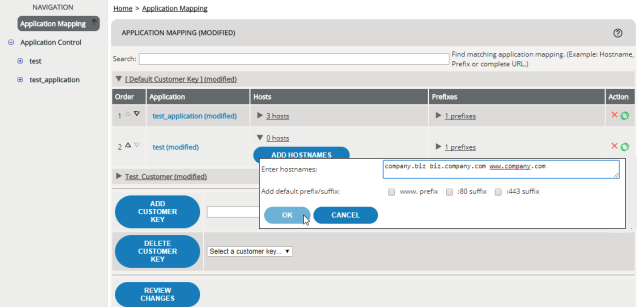
The new hosts now appear in the table.
If you want to change a host, you need to delete and add it again. To delete a host, click the arrow symbol in the Hosts column to expand the view so that it shows all hosts, and then click the corresponding Delete icon.
If you’ve added the same host to multiple mappings, this only deletes the host from one mapping but not from all mappings.
Editing prefixes
Note that regular expressions are not allowed within prefix definitions.
By default, each mapping contains an “[Empty Prefix]”, which matches everything. When adding your first own prefix, the default “[Empty Prefix]” is automatically removed.
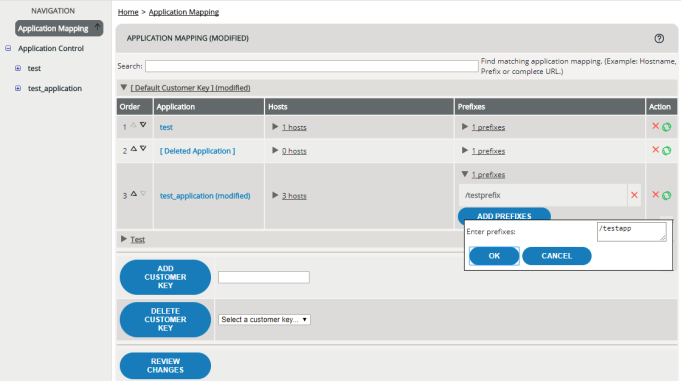
To add a prefix to a particular mapping, click the arrow symbol in the Prefixes column, and then click Add prefixes.
You can add multiple prefixes in one go by adding them in separate lines in the edit field.
To delete a prefix, click the Delete icon next to the prefix name in the Prefixes column. When deleting the last of your own prefixes, the default “[Empty Prefix]” is automatically added again.
Changing the processing order
vWAF always processes the mappings from top to bottom in the same order as they’re listed in the administration interface. Only the first matching mapping is used. This can make a big difference if you’re using hostnames with the placeholder symbol *.

Using search
You can utilize the Search field on top of the Application Mapping page in two ways:
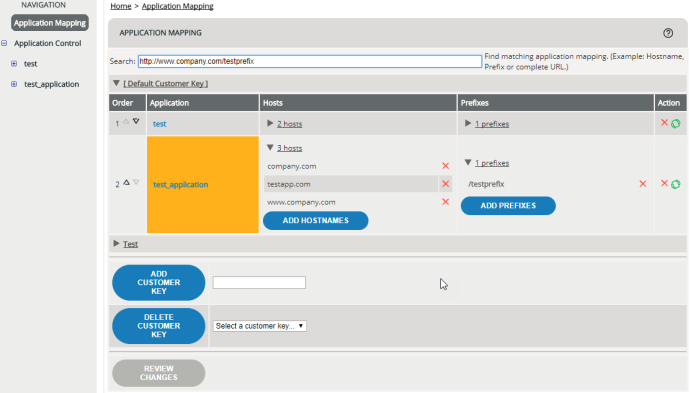
- If you want to find one or multiple mappings that contain a particular host or prefix, just enter the name of this host or prefix. All matching applications are automatically highlighted. (You don’t have to click any submit button.)
- You can also use the search function for testing how your mappings work. If you enter a full URL beginning with http://, all applications are highlighted that would match a request with this URL.
If you’re using several customer keys and if there are applications found below several customer keys, all applications under all customer keys are highlighted. If collapsed, the corresponding sections expand automatically.
Deleting a mapping
If you want to delete all mappings of a particular customer key, you don’t have to delete the mappings individually. When deleting the customer key, this also deletes all mappings under this key.
To delete a single mapping:
- If the mapping is not already shown, click the customer key to expand the corresponding section.
- Find the line that shows the mapping, and then click the Delete icon in the Action column.
Deleting a customer key
Deleting a customer key also deletes all mappings below this key, including your settings for hosts and prefixes. If you want to preserve your settings (to use them for another customer, for example), first export your mappings by clicking the green Export/ Import icon. For details see Export and Import.
To delete a customer key:
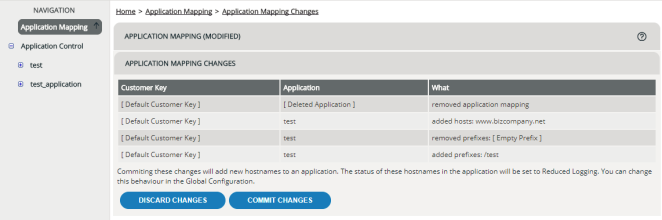
Reviewing and committing or discarding changes to application mapping
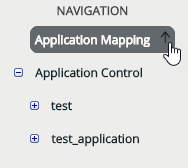
Until you commit the changes that you’ve made to application mapping, these changes aren’t saved and don’t become active. If you have uncommitted changes, a green arrow appears next to the entry Application Mapping in the navigation area.
To save and activate your settings as they’re reflected within the administration interface:
- Click the
Review changes button at the bottom of the
Application Mapping page.
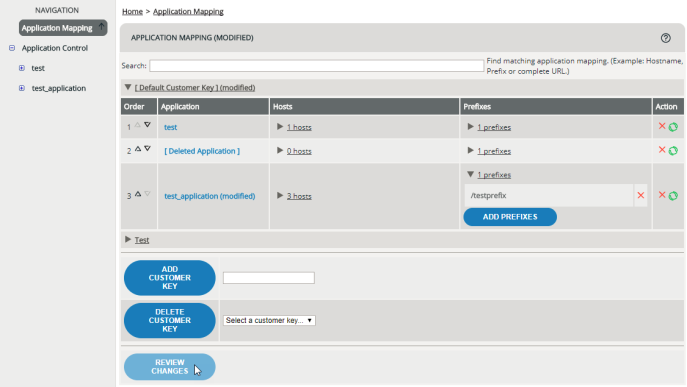
A table appears, listing all current changes