Setting Up a Custom Error Page
If you don’t configure anything else, when vWAF denies a request, it returns one of the standard HTTP error codes to the web server. The web server will then react according to its configuration.
Alternatively, you can set up your own error page or you can redirect to a particular URL. In these cases, you can display a unique error ID, which vWAF creates for each denied request and also writes to the log files. If users of your web application get an error message (for example, because one of the protective rules that you’ve set up is too restrictive), you can ask them to tell you the error ID. You can then go to the log file view (see Log Files), filter your log files for the given error ID, and see precisely which handler has denied the corresponding request.
There are two places where you can set up what vWAF does when it denies a request:
- In Global Configuration you can set up the default behavior for all applications.
- When you select an application in the navigation area, you can activate the Configuration | Error Page Setup tab. On this tab, you can configure a specific behavior that exclusively applies to the selected application.
You can choose from the following options:
- HTTP error code:
This is the standard behavior. When vWAF denies a request, it returns one of the standard HTTP error codes to the web server. The web server will then react according to its configuration.
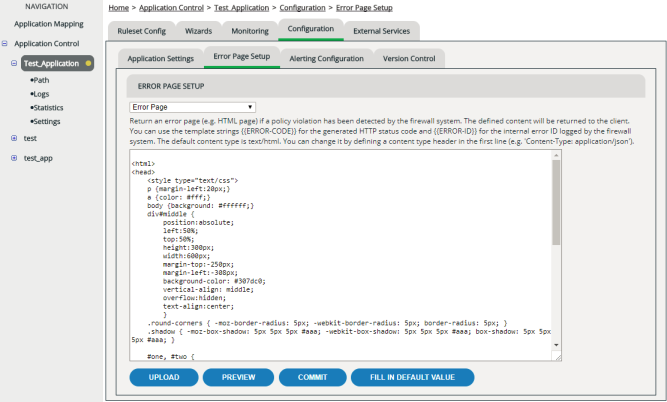
- HTML error page:
Displays a configurable error page when vWAF denies a request. You can edit the HTML code of this page freely. On your error page, you can show the generated HTTP error code, and you can show the unique error ID that vWAF creates for each denied request.
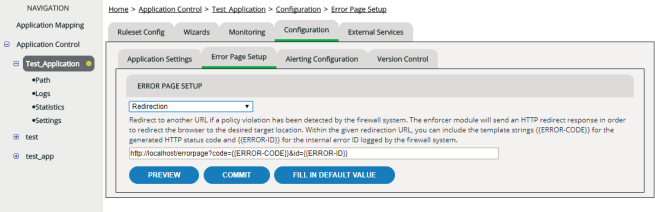
- Redirection:
Sets up a redirection to a specific URL. Within the URL, as parameters you can include the generated HTTP error code and the unique error ID that vWAF creates for each denied request.
- Inherited from global configuration:
This option is only available on the Configuration | Error Page Setup tab. It applies the behavior as it was defined in Global Configuration.
Setting up an HTML error page
- In the list, select
HTML error page.
An edit field appears with some default HTML code for the error page.
Setting up a redirection to a given URL
- In the list, select
Redirection.
An edit field appears, containing a default URL. Within the URL, you can use the template strings {{ERROR-CODE}} for the generated HTTP error code and {{ERROR-ID}} for the unique error ID that vWAF creates for each denied request.