User Management
You can only edit the entries if you belong to the zeusafm Administrator user group or to another user group with appropriate user rights. You can edit your personal user data via the menu item My Profile.
vWAF uses single sign-on in combination with the Traffic Manager. Users who aren’t known by vWAF are added automatically, using the same username as in the Traffic Manager.
You can change the user group to which users are assigned who are added automatically. This is done via System Configuration (attribute “AdminAuthAutoAddUserGroup”).
The password that you can edit in User Management is ignored when vWAF is accessed via the Traffic Manager.
Purpose
You can assign users to one or more of the following user groups (see also Organizational Integration):
-
Internal user group zeusafm Admin (vWAF Administrator)
- Has all rights.
- Can edit the rulesets for all applications without having to be assigned to these applications explicitly.
- Internal user group
Application Admin
- Can only edit the rulesets of “his”/“her” applications.
- Can only view the global vWAF configuration and not edit it. For example, the Application Administrator can’t create new applications, hosts, and users.
- In the navigation area can only see “his”/“her” applications, but not necessarily all applications.
- Internal user group
PCI Auditor
- Can view the entire configuration, except for application-specific log files and application-specific statistics.
- Can’t change any configuration settings.
- User defined user groups with fully customizable permissions
ATTENTION
Deactivate the default account
admin as soon as possible, or assign a secure password to this account and keep that password in a safe place.
Opening
To open User Management, select the menu item .
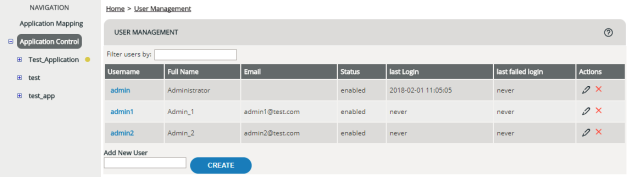
Information displayed
| Column | Meaning |
|---|---|
|
Username |
Username assigned. |
|
Full Name |
First name and family name of the person in question. |
|
|
Email address of the person in question. |
|
Status |
Activation status enabled or disabled. A deactivated user can no longer log in. |
|
Last Login |
Year, month, day and time of the last login. |
|
Last Failed Login |
Time of the last failed attempt to log in under the Username. |
|
Actions |
Links for editing and deleting the user. |
Filtering the display
When you enter a string into the Filter users by field, the user list gets immediately filtered by this string.
The filter works with all columns of the table, not only with the “email” column.
You can for example use the filter as follows:
- to find a particular user, enter his or her name
- to list all users of a particular company, enter the company’s domain name as it appears in the email addresses
- to list all users whose account was disabled, enter the sting “disabled”
Creating a new user
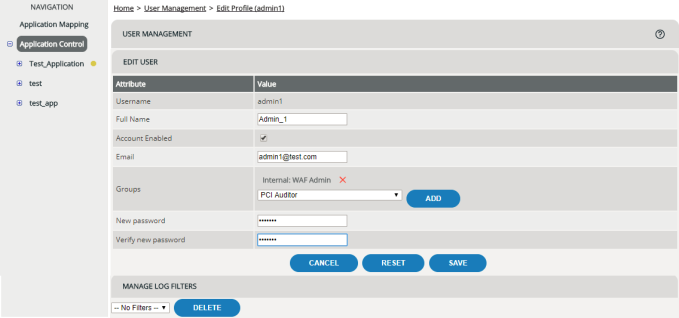
Editing a user
The page for editing user data appears either automatically when a new user is created, or after clicking the Edit icon in the Actions column.
You can access your own settings also directly via the menu item My Profile.
Deleting log filters
When viewing log files, you can create and save filter sets in order to filter the display (see Log Files).
You can only delete filter sets that you’ve created yourself . You can’t delete filter sets of other users.
To delete one of your filter sets:
Deleting a user
To delete a user from vWAF:
- Select the menu item to open User Management.
- Click the relevant Delete icon in the Actions column.