Use Case 1: Private Cloud and On-prem Access with SSO into Salesforce
Use ZTA to route traffic securely to these resources, front ended by ZTA Gateways. There are a few key configurations that are required before this use case can be met.
•Creating or connecting user database
•Deploying a gateway in a location that permits access to a protected resource
•Configuration on the Salesforce domain for SSO integration into the ZTA domain
Creating or connecting user database
-
Local users can easily be added by the admin
-
SAML integration can also be used to link to an external user database
-
Use Workflows > User Authentication to start the configuration wizard
-
The admin will need to define authentication servers for at least Enrollment and User Signin and optionally Admin Signin.
Deploying a gateway in a location that permits access to a protected resource
-
The steps to gateway deployment vary greatly depending on what type of hypervisor is being used
-
Follow the steps outlined in the Help documentation, Getting Started with ZTA.

Configuration on the Salesforce domain for SSO integration into the ZTA domain
-
Sign up for a new Salesforce Developer account.
-
Once domain is registered, log in to the domain (Example: cloudsecure-dev- ed.my.salesforce.com).
-
Click setup located on top right corner of the page.
-
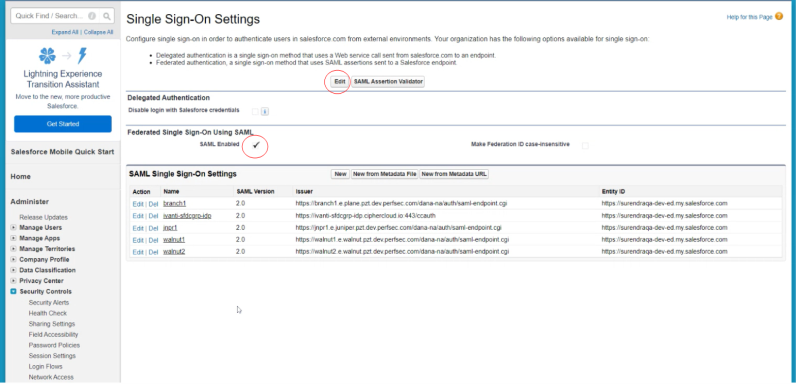
Navigate to Security Controls > Single Sign-On Settings on the left panel. Click on Edit, check SAML Enabled and click Save.
-
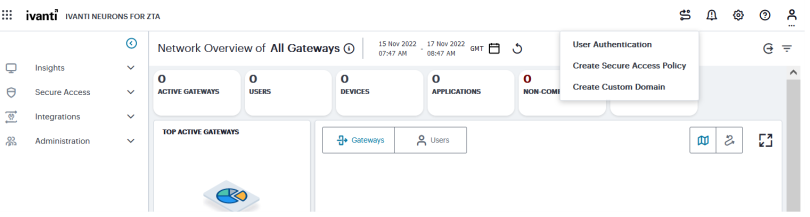
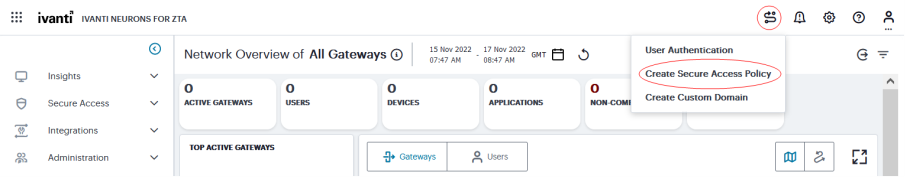
Return to the ZTA domain and begin the process of creating a Secure Access Policy
-
You will need to fill out the first few fields in order to get the SAML metadata file from ZTA before returning to the Salesforce domain to complete configuration.
-
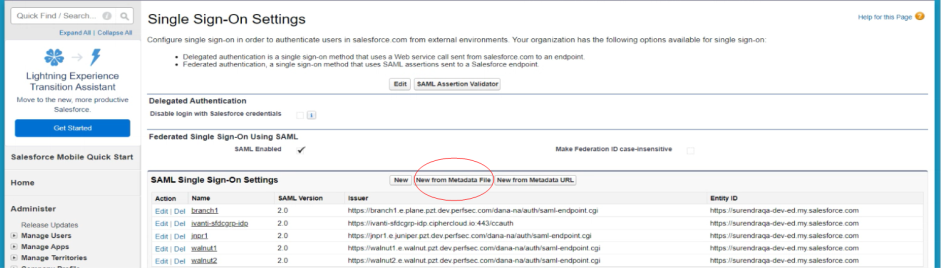
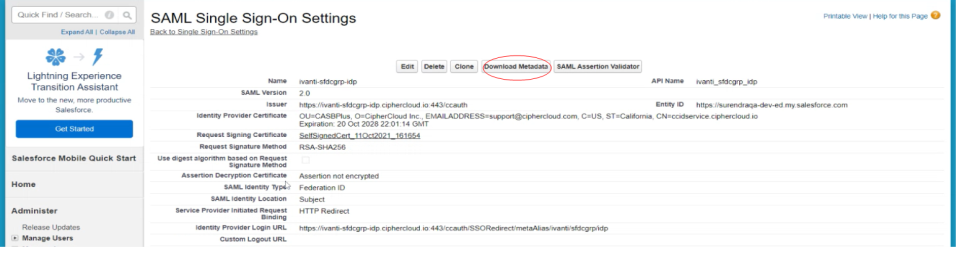
Return to Salesforce domain in the SAML SSO settings and select New from Metadata File and upload the file downloaded from ZTA
-
Click the name of the new entry (next to Edit | Del) and download the metadata file associated with the new entry.
-
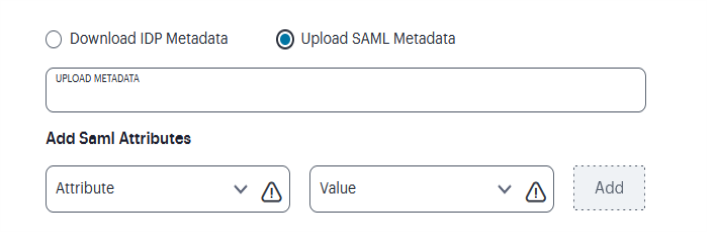
Take the metadata file back to ZTA and upload (move the radio button selection from download to upload)
-
Select Next and move through the rest of the settings.
-
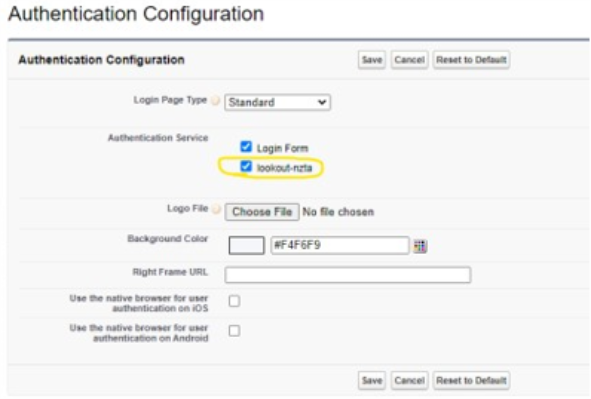
Navigate to Domain Management > My Domain on the left panel. Click Edit under the Authentication
-
Configuration section, check the box for the SSO profile created above and click Save.
-
Navigate to Administer > Manage Users > Users. Click New User to create a new Salesforce user if user does not exist. Provide the following details, matching the user created on the ZTA domain:
-
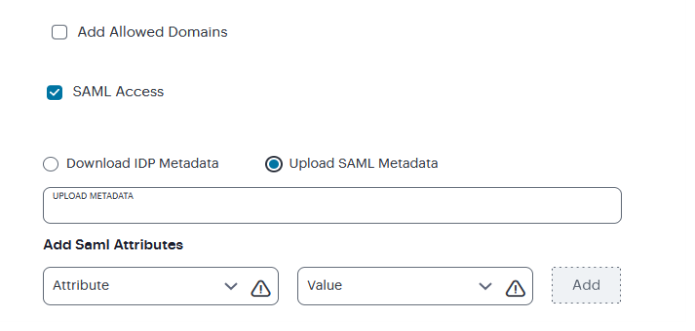
Take the downloaded file from step above back to ZTA and upload it in the Secure Access Policy Creation page.
-
Select Add Allowed Domains and upload the below listing for domains saved in an excel generated CSV file.
-
Click Next and select a device policy if desired. This enforces a device posture rule for the resource to be accessed.
-
Select the users and sign-in policy to attach the resource.
-
Select the gateway to be used for access.
-
Save and publish the Secure Access Policy.

1.Select the users who see the bookmark
2.Apply an option host checking rule
3.Attach the bookmark to a gateway for access
1.Provide First Name.
2.Provide Last Name. Alias will get populated automatically.
3.Provide Email. Username and Nickname will get populated automatically.
4.Select Role for the user.
5.Select User License as Salesforce.
6.Select Profile for the user.
7.Click Save. Leave Salesforce.
Only the top 4 are needed if a non-DLP setup is being created (SSO from ZTA to Salesforce, without Lookout).
*.salesforce.com
*.my.salesforce.com
*.force.com
*.lightning.com
*.salesforce-communities.com
*.eloqua.com
*.salesforcemarke.com
*.documentforce.com
*.forcesslreports.com
*.forceusercontent.com
*.salesforceliveagent.com
*.sfdcstatic.com
*.developerforce.com
Register a device (using the Enrollment link found in Secure Access > User > User Policies) and bring up the ZTA connection in the Ivanti Secure Access Client to leverage the settings defined in the above steps.