Your Ivanti Neurons for Zero Trust Access (nZTA)
tenant subscription is deployed, by default, as a unique Fully Qualified
Domain Name (FQDN) provided by Ivanti - typically at
pulsezta.net. Enrollment and sign-in endpoints are
configured at this FQDN through user authentication policies
and provided to end-users in a welcome email. To learn more about user
authentication, see Defining User Authentication.
A FQDN is reserved for a specific tenant and remains deployed for the
duration of the subscription.
Should you require it, you can provision a custom domain to be used
in place of the Ivanti-provided domain. In this scenario, you
set up the custom domain within your own DNS infrastructure, pointing to
the IP address of your standard Ivanti tenant domain. Through
this mechanism, you can advertise the FQDN of your nZTA service
as appearing to originate within your own organizational network. For
example, where your company domain might be
www.example.com, you can configure nZTA at
zta.example.com.
With an active custom domain:
All end-users see your nZTA service as originating at the
new domain (such as zta.example.com), and enroll or
sign-in their devices at endpoints based on that URL.
When you add Gateways, their hostnames also reside in this domain.
The Controller automatically manages DNS and certificates for
all Gateways configured in your nZTA service.
Tenant admins use the Admin Portal based at the custom domain.
However, as an emergency backup, access to the standard domain at
pulsezta.net remains available.
Custom domain support is a change to the server-side hostnames and
certificates used by the Controller and your Gateways. Your
end-user client certificates are unaffected.
IMPORTANT: It is essential to determine whether a custom
domain is required at the outset of your subscription, and particularly
before you have deployed any Gateways or enrolled any
users.
Custom domain usage is contingent on the following restrictions:
Once configured, a custom domain cannot be removed from a tenant
subscription. Consider carefully if you want to enable this
feature.
If you want to add a custom domain to a subscription that uses (or
plans to use) an enterprise-provided Public Key Infrastructure (PKI)
(see Using an Existing Enterprise PKI), you must configure all
enterprise-provided certificates before you configure the custom domain.
Failure to follow this order of configuration can result in the
Controller becoming unresponsive.
In this scenario, enterprise PKI configured tenant subscriptions can
not be reconfigured to become non-PKI subscriptions.
Custom domains require at least one server certificate. If you later
need to delete the certificate, make sure you have a replacement ready
to upload.
You configure a custom domain during the Onboarding Wizard,
or at a later time through the Tenant Admin portal.
A custom domain is configured through any of the following
routes:
From a link in the Onboarding Wizard.
Through the Create Custom Domain workflow, accessed through
the Workflows menu icon in the title bar.
Through the Administration > Enterprise Integrations >
Custom Domains page.
Typically, a custom domain is configured at the point a new
nZTA subscription starts, through the Onboarding Wizard. The
link provided in the wizard triggers the Create Custom Domain
workflow, which is described here. The Create Custom Domain
workflow enables you to define the custom domain for your nZTA
service, together with uploading the necessary server certificates for
that domain.
Before you begin, make sure you have the full public TLS server
certificate chain and private key files, in PEM or PKCS#12 format, for
your proposed domain.
To configure a custom domain, perform the following steps:
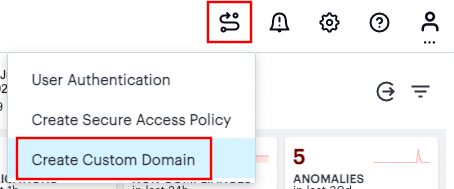
Select the Workflows icon, then select Create
Custom Domain:
Starting the Create Custom Domain
workflow
This starts step 1 of the Create Custom Domain
workflow.
Enter the domain name you want to use in the field provided:
Using the Create Custom Domain workflow -
step 1
After you enter your domain, nZTA populates the mTLS domain
field automatically. This domain is predetermined based on your entered
domain name and is read-only. For example, if you enter
"zta.example.com" as your custom domain, the mTLS domain automatically
becomes "e.zta.example.com".
To continue, select Next.
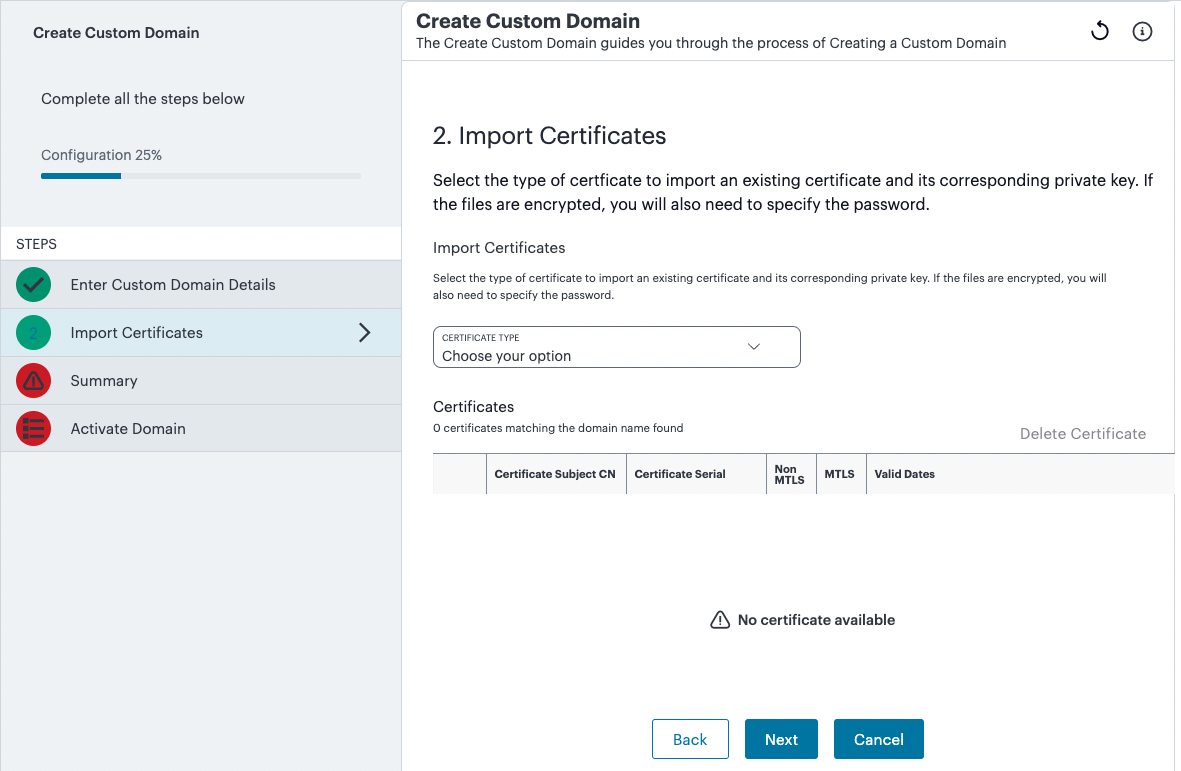
In this step, you import the TLS server certificate chain
applicable to your domain (or certificate chains, where TLS and
mTLS domains use separate certificates):
Using the Create Custom Domain workflow -
step 2
For Certificate Type, choose one of the following
options:
Custom Domain with embedded private key: Use this
option to upload a certificate file that includes an embedded private
key.
Custom Domain with separate private key: Use this
option to upload a separate certificate file and private key file.
For encrypted certificates, enter your Password in
the field provided. Then, add your Certificate File
(and Private Key File where applicable) (in PEM or
PKCS#12 format) into the fields provided. To upload your files, select
Import Certificate.
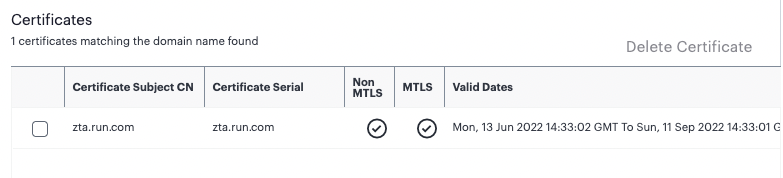
Uploaded certificate files are presented in the table for
verification:
Observing successfully uploaded server
certificates
Repeat this step for every certificate you want to upload. Then,
select Next to continue.
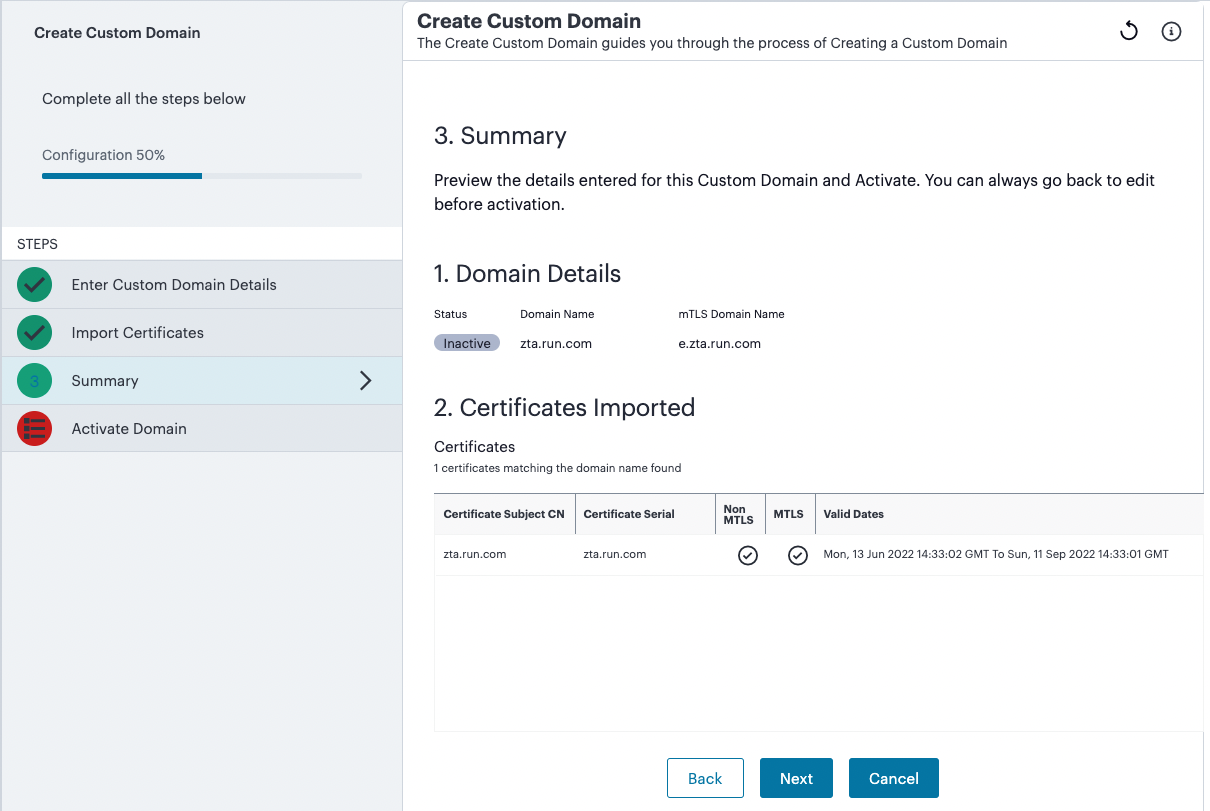
Verify the details you have provided:
Using the Create Custom Domain workflow -
step 3
To continue, select Next.
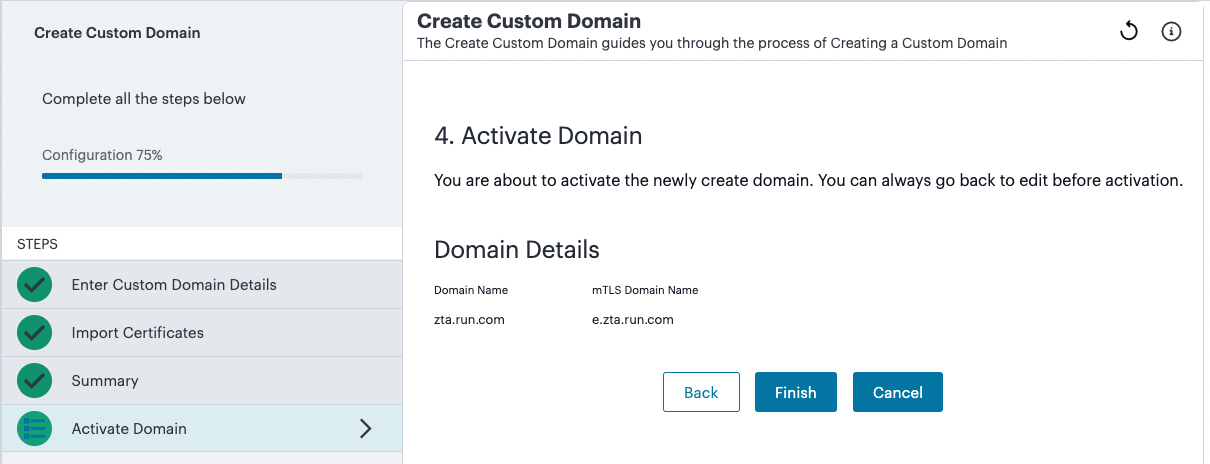
Activate the domain:
Using the Create Custom Domain workflow - step 4
Select Finish to complete the configuration and
activate your custom domain. Through this action, your new domain
becomes active, and the original Ivanti-provisioned domain is
marked inactive.
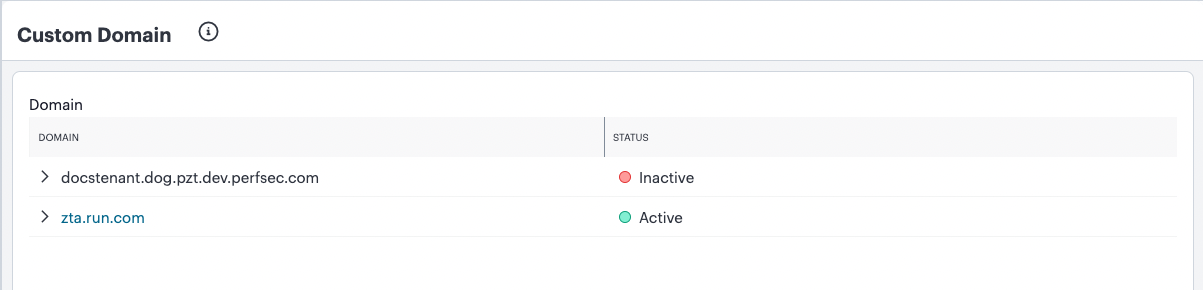
Checking the Configured
Domain
To view the currently configured domain details for your
subscription, use the Administration > Enterprise
Integrations > Custom Domain menu. This presents the
Custom Domain page:
Viewing the Domains for your Subscription
Through this page, you can:
View the currently active and inactive domains.
Add a custom domain, where one is not currently defined. To learn
more about the process of adding a custom domain, see Configuring a Custom Domain.
Select the arrow icon adjacent to a domain to view the TLS and mTLS
domains defined for that entry, including the server certificate expiry
details if applicable.
Select the name of a custom domain to view or modify the applied
server certificates.
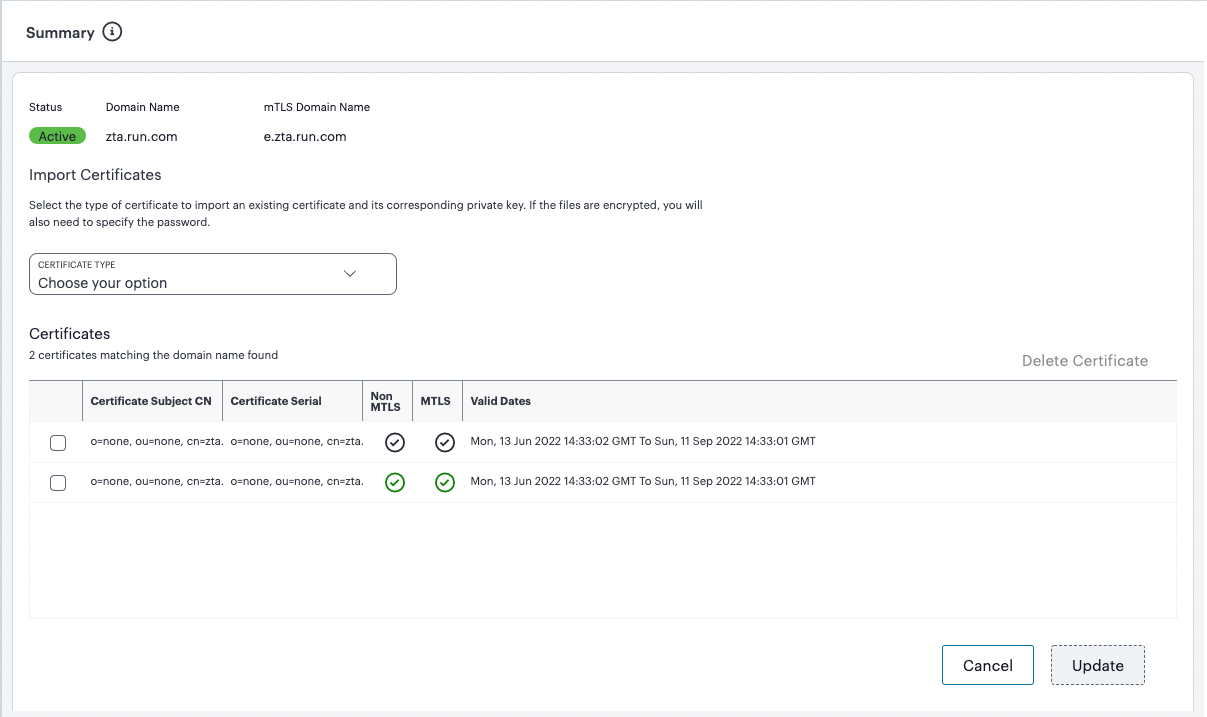
When you select a domain, a detail page is presented showing the
current status and certificate usage for the domain:
Viewing the Settings for a Domain
For currently applied certificates, select a Certificate
Subject CN entry to view a dialog containing the certificate
parameters.
To add a server certificate, use the Certificate
Type field. Choose one of the following options:
Custom Domain with embedded private key: Use this
option to upload a certificate file that includes an embedded private
key.
Custom Domain with separate private key: Use this
option to upload a separate certificate file and private key file.
Make sure you are adding the full public TLS server certificate chain
and private key applicable to your custom domain.
Then, add your Certificate File (and Private
Key File where applicable) (in PEM or PKCS#12 format) into the
fields provided. To upload your files, select Import
Certificate.
For encrypted certificates, enter your Password in
the field provided.
To remove a certificate, select a checkbox adjacent to an uploaded
certificate in the table, then select Delete
Certificate.