Configuring Auto-Config of a VPN Provider on Mobile Devices
Each VPN-enabled mobile device requires a CA certificate to perform certificate-based VPN authentication. This certificate can be downloaded and configured manually, but Pulse Workspace supports the automatic configuration of a VPN provider based on a policy. This enables the automatic download of the required CA certificate to each device that uses the policy.
After these tasks are complete, all devices that use the policy will have a CA certificate that enables authentication-based access to the VPN on a PCS appliance.
Ensuring that PCS has a CA Certificate Associated With its External Port
First, you must ensure that the PCS that will act as the VPN provider has a CA certificate assigned to its external port.
To view current CA certificates:
1.Log into the PCS appliance as an administrator.
2.Select the System menu, and then select Configuration > Certificates > Device Certificates.
The PCS Device Certificates page appears. This page shows all current CA certificates on the PCS appliance. For example:
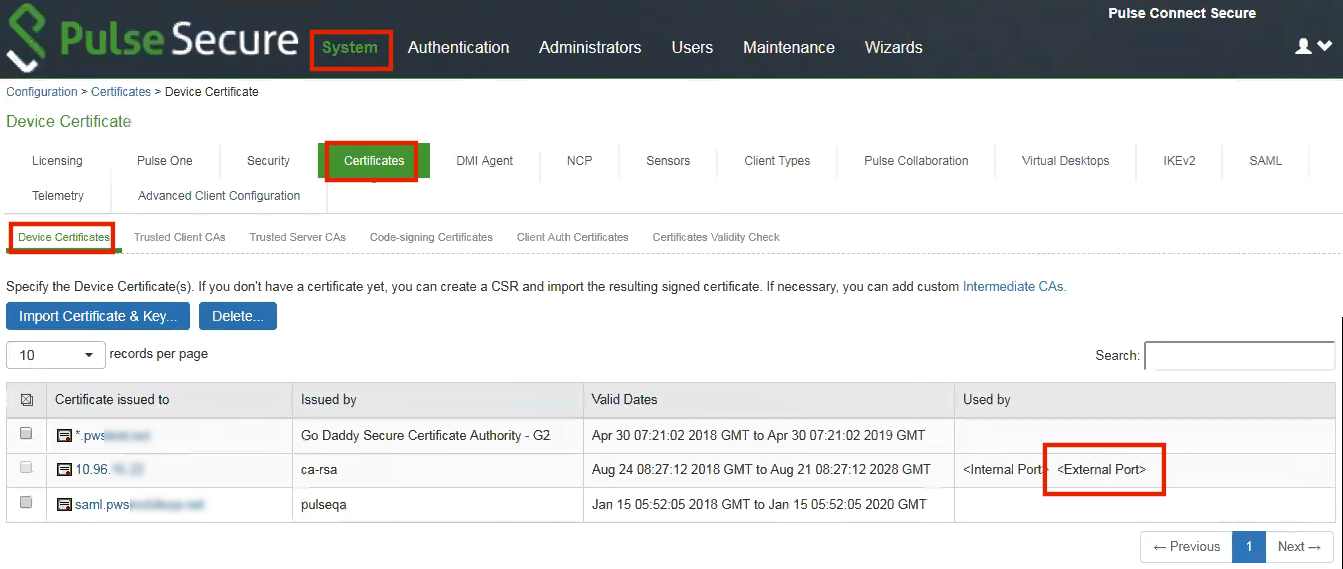
In this example:
•The 10.96.xx.xx CA certificate has a Used by property that includes <External Port>, which indicates that it is associated and in use on the external interface of the PCS appliance.
•The other certificates have no Used by values set. These certificate are not currently assigned to any interface on the PCS appliance.
To assign a CA certificate to the external interface of a PCS:
1.Log into the PCS appliance as an administrator.
2.View all current CA certificates on the appliance on the Device Certificates page (see above).
3.Locate the CA certificate that you want to assign to the external port of the PCS.
4.In the Certificate issued to column, click the hyperlink for the required CA certificate.
The Certificate Details page appears. Under Present certificate on these ports, an unassociated certificate will look as follows:
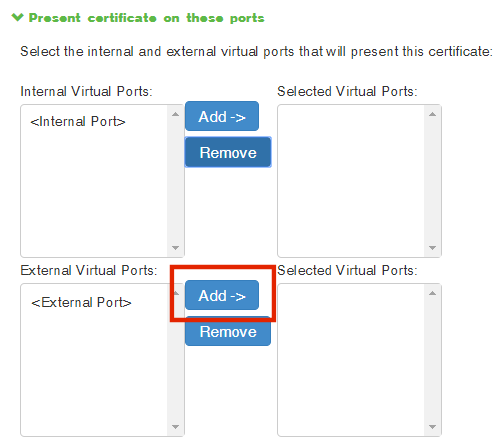
5.Under External Virtual Ports, click Add to move <External Port> into Selected Virtual Ports. For example:
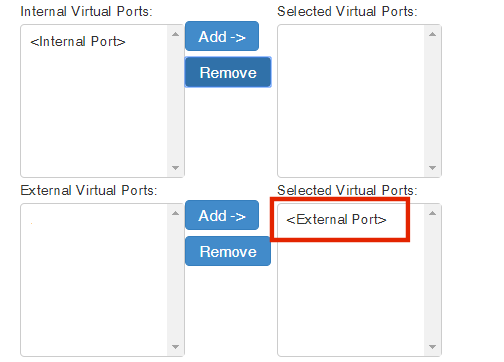
6.Click Save Changes to close and return to the Device Certificates page.
The CA certificate will show that it is Used by the <External Port>.
You must now ensure that Pulse One and the PCS are synchronized, see Ensuring that PCS is Synchronized with Pulse One.
Ensuring that PCS is Synchronized with Pulse One
After you have updated a CA certificate to be associated with the external interface of a PCS appliance, you must then ensure that the PCS configuration is synchronized with the Pulse One appliance.
1.Log into Pulse One as an administrator.
2.Click the Appliances menu, and then the Appliances tab.
3.In the Appliances tab, locate the PCS appliance that you want to be the VPN provider for a mobile device.
4.Wait until Pulse One synchronizes with the PCS appliance.
Before synchronization occurs, the Appliance Info panel for the appliance shows the following message:
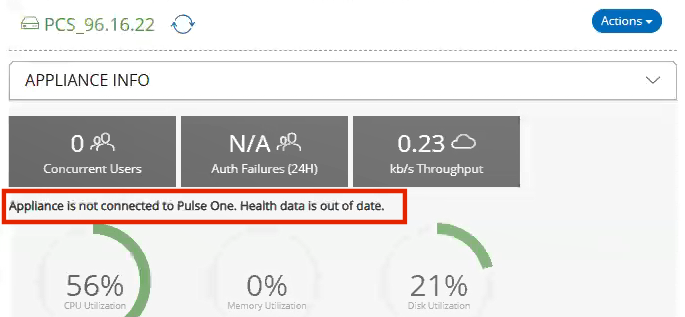
After the listed PCS appliance meets both of the following conditions, it is synchronized:
•A Pulse One Status of Connected.
•A Last Config Update that shows the elapsed time since the last update. For example, 25 mins. If this value is shown as Unknown, the device is not yet synchronized.
For example:

In this example, the PCS_96.16.22 appliance is synchronized with Pulse One.
5.(Optional) Confirm the synchronization by verifying the automatic upload of the CA certificate in the Trusted Client CA page on a PCS appliance.

You must now configure the VPN Provider workspace property, see Configuring a VPN Provider in the Workspace Properties.
Configuring a VPN Provider in the Workspace Properties
After Pulse One and the PCS appliance are synchronized, you can configure the PCS appliance to be a VPN Provider.
To configure a PCS appliance as a VPN provider:
1.Log into Pulse One as an administrator.
2.Click the Settings icon on top-right-corner of the page and select Workspace Properties.
The Workspace Properties page appears.
3.Expand the Enterprise Connections category. For example:
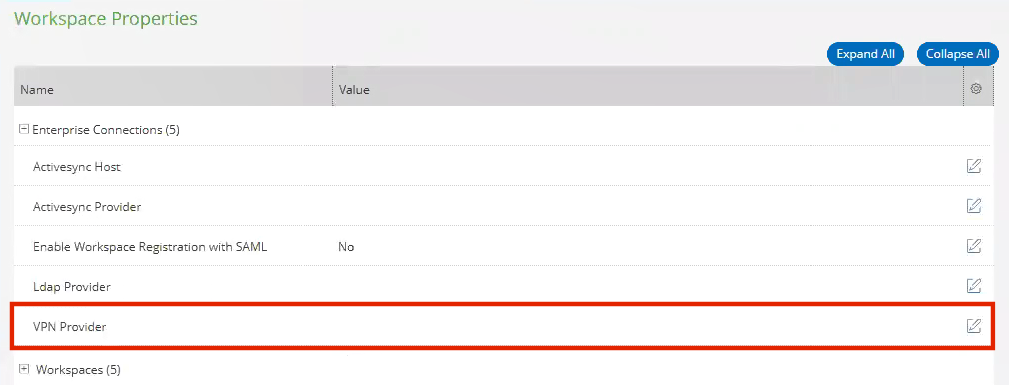
4.Click the Edit (![]() ) icon for the VPN Provider entry.
) icon for the VPN Provider entry.
The Edit Property dialog appears. For example:
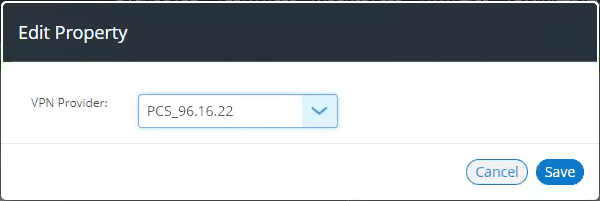
5.Select the required PCS appliance as the VPN Provider.
You cannot select a PCS appliance that is in an appliance group as the VPN provider.
In this example, the PCS_96.16.22 PCS appliance is selected.
6.Click Save.
If you selected a PCS appliance running a version that is earlier than v9.0R3, the selection is accepted, but you must reboot the selected appliance to complete the configuration.
The Workspace Properties page updates. For example:

After the VPN workspace property is set, you can update any policy that requires the use of the selected VPN provider, see Updating and Publishing a Policy to Use a Specified VPN Provider.
Updating and Publishing a Policy to Use a Specified VPN Provider
After the workspace properties are set, you can update the VPN policy properties on any policy that requires them. You can then publish the policy to all devices.
To update the VPN policy properties for a policy:
1.Log into Pulse One as an administrator.
2.Select the Workspaces menu.
3.Select the Policies tab.
4.Select the required policy.
5.Click the Properties tab for the selected policy.
6.Expand the VPN category to view current VPN settings. For example:
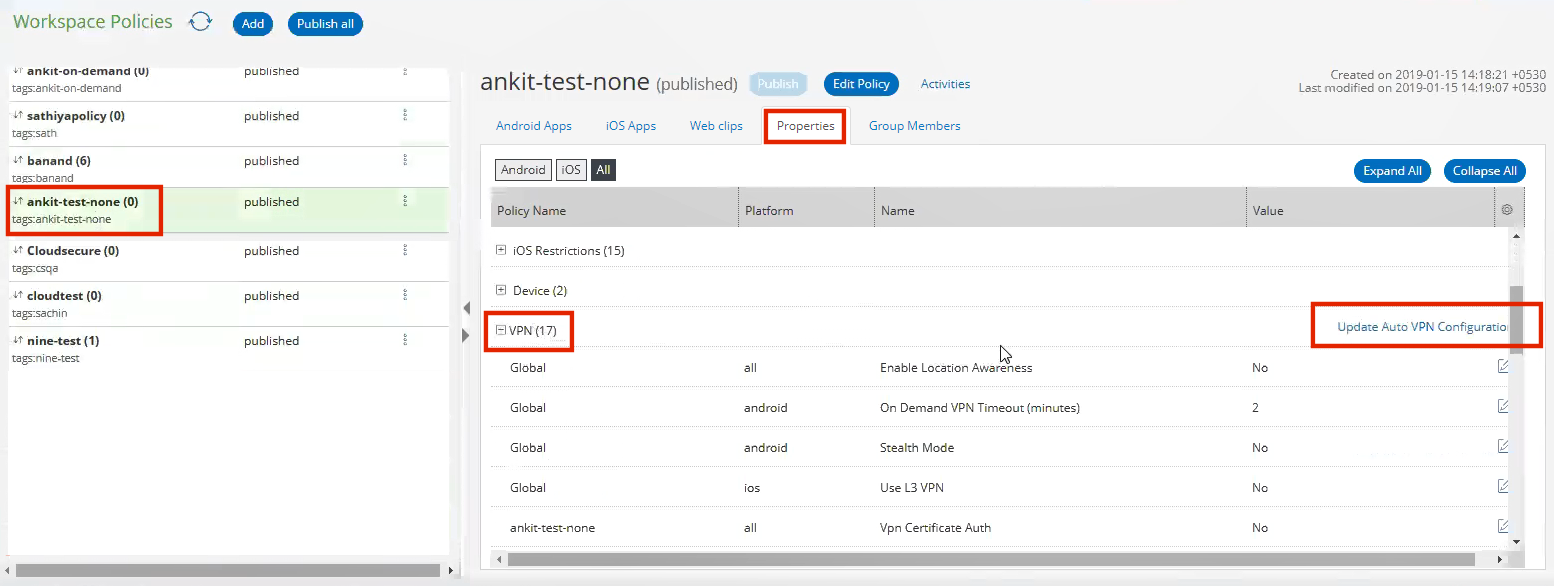
7.Next to the VPN category, click Update Auto VPN Configuration.
The Edit VPN Provider Configurations dialog appears. This indicates current settings and new settings from the VPN provider CA certificate. For example:

8.Click Save to confirm the changes.
The Policies tab updates to show the new VPN values, and the policy shows as Edited. For example:
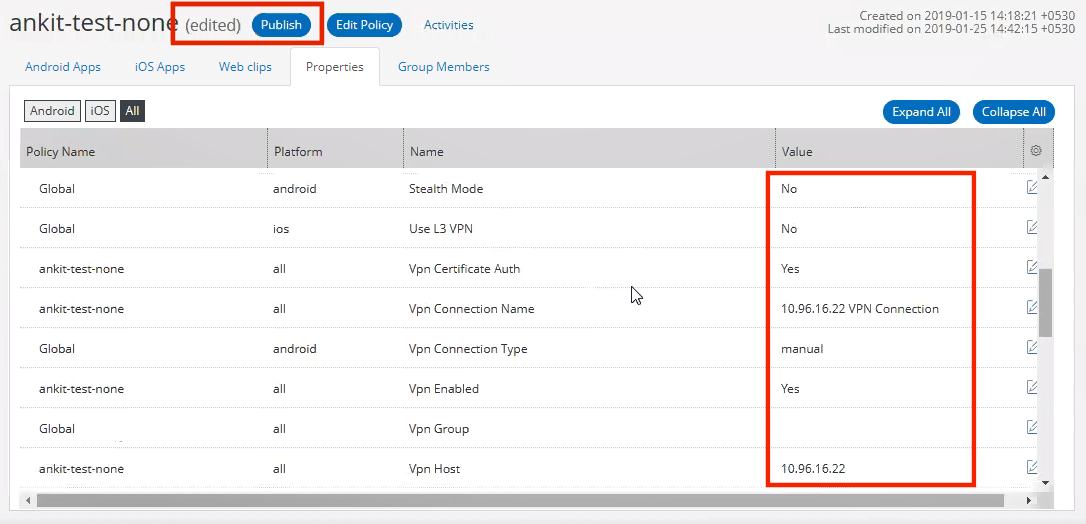
9.Click Publish.
The policy's state changes from edited to publishing and then published.
This applies the policy to all mobile devices that use the policy.
The process is now complete.