Onboarding iOS BYOD Devices
This section describes the steps to provision a Bring Your Own Device (BYOD) mobile iOS device. BYOD devices are personal property which are then configured to contain separate areas for:
•Personal apps and data.
•Corporate apps and data.
When the Workspace administrator invites you to provision your device, you will receive a welcome email which contains instructions for provisioning your device.
Based on the domain property setting, the registration workflow that follows the welcome email differs.
Understanding Your SAML-Based Authentication Email
Where your organization uses SAML authentication, you receive a welcome email. This is similar to the following:
This email contains:
•A registration link to download and install Pulse Secure from Apple App Store for iPhone or iPad devices.
•An Enterprise URL.
•Instructions for completing the device registration.
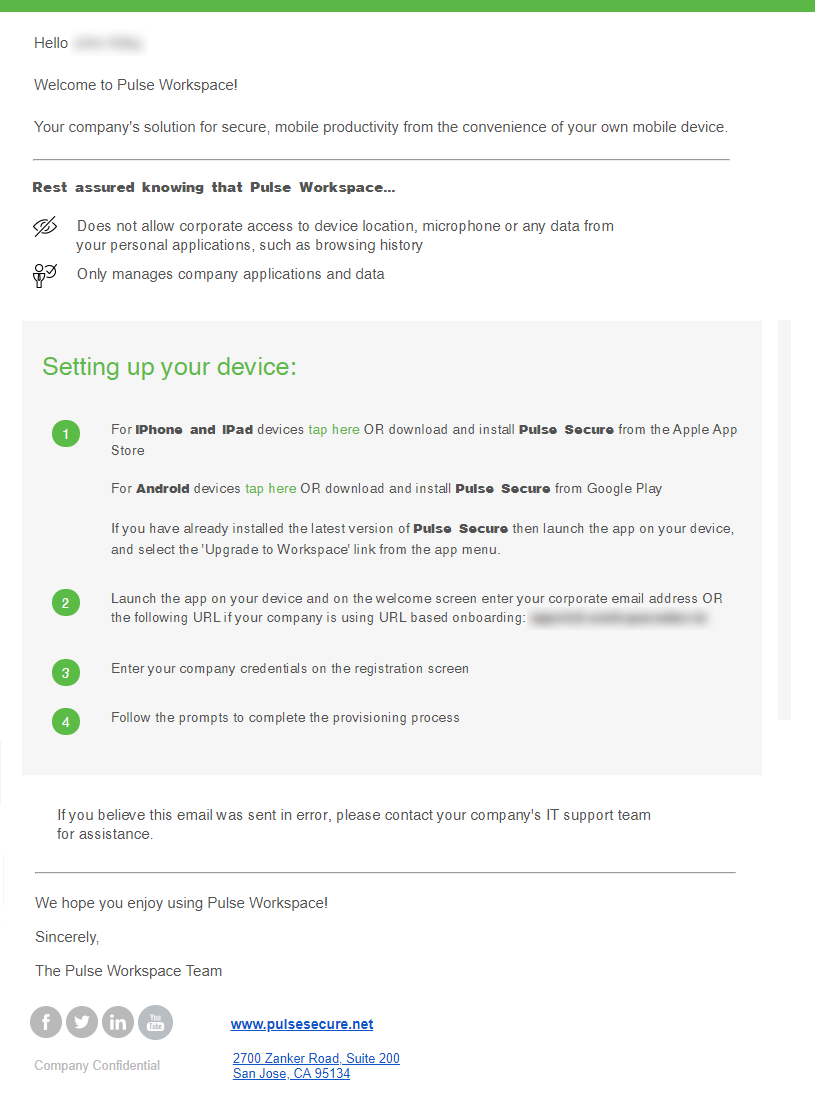
Understanding Your PIN-Based Authentication Email
Where your organization does not use SAML authentication, you receive a welcome email. This is similar to the following:
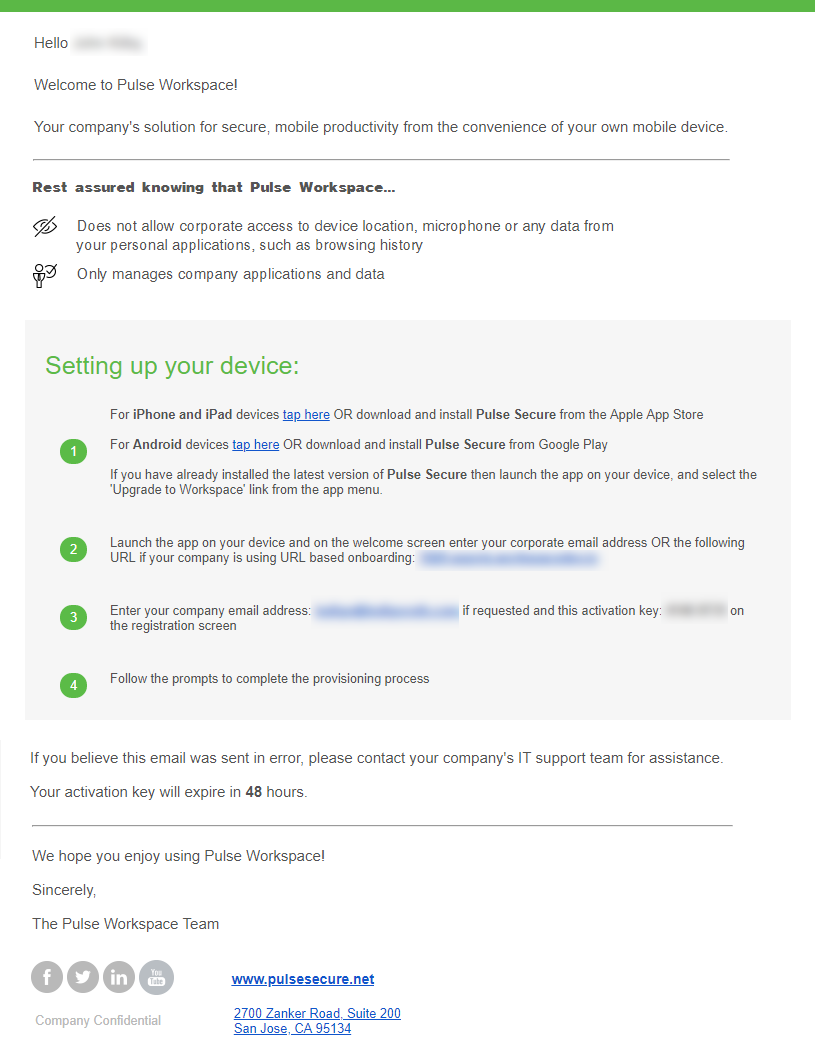
This email contains:
•A registration link to download and install Pulse Secure from Apple App Store for iPhone or iPad devices.
•An Enterprise URL.
•A provisioning email address.
•A provisioning activation key.
•Instructions for completing the device registration.
Registering an iOS BYOD Device
Starting at iOS 12.2, Apple has changed the manual enrollment flow for Mobile Device Management (MDM), see https://support.apple.com/en-us/HT209435. As a result, installing the MDM profile involves some additional steps for end users who perform manual enrollment on their Apple device running iOS 12.2 and later. This change is applicable only for new Pulse Workspace user registrations.
To set up an iOS device when Pulse Secure is not installed on the device:
1.In your email, click the iOS registration link. This installs Pulse Secure.
2.Start Pulse Secure on your device.
The Pulse Secure Welcome screen appears:
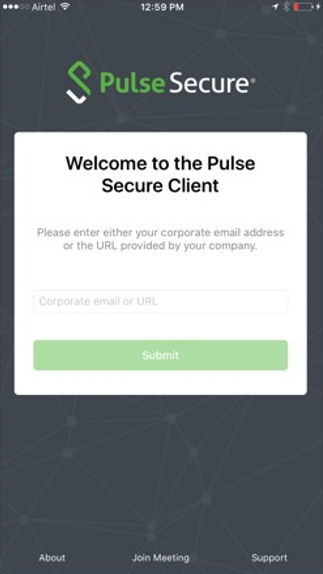
On this screen:
•Enter the Enterprise URL from your welcome email.
•Click Submit.
The next step depends on whether you have SAML-based authentication.
3.(Optional) If you are using a SAML-based registration, the SAML Login screen appears.
On this screen, enter your corporate user name and password and click Sign In.
A BYOD policy Agreement page appears (skip step 4).
4.(Optional) If you are using PIN authentication, the following screen appears.
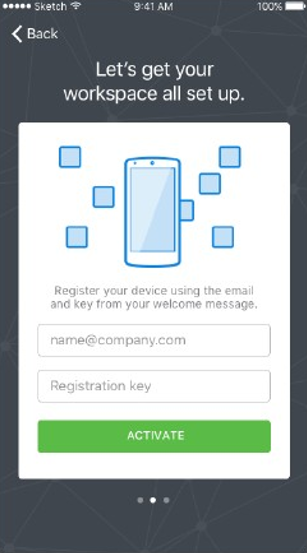
On this screen:
•Enter your corporate email address.
•Enter your registration key from your welcome email.
•Click Activate.
The client parses the domain and sends it to a discovery server to fetch the server URL. It then continues with Active Directory (AD) authentication with the server.
To set up the Auto-Discovery experience, you will need to contact Pulse Secure Technical support through a DevOps ticket. After the needed information is provided (and validated), Technical Support will enable the Auto-Discovery experience for your Email Domain.
A BYOD policy Agreement page appears. (continue from step 5)
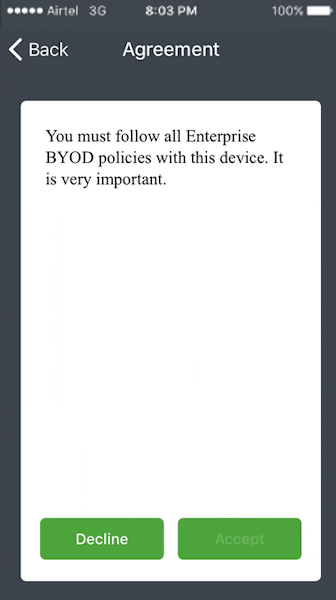
5.On the Agreement page, press the Accept button to accept the Enterprise BYOD policies.
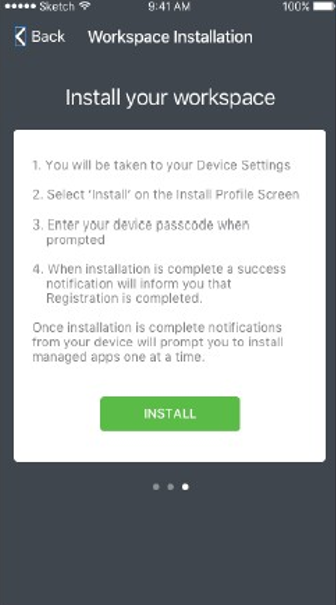
The Install Your Workspace page appears.
6.Press the Install button to begin workspace registration.
7.The next phase of this process depends on your iOS version.
To check the iOS version of your device, access Settings > General > About.
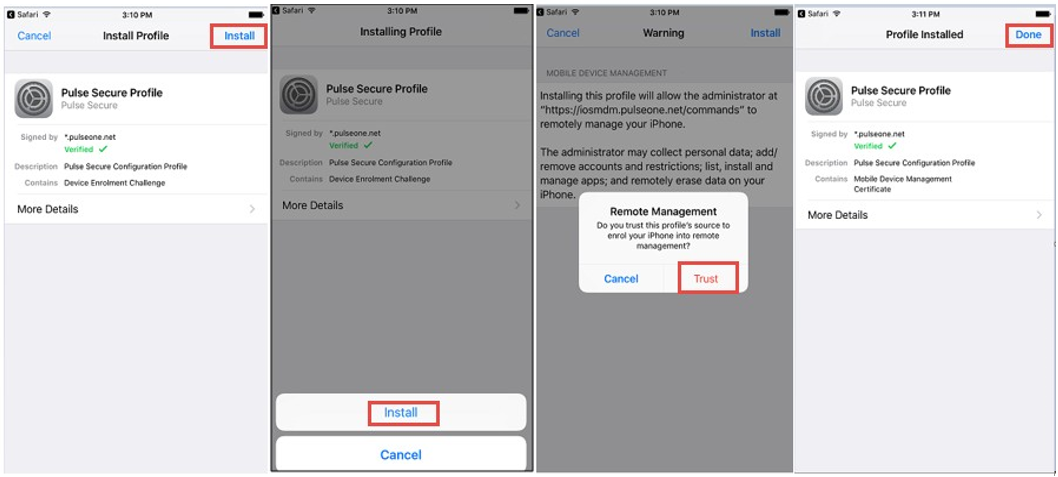
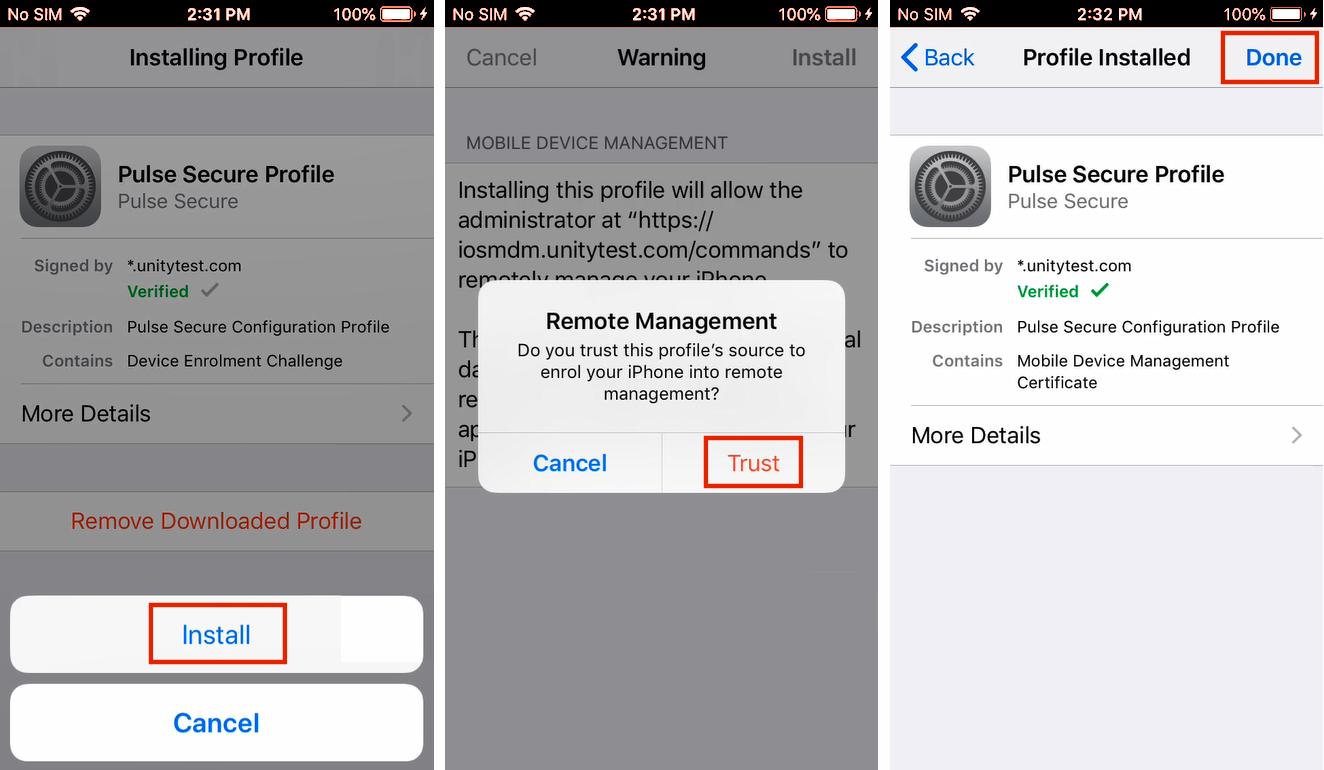
•For iOS 12.1.4 or earlier, you are automatically prompted to install the Pulse Secure Profile Workspace Server certificate on the iOS device. Press Install, then Install, then Trust, and then Done to complete the process. For example:
•For iOS 12.2 or later, you are instructed to go to the Settings app and install the downloaded profile.
There is a time limited of eight minutes for the install operation.
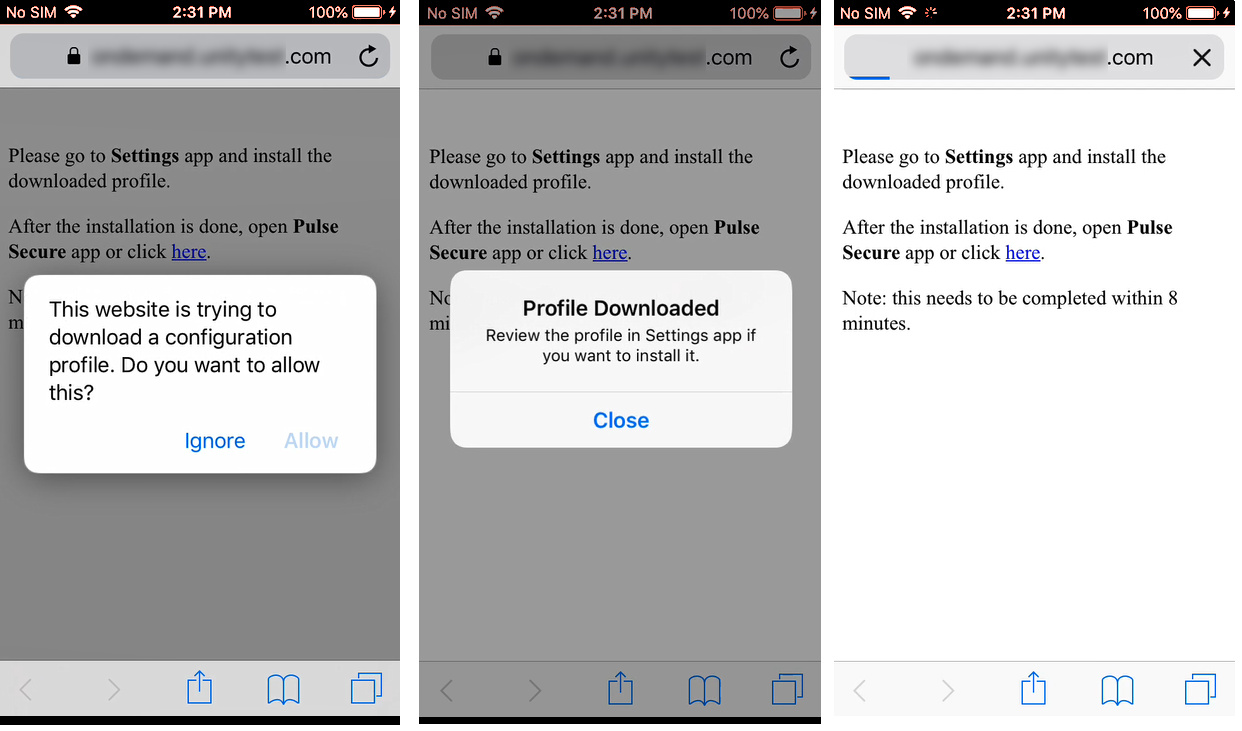
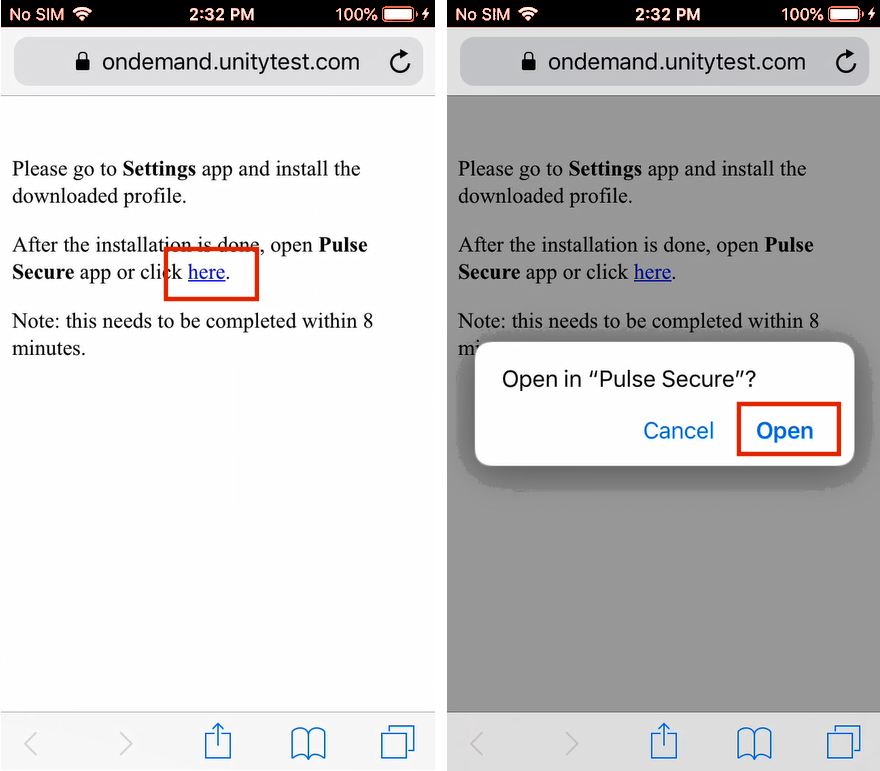
On the iOS Device Registration page, press Allow, and then Close.
Do not dismiss this screen. You will return to this screen later in this step.
You must then manually access Settings > General > Profiles. Press the Pulse Secure Profile, then Install, and then enter your passcode.
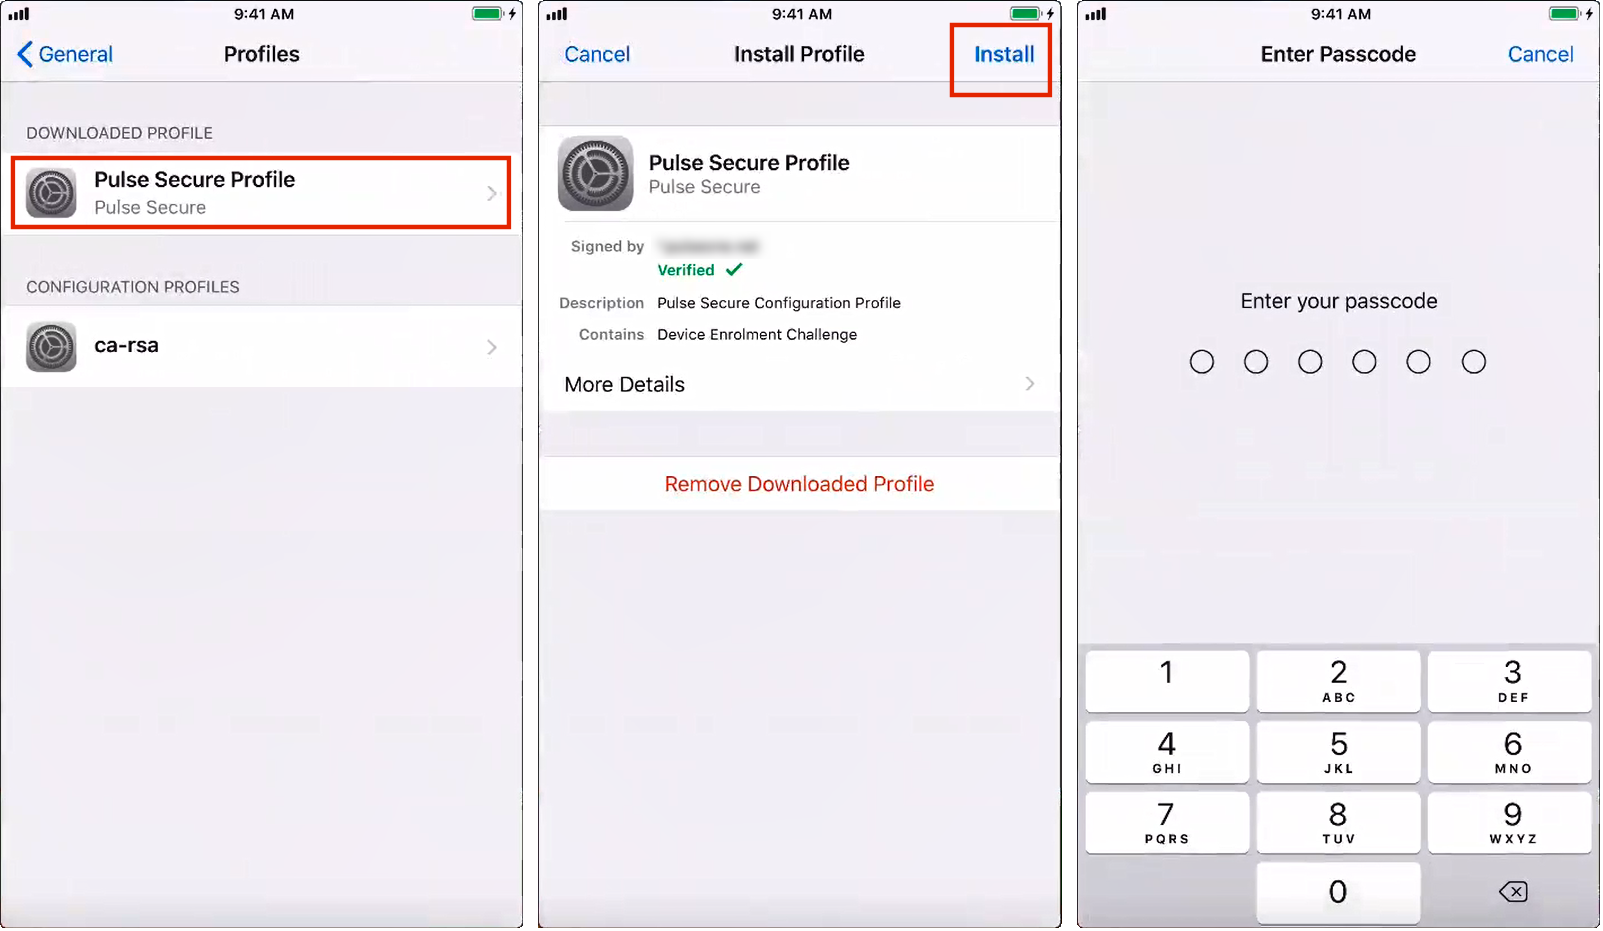
Press Install to confirm the installation, then press Trust. Once the installation is complete, press Done.
You can then return to the iOS Device Registration page and click the hyperlink to complete and then press Open to complete this manual process.
8.After the workspace registration is complete, press the Close button.

You may then be prompted to perform a variety of post-registration actions such as automatically installing applications, setting a device passcode or entering your email password. For example:
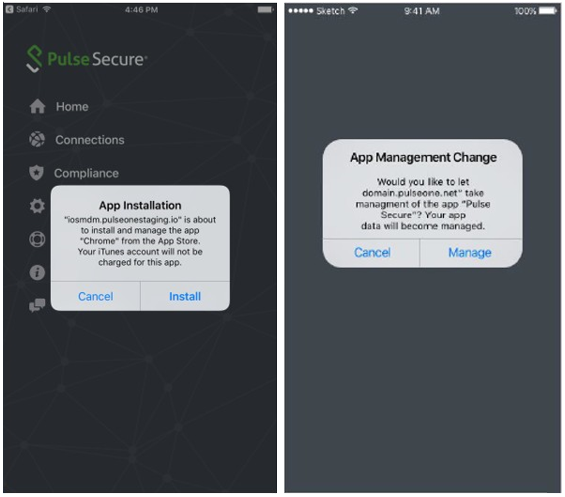
These actions will depend on:
•Your enterprise security policy.
•Whether you are on a managed device or a managed client, see Understanding Managed Devices and Managed Clients. For example, managed clients will not install any applications after enrollment.
To install apps manually on a managed device:
1.Navigate to Workspace Apps.
2.Tap the Installed tab to view installed apps.
3.To install optional apps, tap the Available tab and press Install for each app you want to install.
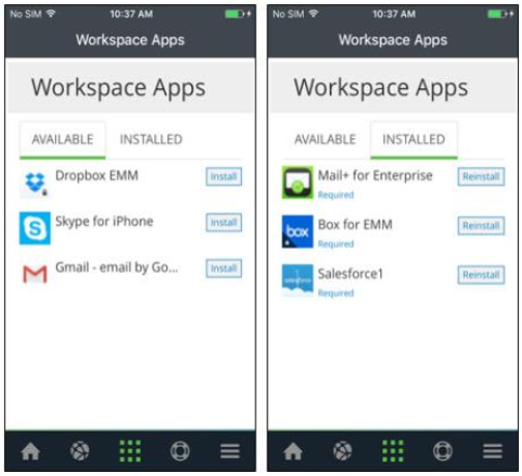
After installation, the app will be listed in the Installed tab.