System Management
Working with LDAP Groups
Enterprises typically assign policies based on the LDAP group. For example, staff in Sales need access to a specific set of Enterprise apps, while staff in Finance need a different set of Enterprise apps.
You can configure LDAP groups and assign these groups to policies. These policies are then sent to Workspaces when users configure Workspaces on their mobile devices.
If users are in multiple LDAP groups, then they get multiple policies. The order of policies applied to Workspaces depends on the order of polices configured on Workspace Server.
Adding an LDAP Group
To add an LDAP group:
1.On the Pulse One console, select Settings > Workspace Settings > LDAP Groups.
The Manage LDAP Groups page appears.
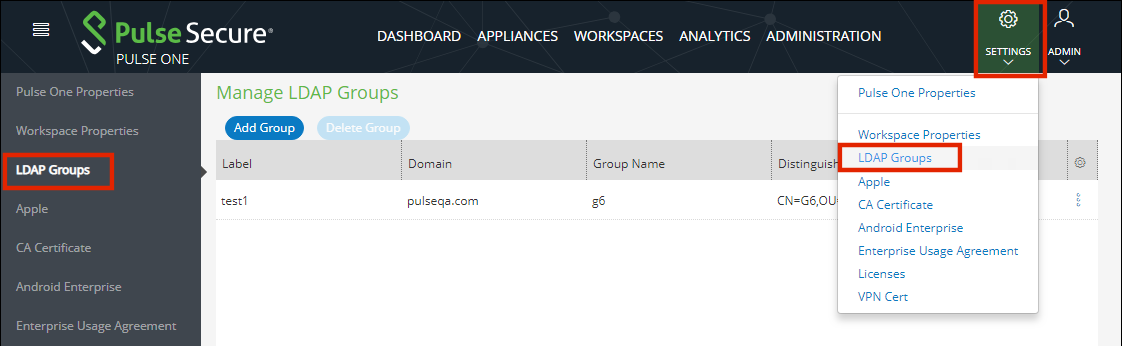
2.Click Add Group.
The Add LDAP Group dialog appears.
3.Enter a Label for the group.
4.Select either Group Name or Distinguished Name format. The dialog updates.
5.(Optional) If you selected Group Name:
•Enter the Domain name to which the group belongs.
•Specify a Group Name.
•Click Save to add the group.

6.(Optional) If you selected Distinguished Name:
•Enter a Distinguished Name in the CN=Name,OU=organizationname,DC=domain,DC=com format.
•Click Save to add the group.

When an LDAP Group is added, it is unverified.
A notification is then sent to PCS, which will validate the group name against the LDAP server and will send one of the following validation status:
•Verified - Group name is available and validated.
Admin can only assign verified LDAP groups to policies.
•Invalid - Group name is not available.
•Pending - LDAP provider is not configured.
•Expired – Group name is deleted from the back-end LDAP server.
Removing an LDAP Group
To remove an LDAP group:
1.To remove an LDAP Group, click the More icon next to the state of the group that you want to remove, and select Delete Group from the options.
2.In the dialog displayed, click Yes to remove the group.
When the LDAP Group is deleted, it is removed from all the policies to which it is attached.
Configuring an LDAP Group
To configure an LDAP group:
1.Click the Settings icon on top-right-corner of the page.
2.Select Workspace Properties.
The Workspace Properties page appears.
3.Expand Enterprise Connections.
4.Click the Edit icon corresponding to LDAP Provider.
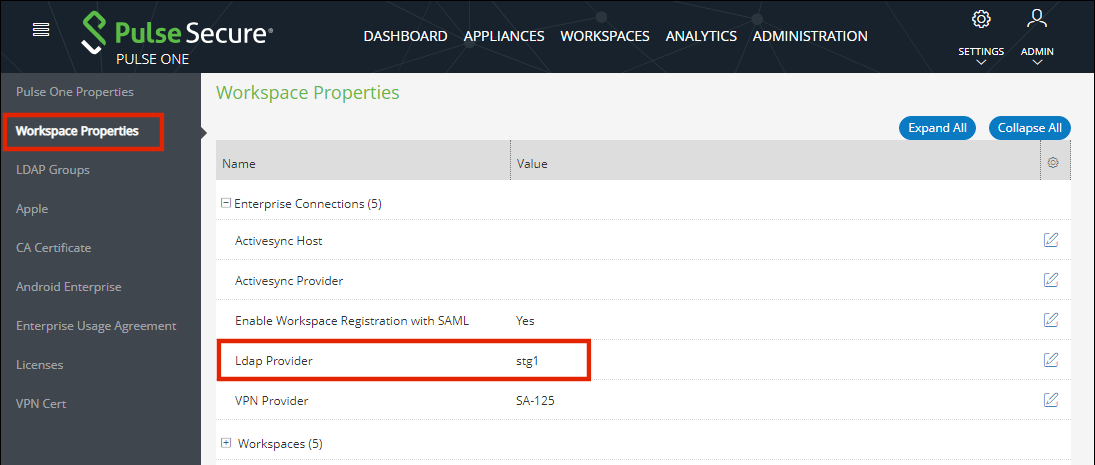
The Edit Property dialog appears.
5.Select the required LDAP Provider from the drop-down list and click Save.
6.Select the Workspaces menu, and then the Policies tab.
7.Under Workspace Policies, click Add.
The Add Policy dialog appears.
8.Specify a Policy Name, one or more user tags, and choose a verified LDAP group.
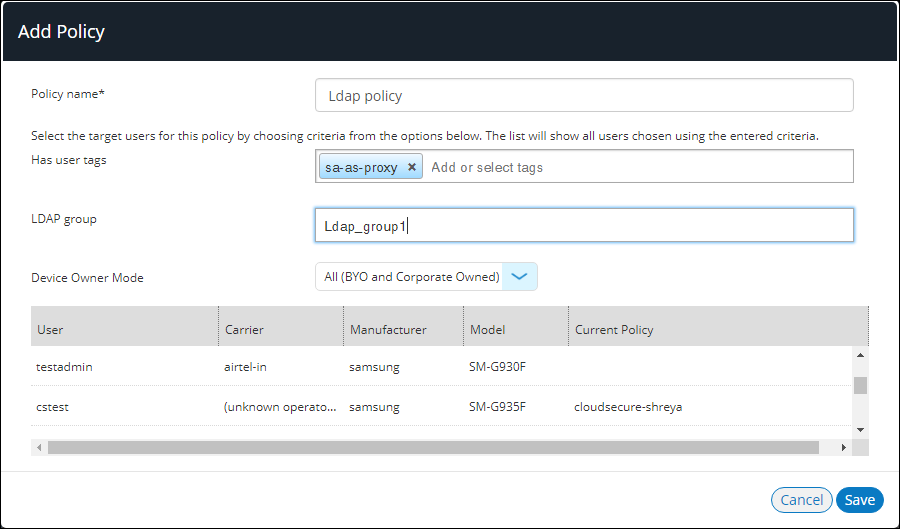
9.Click Save.
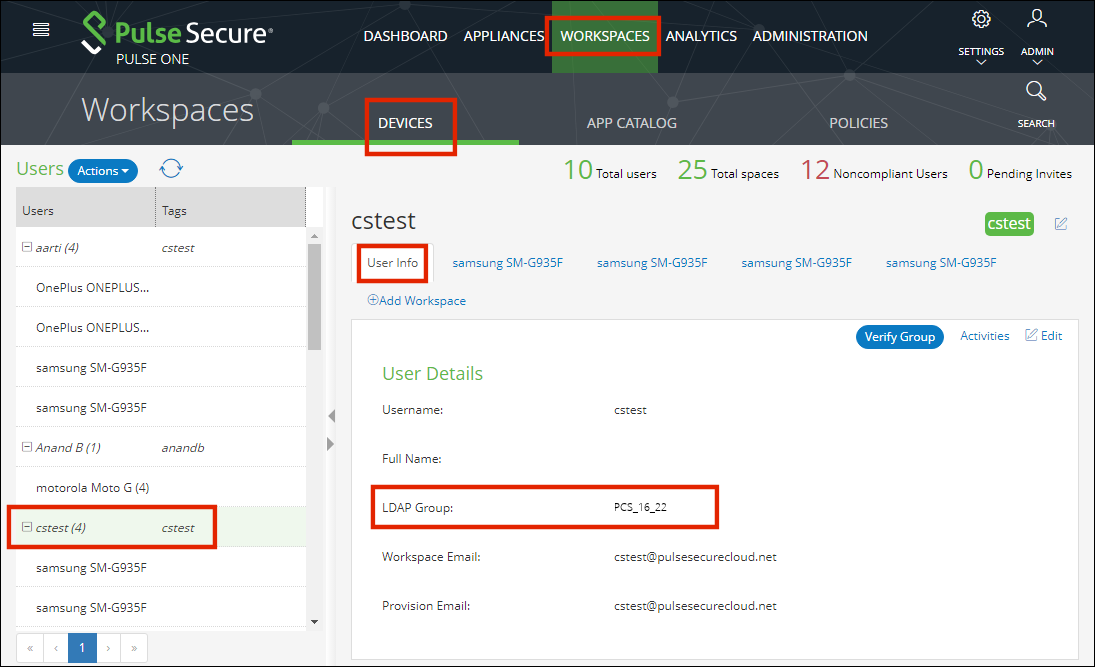
10.Select the Workspaces menu, and then the Devices tab.
A list of workspace Users is displayed.
11.Select a user.
The User Info tab shows the LDAP Group to which the user is attached.