Management Portal Setup
After installing the Workspace Control Management Portal, follow these steps to set up a connection to the Datastore:
-
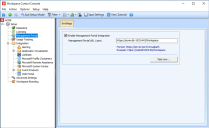
Open the Workspace Control Console and navigate to Setup > Management Portal.
-
Select Enable Management Portal Integration.
-
In the Management Portal URL/port field, enter the following:
https://<hostname>:<port>/Workspace
Replace <hostname> with the hostname and <port> with the port number (default 443) provided during the Configure IIS Binding step of the Management Portal installation wizard.
-
Launch the Workspace Control Management Portal using the desktop shortcut.
This starts an internet browser window. -
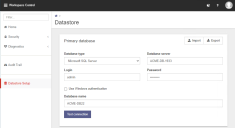
On the Datastore Setup page, configure the Datastore connection settings:
-
Database type
Select the database type:-
Microsoft SQL Server
-
Microsoft Azure SQL Database
-
-
Database server
Enter the name of the server where the Datastore is located. -
Login and Password
Enter the credentials used to connect to the Datastore. -
Database name
Enter the name of Datastore.
-
-
Select Test connection to check if a connection to the Datastore is established using the provided settings.
-
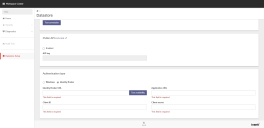
(Optional) By default, the Management Portal uses Windows authentication. To configure the Management Portal to use Identity Broker authentication, navigate to the Datastore > Authentication type section.
-
Once the connection test is successful and additional options are configured, select the Save button at the bottom of the page.
After the settings are saved, you are redirected to the Management Portal login screen.


