Azure Blob Storage Account Configuration
Following are the steps required to create and configure an Azure blob storage account.
In this configuration example, acmeazure is used as the name for the blob storage account component.
This name is used for example purposes. In your configuration, use a name that is appropriate to your business requirements.
To create and configure a new Azure storage account, follow these steps:
-
Log into the Azure portal at https://portal.azure.com/.
-
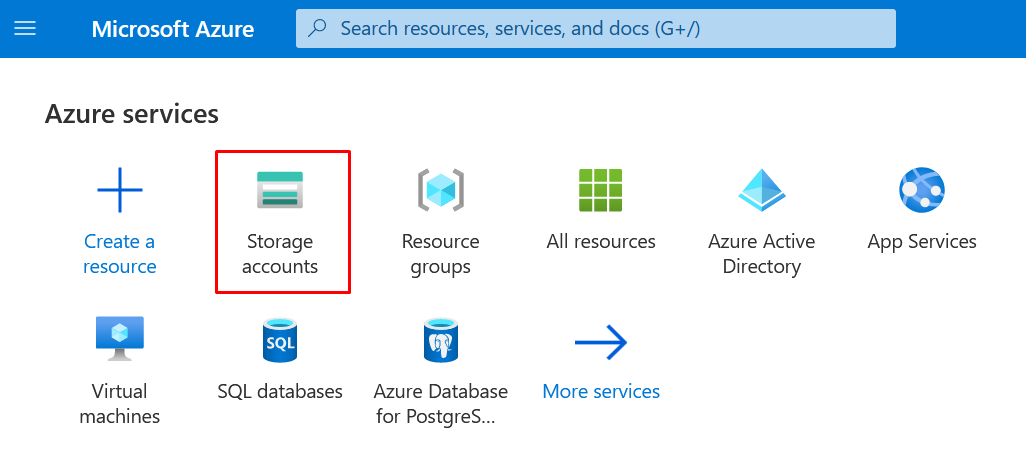
From the Azure welcome screen, under Azure Services, select storage accounts.
(click the image to enlarge it)If the option is not visible under Azure Services, click on More services and locate it there.
-
Click on Create.

(click the image to enlarge it) -
Fill in the required fields in the Basics tab:
-
Subscription: Select an appropriate subscription.
-
Resource group: Select a resource group as the residence of the storage account.
You can also create a new resource group. -
Storage account name: Enter a name for the storage account.
The name of the storage account must be unique in the Azure environment and not bound to the current subscription of your business.
-
Location, Performance, Account kind and Replication (redundancy): consider your business requirements and select the appropriate options.

(click the image to enlarge it) -
-
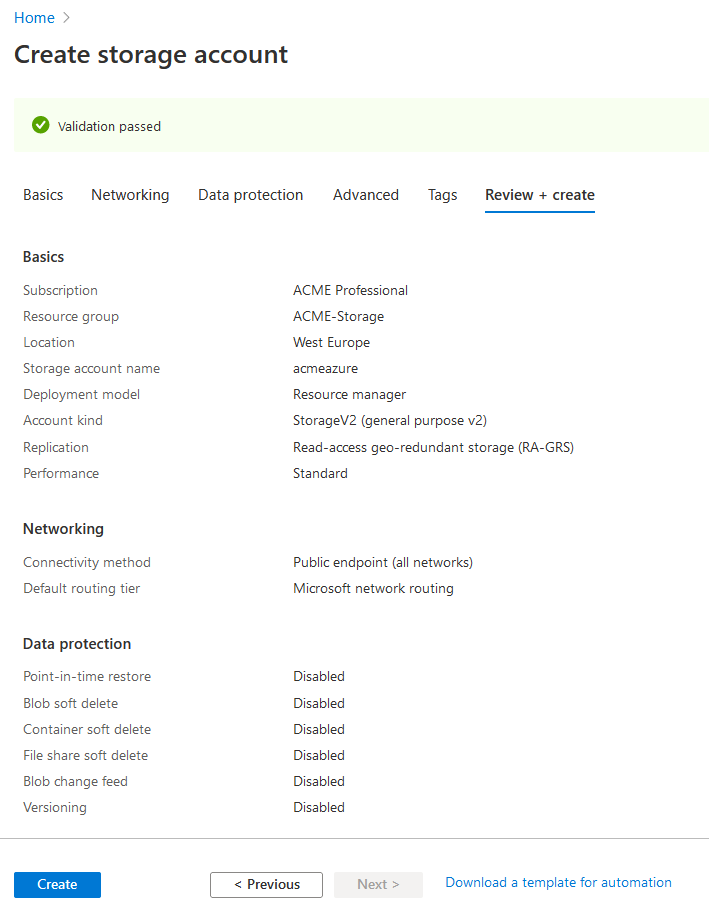
Complete the rest of the storage account configuration (Networking, Data protection, Advanced and Tags) according to your business requirements, and then click Review + Create.
Ensure that under the Advanced tab > Security. the option Allow shared key access is set to Enabled. If disabled, requests to the storage account that are authorized with shared access signatures (SAS) are denied.
Azure starts validating the storage account configuration.
(click the image to enlarge it) -
Once the validation process is complete, review the configuration and then click Create.
The deployment process starts and can take a few minutes until it is complete.


The Azure storage account is now configured.
To create additional blob storage accounts, for example for a separate Azure tenant, switch to another tenant and repeat the previous steps.