Configuring Authorized Owners
By default, when enabling the Authorized Owners feature, the following authorized owners list is evaluated before Workspace Control allows an application to start:
-
.\Administrators
-
BUILTIN\Administrators
-
NT AUTHORITY\SYSTEM
-
NT Service\TrustedInstaller
Therefore, by default, Workspace Control trusts items owned by the BULTIN\Administrators group and the local administrator. The default list of authorized owners is visible in the Workspace Control Console, under the Security > Authorized Owners > Authorized Owners tab.

Ivanti recommends to add only user accounts to the authorized owners list. Groups can be configured as authorized owners. However, the members of the configured groups are not part of the authorized owners list. If an unauthorized user attempts to start an application, Workspace Control blocks the application from running, even if the user is a member of an authorized group.
The list of authorized owners can be further configured by adding or removing NTFS users:
To add a new user to the list of authorized owners, follow these steps:
-
Open the Workspace Control Console and navigate to Security > Authorized Owners > Authorized Owners tab.
-
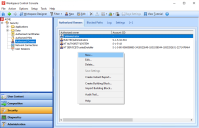
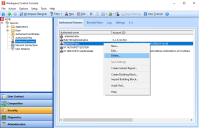
Create a new authorized owners using one of the following methods:
-
Right-click in the right-side pane and select New from the context menu.
-
Select New from the main toolbar.
-
From the main menu, select Action > Authorized Owners > New.
-
-
In the Authorized Owner window, configure the following fields:
-
Account — Select
 to open the Search Directory Services window and select a user to add to the list of authorized owners.
Enter a search criteria in the Search for field to filter the available users.
-
(Optional) The new authorized owner is enabled by default. To set the authorized owner as disabled upon creation, deselect the checkbox next to Enabled.
-
(Optional) Administrative note — Enter an appropriate description.
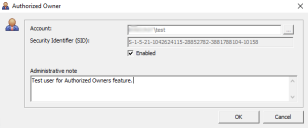
Select OK to add the user to the list of authorized owners.
-


The configured authorized owner now appears under the Authorized Owners tab.

To edit an authorized owner, follow these steps:
-
Open the Workspace Control Console and navigate to Security > Authorized Owners > Authorized Owners tab.
-
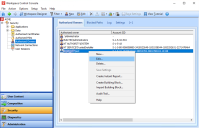
Select the specific authorized owner and then use one of the following methods to delete the user:
-
Double-click on the specific authorized owner.
-
Right-click on the specific authorized owner and select Edit from the context menu.
-
Select the Edit button from the main toolbar.
-
From the main menu, select Action > Authorized Owners > Edit.
-
-
In the Authorized Owner window, edit the following fields:
-
To disable the authorized owner, deselect the checkbox next to Enabled.
To re-enable the authorized owner, select the checkbox next to Enabled. -
Administrative note — Edit the description.
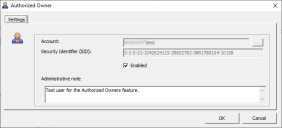
You cannot edit the Account field. To change an authorized owner, remove the desired account and add a new user to the list of authorized owners.
-
-
Select OK to save your changes.


To remove a authorized owner, follow these steps:
-
Open the Workspace Control Console and navigate to Security > Authorized Owners > Authorized Owners tab.
-
Select the specific authorized owner and then use one of the following methods to remove them from the list of authorized owners:
-
Right-click on the specific authorized owner and select Delete from the context menu.
-
Select the Delete
 button from the main toolbar.
 -
From the main menu, select Action > Authorized Owners > Delete.
-
-
The Workspace Control Console prompts you to confirm the removal of the authorized owner. Select Yes to remove the authorized owner.

The authorized owner is now removed from the list of authorized owners.
If the feature is enabled and all authorized owners are deleted, Workspace Control reinstates the default authorized owners list. If the feature is disabled and the list of authorized owners is empty, Workspace Control does not reinstate the default authorized owners list until the feature is enabled.
To enable the Authorized Owners feature only for specific Workspace Containers, follow these steps:
-
Open the Workspace Control Console and navigate to Security > Authorized Owners.
-
From the right-side pane, select the Add Workspace Container
 button.
 -
In the Select Workspace Container window, select the desired Workspace Container.
-
Set the Authorized Owners option to Enabled.
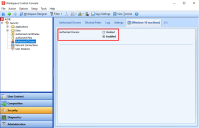
To disable the feature, select Disabled.
-
Select Save Settings from the main toolbar to save your changes.

The Workspace Container uses the same list of authorized owners as configured under the Authorized Owners tab.