In order to create a report, you must first configure the name, scope, output, and the time period to be included in the report. Then you can either generate the report immediately or schedule a time for the report to be generated. When a report is scheduled, it can be set to run once or on a recurring basis.
This section includes instructions for configuring a report using a preexisting template. For information on creating custom reports, see Creating Custom Reports.
To configure a report with an Avalanche template:
| 1 | Click Tools > Reports. |
| 2 | In the Configured Reports panel, click New. |
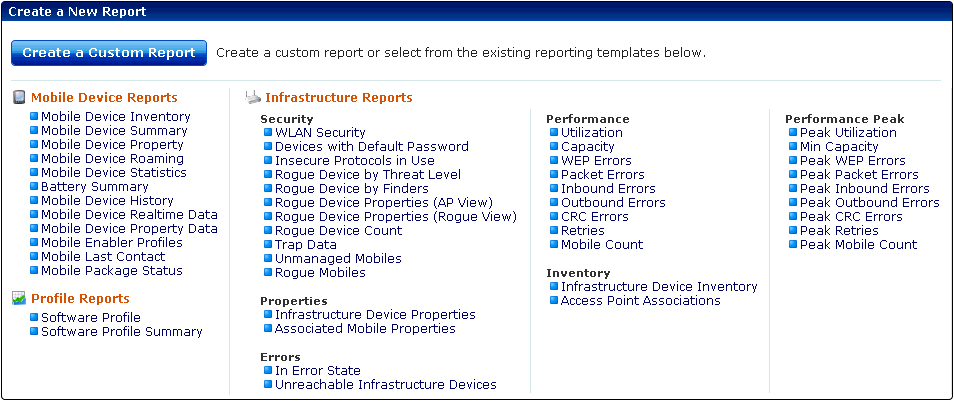
The Create a New Report page appears.
Create a New Report page
| 3 | Click on the desired template from the list of preexisting Avalanche report templates. |
| 4 | Depending on the template, the Reports tool will guide you through configuring the available options for the report. These will always include the name and output format, but may also include the scope or the time period to be included in the report. You may also choose to have a report sent to an e-mail recipient when it is generated. |
| • | Scope. Configure the report to collect information from a specific location in the Avalanche navigation tree |
| • | Name. Create a unique name for each configured report. |
| • | Output Format. Choose the file format for the report results: .pdf, .xml, or .csv. |
| • | Time. Set the report to include information from the past 24 hours, past week, or past month. |
Note: You cannot use a PDF output for reports with a scope of more than 1000 mobile devices — it will not run. The PDF generated would be too large. For a Mobile Device Property report, the maximum device limit for PDF is 250. If you want to run a report for a larger number of devices, it must be in CSV or XML format.
When you have completed the configuration, the report will appear in the Configured Reports panel on the Reports tool main page.
![]()
© 2012 Wavelink Corporation. All Rights Reserved.