Avalanche powered by Wavelink
This page refers to an older version of the product.View the current version of the User Guide.
Managing Folders
Create folders to organize your devices and make it easier to manage their settings.
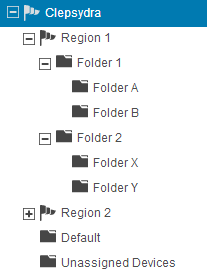
Example Location View
Smart devices are assigned to folders depending on the enrollment rules you have created. When you create an enrollment rule, you associate the rule with a specific folder. Each smart device that connects using that enrollment rule is assigned to the associated folder. For more information about enrollment rules, see Creating Enrollment Rules for Smart Devices. For information about moving smart devices to different folders after enrollment, see Moving a Smart Device.
AIDC devices are assigned to folders depending on selection criteria defined when the folder is created. For example, if Folder A is created with the selection criterion: ModelName = ITCCK30, Intermec CK30 devices automatically appear in the Folder A inventory when they connect to the server.
If an AIDC device does not match the selection criteria for any folders, it will appear in the Unassigned Devices folder that is created by default.
A folder that has sub-folders does not need specific enrollment rules or selection criteria. Instead, these parent folders display all of the devices that are included in the sub-folders.
You can manually move a smart device to a different folder, but if the device re-enrolls, it will be moved to the folder associated with the enrollment rule used.
To create a folder:
1.In the Navigation Tree, select where you want to add the folder and click New Folder.
The New Folder page appears.
2.Type a name for the folder in the text box.
3.If you want to add AIDC devices to the folder, click Launch Wizard to configure unique selection criteria for the folder.
4.If you do not want inherited profiles and device groups to be visible, enable the Hide inherited profiles and device groups option.
5.(Optional) Configure the latitude and longitude so the new folder is displayed on the map. Click the Use map to plot button to set the latitude and longitude by clicking on the map.
6.Click Save.
The folder appears in the selected location.
To make changes to a folder after it has been created, select the folder in the Navigation Tree and click View. The View Folder dialog box appears, displaying details about the folder. Click Edit to make changes.
This page refers to an older version of the product.View the current version of the User Guide.
The topic was:
Inaccurate
Incomplete
Not what I expected
Other
Copyright © 2018, Ivanti. All rights reserved.