Alert profiles are configured with a list of events that will generate an alert. These profiles are then deployed to the servers. When an event on the list occurs, an alert is sent to the Avalanche Console. If the profile is configured for forwarding the alert to e-mail recipients or a proxy, the Console forwards the alert.
The Authorized Users
The settings that can be configured for an alert profile include:
|
|
Each alert profile can notify one or more e-mail addresses when specified events occur. If you want the Avalanche Console to send notification by e-mail, you must add the e-mail address to the Email Recipients list for that profile. The entire contact list will receive e-mails for all alerts generated by that profile. |
|
|
The Avalanche Console allows you to set one or more proxy hosts for an alert profile. When you add a proxy to a profile, the Console automatically forwards all alerts for that profile to the IP address of the proxy, enabling you to integrate Avalanche with your existing network management tools. |
|
|
Avalanche provides a list of events that will generate alerts. You can choose events from this list when you create an alert profile. |
See the following sections for additional information on configuring alert profiles:
| • | Adding E-Mail Contacts |
| • | Adding SNMP Proxies |
To create an alert profile:
| 1 | From the Profiles tab, click Add Profile. |
The Add Profile Wizard appears.
| 2 | Select the Alert Profile option and click Next. |
| 3 | Type a Name for the profile and set the status to either Enabled or Disabled. Click Next. |
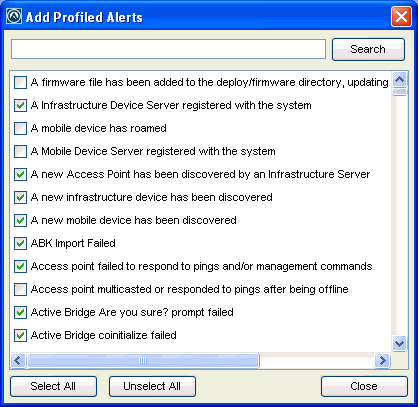
| 4 | Click Add to specify the alerts the profile will monitor. |
The Add Profiled Alerts dialog box appears.
Add Profiled Alerts dialog box
| 5 | From the list, select the events for which you want an alert to be generated. When you are finished, click Close. |
| 6 | The selected alerts appear in the list. click Next. |
| 7 | Confirm that the information is correct and click Finish. |
The profile is added to the Profile List.
To configure an alert profile:
| 1 | From the Profiles tab, select the alert profile you want to configure. |
| 2 | Click Edit. |
| 3 | Select Enabled to enable the profile, if desired. |
| 4 | In the Alert Profile tab, click Add in the Profiled Alerts area. From the list, select the events for which you want an alert to be generated. When you are finished, click Close. |
| 5 | If you want to forward alerts to an e-mail address or a proxy address: |
| • | If you want to receive an e-mail when an alert is generated, click Add in the Profiled Contacts area. |
The Contact Information dialog box appears.
Enter the contact information and click OK. The contact will appear in the Profiled Contacts list.
Note: You must configure the e-mail settings in the Preferences dialog box before Avalanche can e-mail you when alerts are generated. For information on configuring e-mail settings, see Configuring E-mail Settings.
| • | If you want to forward alerts to a SNMP proxy, click Add in the Profiled Proxies area. |
The Proxy Address dialog box appears.
Enter the proxy address and click OK. The address will appear in the Profiled Proxies list.
| 6 | Save your changes. |
The alert profile is created and configured, and can be assigned to a location.
![]()
© 2012 Wavelink Corporation. All Rights Reserved.