Configuring the Session Persistence Server
Configure the Session Persistence Server after installation from the web interface. The web interface allows you to define the client-proxy and host-proxy connections, modify the Session Persistence Server web server connection information, and modify the logging level.
The web interface provides options for configuring the Session Persistence Server. You can change values in the text window or click Wizard to launch the Configuration Wizard, which provides additional help in configuring Session Persistence Server.
To access the web interface
1.Open a web browser and type the address and port of the Session Persistence Server web server in the address bar.
Example: http://192.168.1.10:4428
2.The Authentication Required dialog box appears. Enter the user name and password in the provided text boxes and OK.
This is the password set in the initial configuration when Session Persistence Server was installed.
3.The Current Status page appears. Click Configuration in the navigation bar across the top.
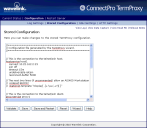
4.The Stored Configuration page appears.
This page provides options for configuring the Session Persistence Server.
•For a description of options available in the text window, see Configuring Session Persistence Server from the Text Window.
•For information on using the Wizard, see Configuring Session Persistence Server with the Configuration Wizard.
In addition to modifying and saving the configuration (either through the text window or the Wizard), this page gives you the option to Validate the changes you’ve made, Save and Restart the server with the changes applied, or Reset the page to the last saved configuration. Clickingthe Help button provides details about configuring the server using the text window.
For examples on how to configure the Session Persistence Server, see Sample Session Persistence Server Configurations.
