Box connector for home map points
The procedure for setting up your Box connector for home map points is described in this topic.
In this section:
- Prerequisites
- Create Box custom app
- Authorize Box custom app
- Configure File Director cloud connector
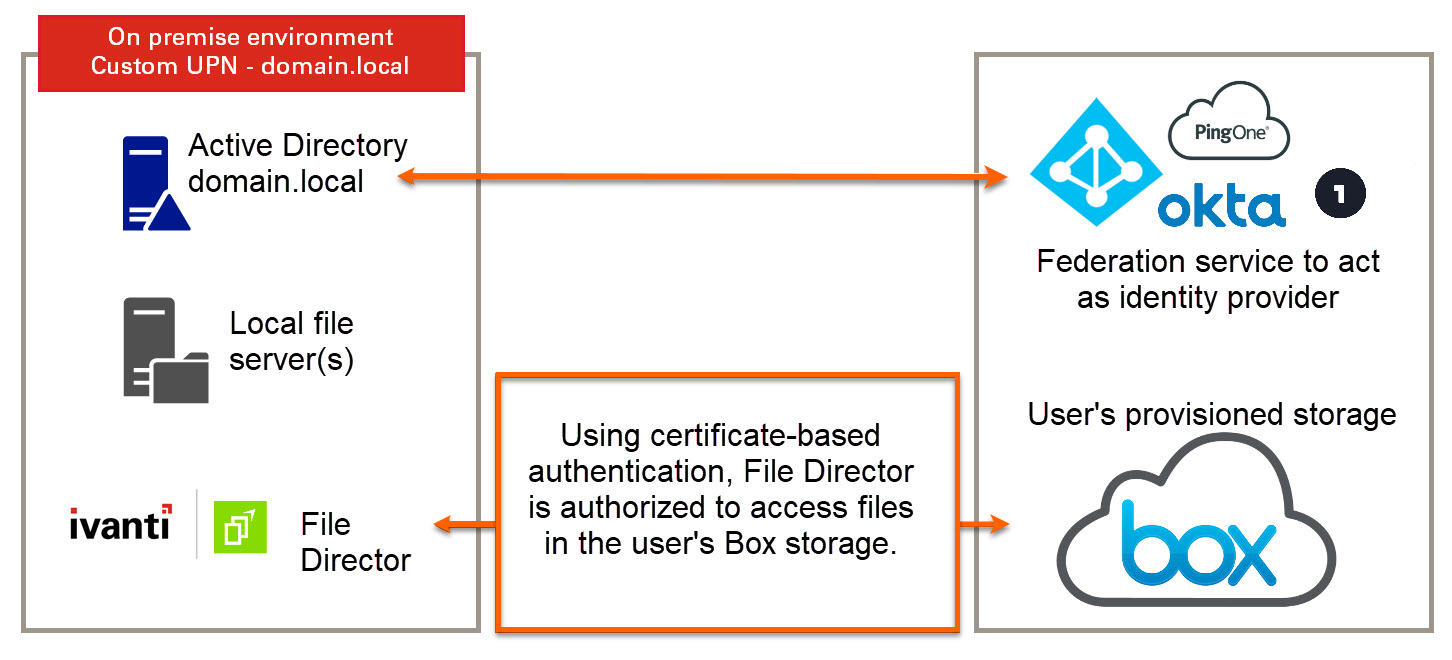
File Director allows you to configure Box as the storage location for user's home map point. Once configured, users can update files on map points using File Director and they will sync with the users' Box storage.
There are a number of file types which cannot be supported by the File Director cloud connectors. This includes proprietary format files such as those created within Box and Google (Box notes and Google documents or sheets) for example.
Video: File Director - Overview of cloud storage using Box
Prerequisites
•Your perimeter firewall must allow communication to https://api.box.com and https://upload.box.com on port 443.
•You are an administrator for your Box tenant, and can access the Box Developer Console for your enterprise.
•Users have Box storage assigned to their account and are appropriately licensed.
•The email address used by the user to log on to Box must match their UPN (User Principal Name) in AD.
•File Director 2020.1 or later is already deployed.
Create your Box custom app
To enable File Director to interact with Box storage you will need to create a custom app from the Box developer website and assign required authorization. Custom apps support client-side OAuth 2.0 authentication, and App Tokens for server-side authentication. The custom app allows File Director to manage your users' data on their behalf.
To create a Box custom app:
1.Log in to your Box.com account and from the All Files menu, click Dev Console.
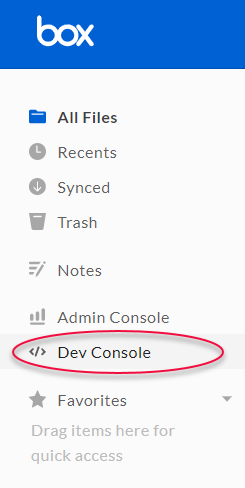
Note, menu options displayed will depend upon how your Box account has been configured. If the Dev Console option is not displayed, from the AdminCConsole, click Apps > Custom apps and then click the Developer Website link near the top of the page.
2.From the My Apps section of the Box Developer console, click Create New App.
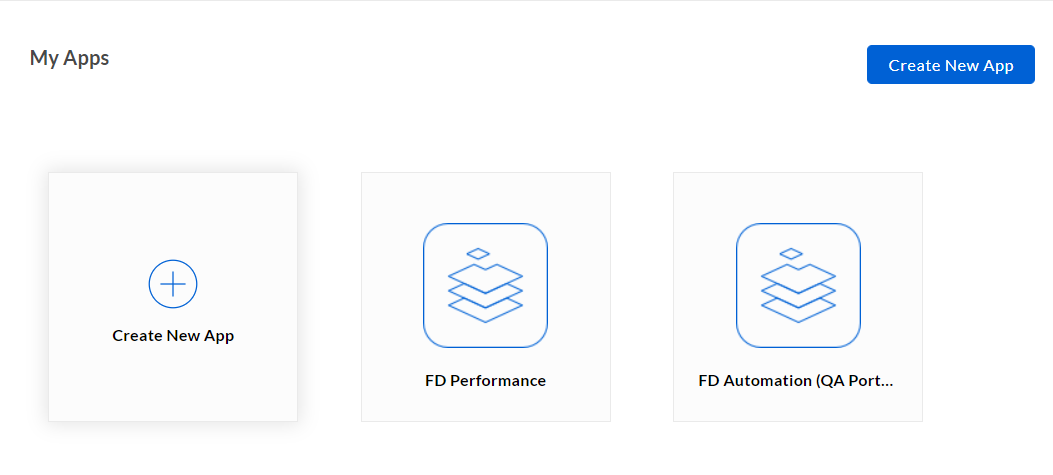
3.Click the Custom App tile, then click Next.
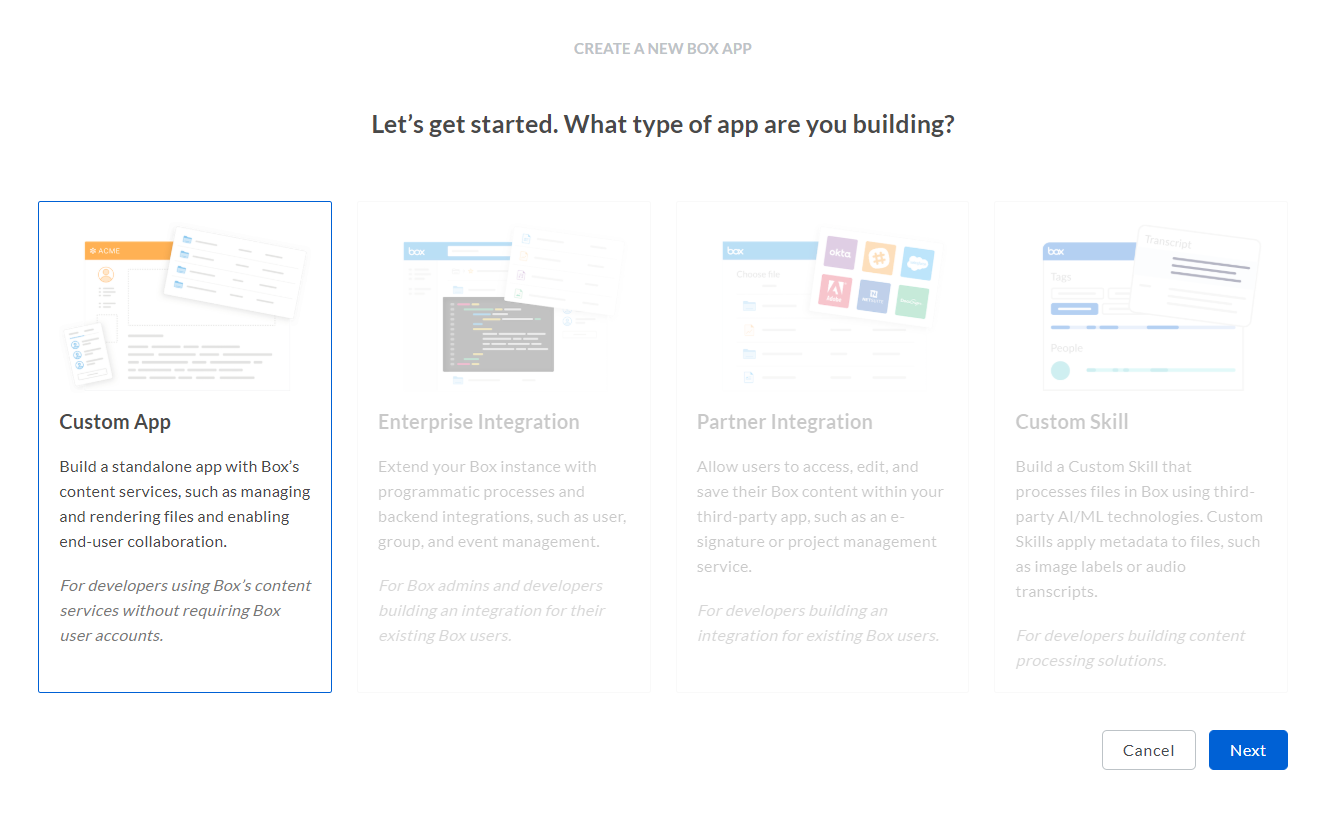
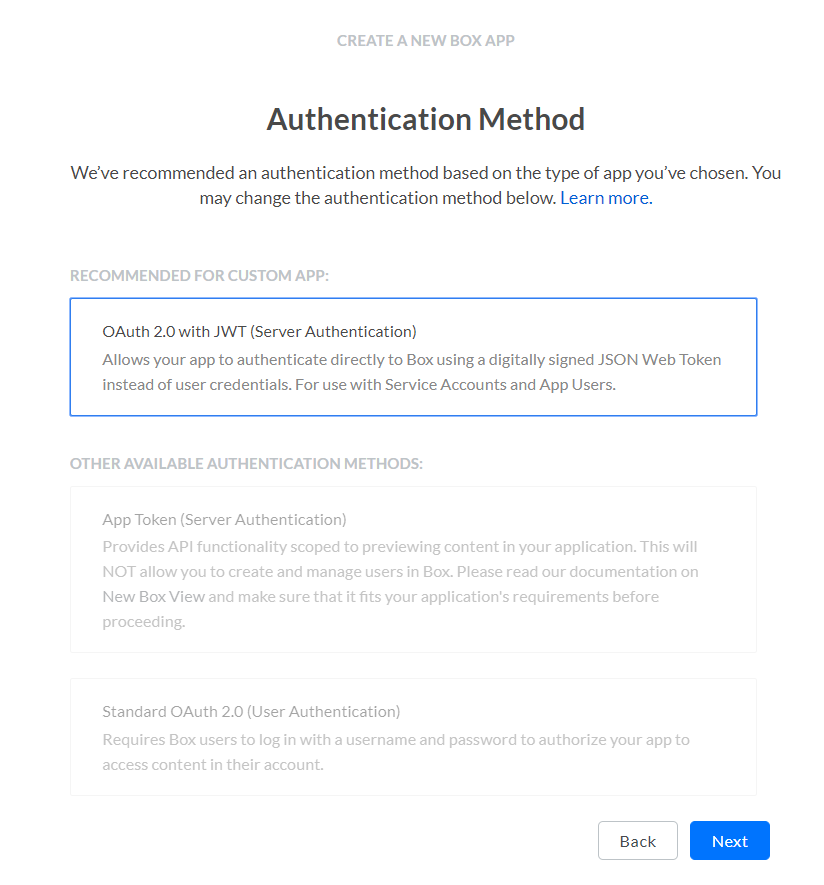
4.Click the authentication method required, then clickNext.
Note that OAuth 2.0 with JWT (Server Authentication) authentication is recommended for custom apps.
5.Enter a unique name for your app, then click Create App.
A message is displayed confirming your app is created. Click View Your App.
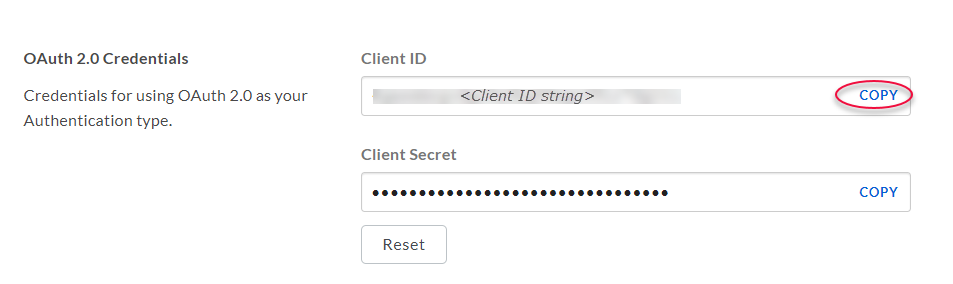
6.From the Configuration view, the OAuth 2.0 Credentials section includes the Client ID. You will need to copy this value in order to authenticate your app.
Highlight the Client ID value and click Copy.
7.In the Application Access section, select the Enterprise radio button.

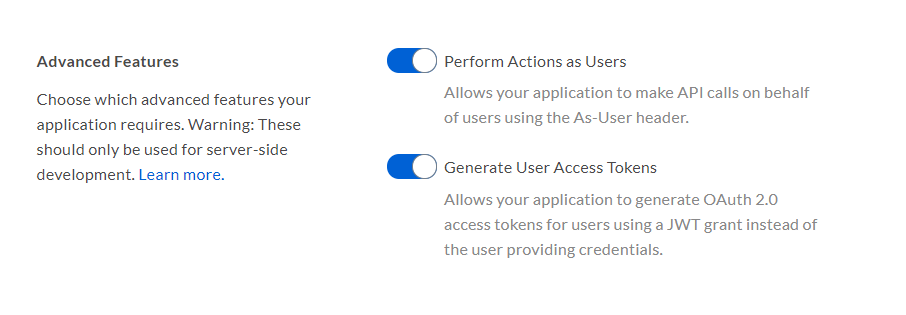
8.In the Advanced Features section, click the Perform Action as Users and Generate User Access Tokens options to enable them.
These settings enable the custom app to access users' Box storage data.
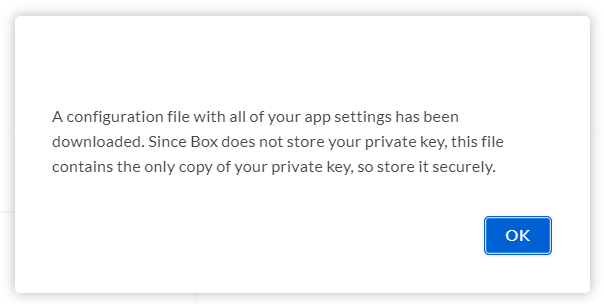
9.In the Add and Manage Public Keys section, click Generate a Public/Private Keypair.
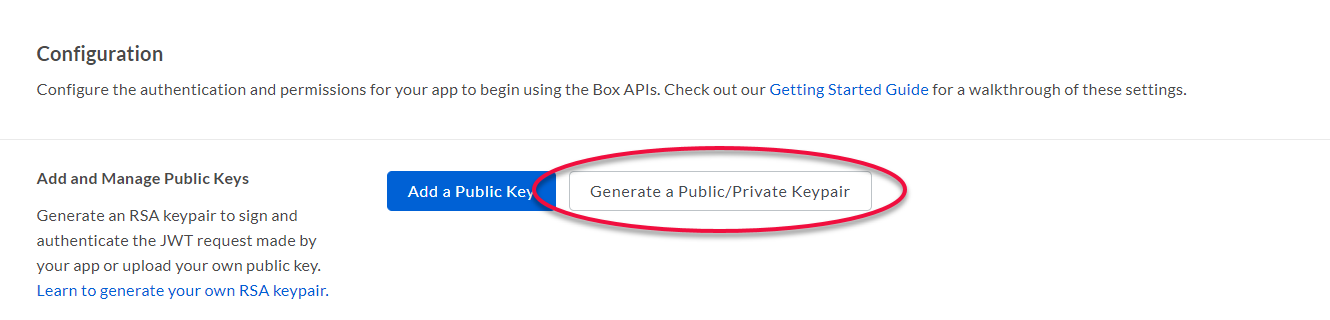
A message is displayed confirming that the file has downloaded and warning that it contains the only copy of the private key generated.
Click OK to dismiss the message.
10.Click Save Changes.
Authorize your custom app
1.From the Box Developer menu, click My Apps > Admin console to open the Box Admin console.
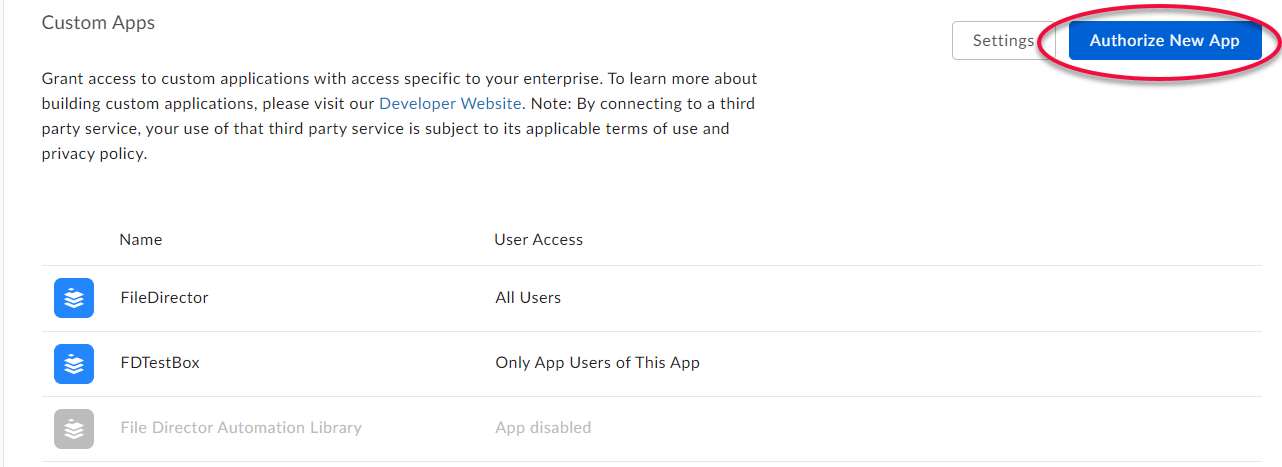
2.From the menu click Apps, and from the Box Apps & Integrations page, click the Custom Apps tab.
3.Authorized custom apps are listed. Click Authorize New App.
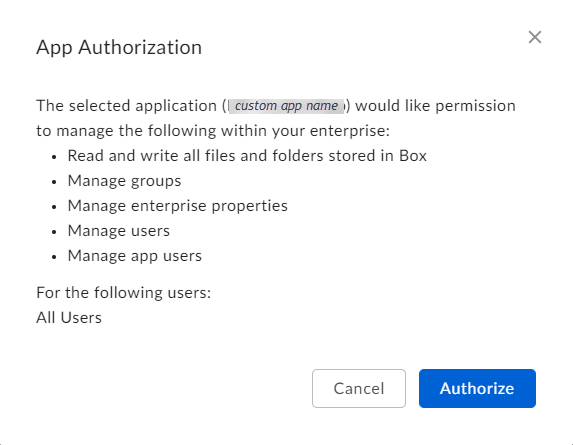
4.In the App Authorization dialog enter the Client ID for your custom app (this is the value copied in step 6 above).
Click Authorize.
5.Click Authorize New App.
Your app is added to the list of authorized Custom Apps .
For further information about creating and authorizing custom apps within Box, refer to online guides.
Configure File Director cloud connector
Having created your Box custom app and assigned required authorization you can configure the cloud connector within File Director.
1.In the File Director Admin console, select Configuration > Cloud Connectors.
2.Click the drop-down arrow next to Box to open the Box cloud connector dialog:
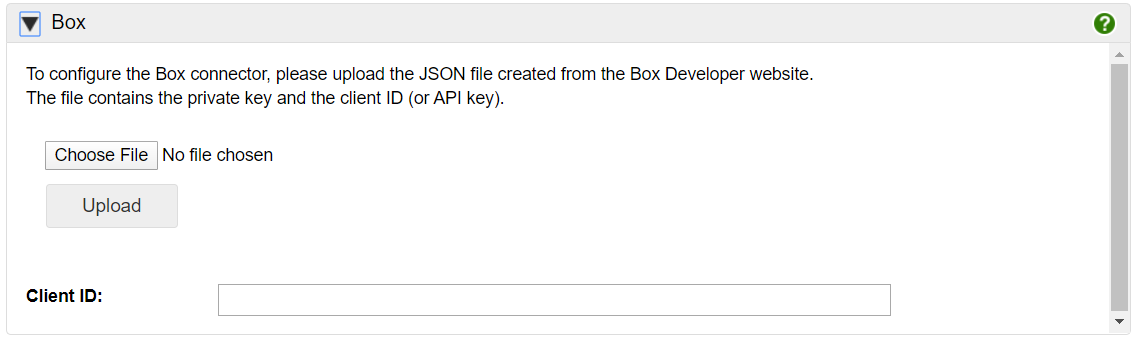
3.The connector requires the JSON file created previously within Box Developer (see Create your Box custom app above).
•Click the Choose File button.
•In the explorer window that opens, select the JSON file required then click Open.
•The selected file name is displayed in the dialog. Click Upload.
This action uploads the file containing the private key to File Director.
4.The Client ID field is populated automatically when the JSON file is uploaded.
Your cloud connector configuration for Box is now complete. You can now create a Box home map point and then assign an access policy for users as required. See Map Point Configuration.