Define SLA Target Times
Use the SLA Target Time form to define SLA Target Times.
To define SLA target times:
- Create a new SLA or open an existing SLA:
- Click
Searching on the
CSM menu bar and select
Search Manager.
The Search Manager opens.
- Select SLA from the Association drop-down.
- Click the
All SLAs Saved Search, and then click the
Run button.
A list of SLAs opens in the Grid.
- Double-click the
SLA that you want to edit (ex: Corporate).
The SLA record opens.
- Click
Searching on the
CSM menu bar and select
Search Manager.
- (Optional) Edit SLA Fields.
- Click the SLA Target Time tab (SLA Arrangement section).
- Click a SLA Target Time
(ex: Priority 1 Incident).
The SLA Target Time Form opens to the right of the Grid.
- Click the
Review link.
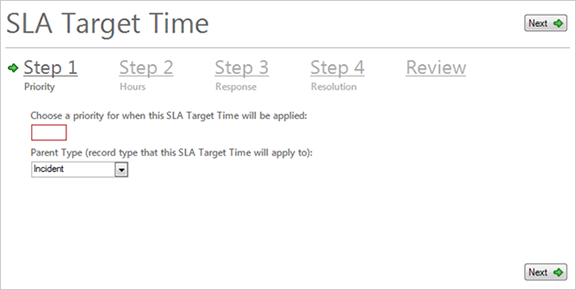
Tip: You can also use the target times wizard to edit target times by clicking the Step links on the Form.
- Edit the Response Time Fields:
- Response Time: Select the target number of
days, hours, or minutes to respond
to the Incident (ex: 1 hour).
The response time must be shorter than the maximum time limits of the Operational Level Agreements (OLAs) and Underpinning Contracts (UCs) linked to the SLA. If the response time is too short, a warning icon
 appears.
- Applies: Select the Business Hours that constrain the Response Time (ex: 24/7).
- Work Hours: Click the icon to the right of the text field to open the Business Hours Manager. The manager sets the Time Zone (based on time zones or the time zone of the server that is using the business hours), Default Hours, and Exceptions.
- Warning: Select the number of
days, hours, or minutes before a
Response Breach to initiate a warning (ex: 15 minutes). This is used to alert
you of an impending breach.
The warning time must be shorter than the response time. If it is not, a warning icon appears.
- Response Time: Select the target number of
days, hours, or minutes to respond
to the Incident (ex: 1 hour).
- Edit the Resolution Time Fields:
- Resolution Time: Select the target number of
days, hours, or minutes
to resolve the Incident (ex: 5 Hours).
The resolution time must be shorter than the maximum time limits of the Operational Level Agreements (OLAs) and Underpinning Contracts (UCs) linked to the SLA. If the resolution time is too short, a warning icon appears.
- Applies: Select the Business Hours that constrain the Resolution Time (ex: M-F 8-5). The SLA uses Business Hours to help calculate the Resolution and Response times.
- Warning:Select the number of
days, hours, or minutes before a
Resolution Breach to initiate a warning (ex: 15 minutes). This is used to alert
you of an impending breach.
The warning time must be shorter than the resolution time. If it is not, a warning icon appears.
- Resolution Time: Select the target number of
days, hours, or minutes
to resolve the Incident (ex: 5 Hours).
- Edit the Response Time Fields:
- (Optional) Edit additional target times.
- Click
Save
 . The new target time appears in the SLA Target Times
Tab.
. The new target time appears in the SLA Target Times
Tab.