Use the Column Selector in the Browser Client to add or remove
columns from the Grid.
- Open a Grid using an applicable feature.
- Click the
Columns button on the Browser Client toolbar.
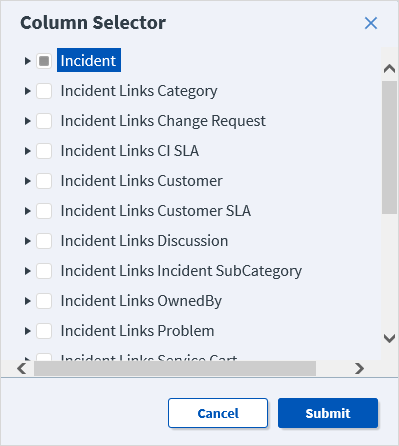
The Column Selector opens displaying the Business Object's
relationships and associated fields. Relationships and fields currently
displayed in the Grid are indicated by a check mark. Close the Column Selector
at any time by clicking the Cancel button.
- Add columns to the Grid by selecting one of the following:
- The
check box next to one or more Relationships in the top level
of the tree (example: Incident Links Customer) to add all fields associated
with the Relationship as columns in the Grid.
- The
check box next to one or more fields in the second level of
the tree (example: Department, Manager) to add only the field(s) you select as
columns in the Grid.
- Remove columns from the Grid by deselecting one or more
check boxes in either the top level or second level of the
tree.
- Click the
Submit
button.
If you added columns, the associated field(s) display on
the right side of the Grid and can be moved anywhere in the Grid by
dragging-and-dropping the column to the desired location.