Add a Business Object to a mApp Solution
The Add Business Object to mApp Solution wizard (accessed from within the mApp Editor) is a specialized tool that adds Business Objects and their associated Fields, Relationships, Forms, Grids, and Form Arrangements to a mApp Solution.
Use the Add Business Object to mApp Solution Wizard to select which Business Object to add to the mApp Solution and define its importance to the mApp Solution. Then, define how the Business Object is imported into the target system when the mApp Solution is applied:
- Overwrite All: Overwrites the existing definitions in the target system, or adds them if they are not already there.
- Overwrite defaults only (applies to Forms and Grids): Overwrites the existing defaults in the target system.
- Do not overwrite any: Leaves the definitions in the target system unchanged (does not overwrite or add the definition).
- Let me choose: Allows you to select which
items or areas (example: Specific Fields) to merge. Selected items are
overwritten if they exist in the target system, and added if they are not. The
items you do not select are left unchanged in the target system.
Tip: When you select Let me choose, you can select Uncheck All
 to clear everything in the list (example: Clear
all Fields) or
Select All
to clear everything in the list (example: Clear
all Fields) or
Select All to select everything in the list.
To add a Business Object to a mApp Solution:
- Open the mApp Editor.
- Select a Business Object in the Object tree, and then select the
Add Business Object to mApp Wizard task in the
Structure area.
 Tip: You can also open the wizard from the Business Object Editor within a mApp Solution, either by selecting Add to mApp or the Add to mApp Wizard link in the Business Object section of the mApp Solution Editor Task Pane.
 - Select a
Business
Object to include in the
mApp Solution, and then specify its importance to the
mApp Solution:
- In the drop-down list, select a Business Object. The Business
Object you selected in the Object Manager is automatically selected.
Note: If you add a Group Member, the Group Leader is automatically added to the mApp Solution for reference.Tip: The drop-down list displays only Major Business Objects. To display all Business Objects, select the Show All check box.
- Define the importance of the Business Object to the
mApp Solution. This marks the items in the
mApp Solution file according to importance so that when a
mApp Solution is applied, the most important items are asked about first.
Note: Because Group Leaders have common items that are shared by all Group Members, Group Objects are always applied first (Group Leader followed by Group Members), regardless of the importance selected here.
- High Importance: Select this radio button if the Business Object is one of the main Business Objects in the mApp Solution.
- (Default) Medium Importance: Select this radio button if the Business Object is a supporting object for the mApp Solution.
- Low Importance: Select this radio
button if the Business Object is not critical for the
mApp Solution.
Tip: You can select Finish on this page or any subsequent pages to accept the default selections for the remaining pages and complete the wizard.
- In the drop-down list, select a Business Object. The Business
Object you selected in the Object Manager is automatically selected.
- Select the
Business Object
Fields to overwrite in the target system:
- (Default) Overwrite all Fields: Select this radio button to overwrite all existing Fields in the target system.
- Do not overwrite any Fields: Select this radio button to make no changes to any of the existing Fields in the target system.
- Let me choose: Select this radio button to
select specific Fields to overwrite.
Note: If you select an option other than Overwrite all Fields, the Business Object is added to the mApp Solution as Merge. This is because Fields are part of Business Objects, and the Business Object must be set to Merge if you do not want all of its Fields to be overwritten. If the Business Object is set to Overwrite, all Fields will be overwritten. For more information, see Configure Merge Actions for Business Object Definitions.
- Select which
Relationships
to overwrite in the target system:
- (Default) Overwrite all Relationships: Select this radio button to overwrite all existing Relationships in the target system.
- Do not overwrite any Relationships: Select this radio button to make no changes to any of the existing Relationships in the target system.
- Let me choose: Select this radio button to select specific Relationships to overwrite.
- Select which
Business Object
Forms to overwrite in the target system:
- (Default) Overwrite default Forms only: Select this radio button to overwrite the default Forms in the target system. This includes the primary Form for the object, along with the summary and mini-summary Forms.
- Overwrite all Forms: Select this radio button to overwrite all Forms (default and other) in the target system.
- Do not overwrite any Forms: Select this radio button to make no changes to any of the Forms in the target system.
- Let me choose: Select this radio button to select specific Forms to overwrite.
- Select which
Grids to overwrite in
the target system:
- (Default) Overwrite Default Grids Only: Select this radio button to overwrite the default Grid for the Business Object in the target system.
- Overwrite all Grids: Select this radio button to overwrite all Grids (default and other) in the target system.
- Do not overwrite any Grids: Select this radio button to make no changes to any of the Grids in the target system.
- Let me choose: Select this radio button to select specific Grids to overwrite.
- Select whether to overwrite the
Form
Arrangement (Major Business Objects only):
- Overwrite Form Arrangement: Select this radio button to overwrite the Form Arrangement in the target system.
- Do not overwrite Form Arrangement: Select this radio button to make no changes to the Form Arrangement in the target system.
- Select which
Tabs in the Form Arrangement to overwrite:
Note: This page is displayed only if you are adding a Major Business Object to the mApp Solution, and if you selected to overwrite the Form Arrangement on the previous page.
- Overwrite all Tabs: Select this radio button to overwrite all Tabs in the target system.
- Do not overwrite any Tabs: Select this radio button to make no changes to the Tabs in the target system.
- Let me choose:
Select this radio button to select specific Tabs to
overwrite.
Note: If a Tab is included in a mApp Solution, but the associated Relationship is not added by the mApp Solution and does not already exist in the target system, the Tab will not be displayed in the target system.
- Define whether to overwrite
Approvals:
- Overwrite Approvals: Select this radio button to overwrite Approvals in the target system.
- Do not overwrite Approvals: Select this radio button to make no changes to Approvals in the target system.
- Define whether to overwrite
Business Object Action areas:
Note: This page is displayed only for Major Business Objects that have Actions defined.
- Overwrite all Actions: Select this radio button to overwrite all Business Object Action areas in the target system.
- Do not overwrite any Actions: Select this radio button to make no changes to the Business Object Action areas in the target system.
- Let me choose: Select this radio button to
select specific Business Object Action areas to overwrite.
Note: Actions are categorized by areas (Menu, Task Pane, toolbar, Context Menu, and Automatic Actions). When you select one of the above options from the wizard, you are defining what to do with an entire area. However, you can define separate options for individual Actions within an area if you use the Business Object Actions window to configure merge actions for Business Object Actions.
- Review the summary page.
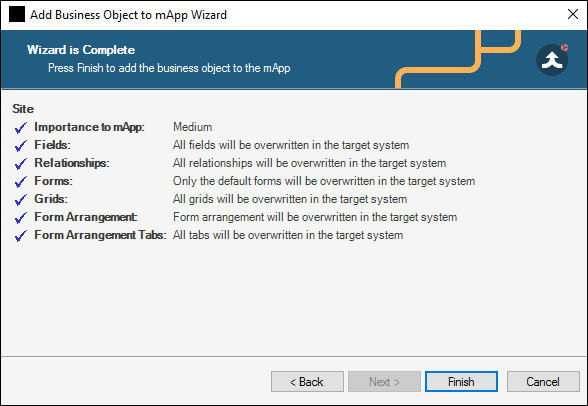
-
Select Finish.
The Business Object and its associated Fields, Relationships, Forms, Grids, and Form Arrangements are added to the mApp Solution. When the mApp Solution is applied, these definitions are imported into a target system according to the selections you made.
- (Optional) Add additional Business Objects or CSM Items to the mApp Solution.
- (Optional) Select
Options
 in the various properties windows of the
mApp Solution to configure merge actions for Business Object definitions.
in the various properties windows of the
mApp Solution to configure merge actions for Business Object definitions.
- Prepare the mApp Solution for Distribution , or save the mApp Solution to continue making other changes.