Define vRealize® Blueprints and Actions
Use Table Management in the CSM Desktop Client to define imported vRealize® blueprints and actions. When you define the blueprint, you provide midpoint values and have the option to provide a description. When you define the actions, you must select the Request Action One-Step for each VM Action record; the One-Step Action determines the appropriate second day action by using JSON to send the action ID to vRealize® and then interpreting and executing the JSON when it returns from vRealize®.
This functionality is only available if you have applied the Orchestration Pack for VMWare vRealize® Automation™. For more information, refer to the mApp Solution Tech Notes documentation.
To define mApp Solution blueprints and actions:
- Open the Table Management interface.
- In the Type drop-down, select VM Blueprint.
- In the Grid, select a blueprint.
A VM Purpose form opens. The following information is auto-populated based on the imported vRealize® blueprint: VM Blueprint, Blueprint available to the following Departments, Minimum size specifications, Mid size specifications, and Maximum size specifications.

- Provide midpoint values (CPUs, Memory, Storage Capacity).
- (Optional) Provide a blueprint description.
- Click Save.
- In the Type drop-down, select VM Action.
- In the Grid, select an action.
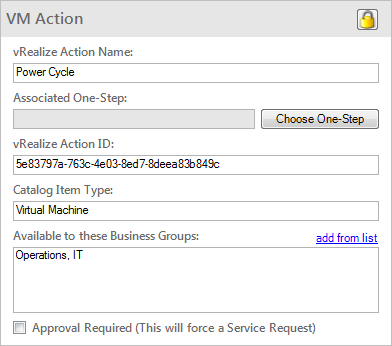
A VM Action form opens.

- Click the Choose One-Step button.
- In theOne-Step Action Actions tree, click Global>vRealize.
- Click the Request ActionOne-Step Action.
- Click Save.
The Request Action One-Step Action must be selected for each VM Action record.
- Close the Table Management interface.