Ivanti Neurons Platform remote control
Ivanti Neurons Platform remote control allows IT analysts with Global Actions > Remote Control permissions to securely remote control endpoints so they can troubleshoot problems or help train users.
Neurons Platform remote control runs in your browser and doesn't require that you set up additional network infrastructure, such as Ivanti Endpoint Manager or an Ivanti Cloud Services Appliance. Both the analyst and the endpoint require internet access. All remote control communication goes through secure internet cloud servers using TLS-encrypted WebSockets, even if the endpoint you're remotely controlling is on the same network as you.
Remote control does not support HTTP proxies.
Neurons Platform remote control works with current versions of these browsers:
- Chrome
- Firefox
- Edge (the version based on Chromium)
Installing agents
To use Neurons Platform remote control, you must have a Neurons Platform tenant with remote control enabled. These are the supported endpoint operating systems:
- Windows 10, 11 (64-bit and 32-bit)
- macOS 10.13 and newer
Neurons Platform remote control requires an updated Ivanti Neurons Agent installation that includes support for remote control. To do this, the policy assigned to the agent must have the Remote Control capability enabled.
To download an Ivanti Neurons Agent that supports remote control
- Click Agents> Agent Deployment.
The Agent Deployment page appears. - On the Deploy Agent via manual installation tile, click Get started.
The Manually install an Agent page appears. - Choose an Agent Policy which has the Remote Control capability enabled. For more information on agent installation and agent polices, refer to Agent Deployment and Agent Policies.
After installing the Ivanti Neurons Agent bootstrap, it may take several more minutes for the agent components to download in the background. Once this is done, remote control should be available as an action for that endpoint.
Starting a remote control session
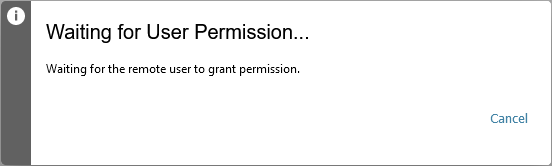
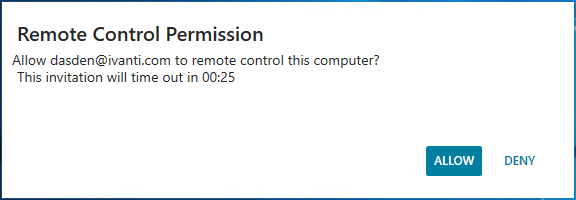
Logged-in Neurons Platform users with the remote control permission can remote control any endpoint. If a user is logged in at the endpoint, the user will be asked if they want to allow the remote control session. The user has 30 seconds to allow or deny the request. After the timeout, the session will be canceled.
If no user is logged in, analysts will see the login screen and will need to log in from there.
Analyst:
Windows Endpoint:
Remote control allows video, keyboard, and mouse control. Audio isn't supported.
To start a remote control session
- In the Devices view, find the device you want to remote control and click it.
- In Device Details under the Actions panel, click Remote Control.
A remote control viewer page (RCViewer) will load in a new tab. It may take up to 30 seconds or so to connect, depending on how quickly the endpoint dynamically loads its remote control agent components. If you don't see the new tab, make sure it wasn't blocked by a pop-up blocker.
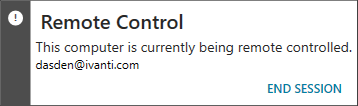
During remote control, the endpoint has a green border around the screen edges. Also, a popup remote control notification displays in the bottom-right corner while the session is active. Move this notification if it's in the way.
Windows endpoint visual notification for an active remote control session:
Remote control tips:
-

 Use the Ctrl+Alt+Del and Windows key toolbar buttons to send those keystrokes to the endpoint.
 -
 Use the Resolution scaling toolbar button to toggle the view between scale to fit resolution and 1:1 native resolution. The native resolution may be larger than your browser window, and you'll have to use the scroll bars to view portions of the desktop that don't fit in the viewer window.
 -
 Use the Full screen toolbar button to toggle between windowed and full screen views.
 -
 Use the Close toolbar button to end the session. Analysts will then have the chance to rate the session quality and send comments to Ivanti.
Chat
Chat lets you initiate a text chat session with the target. Select the Chat toolbar button  to start chat. Once chat has been initiated by the viewer, timestamped messages can be sent by both the target and the viewer.
A clipboard icon at the bottom of the chat pane copies the chat text and timestamps to the clipboard so the viewer can store a record of the chat. Additionally, when a chat session has been used and the viewer ends the remote control session with the Close toolbar button, a prompt will appear asking if the viewer wants to save the chat session to the clipboard.
Transferring files
File transfer lets you download files from the target or upload files to the target. Once you've connected, you can click the file transfer button to open the file transfer page. You will see a list of available drive letters on the target. Double-clicking a drive letter will start browsing the remote file system on that drive.
Once you've browsed to a location, you can Download a file or folder from there or Upload a file to there. If you select a folder to download, the RCViewer application will zip that folder and its contents first before starting a download of the resulting zip file.
To transfer files to a target
- Click the File transfer button
 .
. - Start browsing the target file system by double-clicking a drive letter from the list.
- Navigate to the destination folder on the target (double-click folders in the list to open them).
- Click the Upload button, and browse your local filesystem to select the file you want to upload.
- Click Open. The file will transfer and appear in the target file browser.
To transfer files from a target
- On the remote control viewer page, click the File transfer button .
- Start browsing the target file system by double-clicking a drive letter from the list.
- Navigate to the target file you want to download (double-click folders in the list to open them).
- Click the Download button, and browse your local file system to select the destination folder.
- Click Save to download the file.
Remotely executing files
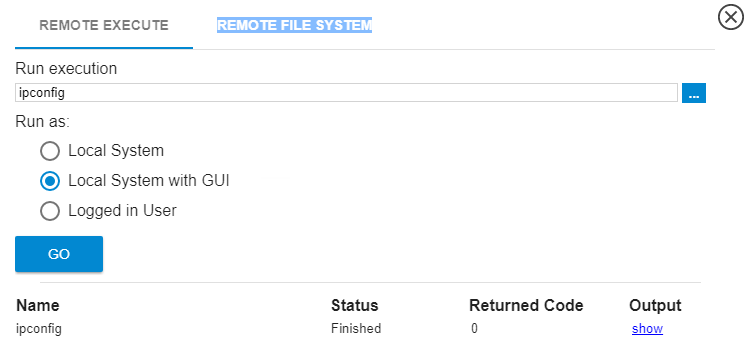
You can remotely execute programs on the target. If you execute a command that runs in a command prompt or PowerShell, the RCViewer application will capture the output from that command so you can view it later. If you execute a command that launches a Windows application, that application will launch and no output will be captured.
When you execute a file, the RCViewer application shows the execution status. If the execution captured a result, click Show to see it. The execution status history is cleared when the session closes.
You can run applications on the target as one of these users: Local System, Local System with GUI, or as the Logged in User.
When specifying the Run execution program you want, you can either type it in directly or you can click the Remote File System tab and browse for it. If you don't include a program path, the program must be in the target's Windows path for the execution to be successful.
To remotely execute a file
- On the remote control viewer page, click the Remote execute button
 .
. - If the program you want to run is in the Windows path, type the command to launch it in the Run execution field.
- If the program you want to run isn't in the Windows path, click the Remote File System tab. Navigate to the program's folder on the target (double-click folders in the list to open them), then double-click the program you want to run.
- Select the Run as user that you want.
- Click the Go button.
- View the execution status in the command history. If the execution captured a result, click Show to see it.