Import sources
The best way of managing your license transactions, contracts, and price data is to import them from the Import Sources page using the template spreadsheets provided. When you import license transactions:
- the software titles named in your transaction files are matched to software titles in the Ivanti SKU Library, to provide access to additional information about them, including identifying if they are SaaS subscriptions
- software titles that are matched to SKUs in the Ivanti SKU Library where there is not a specific version associated (for example maintenance or Software Assurance licenses) have the version set to Non-specific
- the individual transactions are grouped into a single row whenever the vendor, product, edition, version, and metric match
- product types are mapped to either base licenses, subscriptions, upgrades, or maintenance
- each time you import or delete data, costs are re-calculated
Transactions are often linked to a contract, but this is not mandatory.
You can add many import sources, each of which you can import multiple times to add new records or update existing ones. If you delete an import source, all of the associated records are deleted. Take some time to consider what import sources you want to create, and how you want to name them. The names and contents of the import sources can help you to visualize your software estate and also plan the management of the corresponding data in Spend Intelligence.
Creating import sources
You can create different import sources for different sets of transaction records. Each import source defines a connection to a source of transactions, and also represents those transactions in License Manager.
To create a new import source:
- Click Configuration > Import Sources in the Spend Intelligence navigation bar.
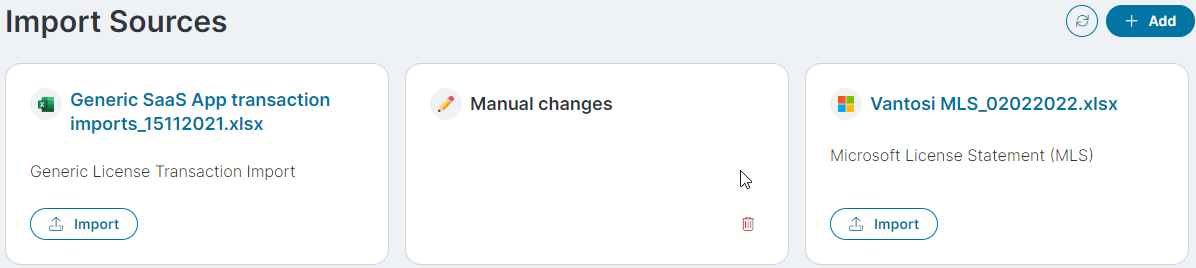
The Import Sources page appears with a separate tile for each existing import source. Each tile has a title and description to help you to identify the import source.
If you have manually created, updated, or deleted contracts or transactions, these changes are associated with an import source labeled Manual changes. If you have configured the integration with Ivanti Neurons for ITAM, these imports are associated with an import source labeled Ivanti Neurons for ITAM.
- At the top right of the Import Sources page, click Add.
The Add import source panel appears. - Type a Name for the import source.
- Click the required Type, then click Add.
The Import Sources page reappears with a tile for the new import source.
For import sources of types Generic License Transaction Import, Generic Contract-Only Import, and Generic Customer Specific Price Data Import, click the Download template file link to download an empty spreadsheet that contains the appropriate columns with the correct names for the import. When you have enabled the downloaded spreadsheets for editing, tooltips become available for each of the column headers to provide more information about the contents of each column.
DO NOT delete the first rows in the spreadsheet that contain instructions, nor change any of the column names in row 5, as these names are used to map values in the system. Do, however, delete the sample data in row 6.
Editing and deleting data sources
You can change the name of an import source by hovering over the tile then clicking  .
.
You can delete an import source and all of the data associated with it by hovering over the tile then clicking  . Clicking on the Manual changes tile removes all manually created contracts and transactions, reverts all updated contracts and transactions, and restores all deleted contracts and transactions.
You can delete ALL of your data in License Manager by clicking Configuration > License Manager in the Spend Intelligence navigation bar, then clicking Delete All Imported Data. Take great care when using this as this action cannot be undone.
Importing data
When you have added the required import source, you can use it to import data.
To import data:
- On the Import Sources page, click Import on the source you want to import.
The import instance page appears with the Create Import Instance panel displayed. - Click Choose file and select the file you want to import, then click Import.
The import starts and the Create Import Instance panel closes. A new row appears in the data grid of import instances showing the current Status of the import and the name of who ran it. When the import completes the status changes to read Completed, Completed with warnings, or Failed.
Viewing details of the import
When an import has completed, you can view its details.
To view the details of the import:
- Click the title of an import source.
The import instances page for the selected import source appears, showing a data grid that reports when the import was run, its status, and who updated the import instance.
Click the name of the person who ran the import to see more information about them on their Members page (see Access Control for more information). - Click the required link in the Import date and time column.
Details of the import instance appear. This page has several tabs, depending on the type of import. The first tab is Summary, which shows creation and update details, the status of the import, and a count of the different types of messages generated during the import. There are then tabs that display the data you have imported, which vary depending on the type of data imported. You can page through this data and export it using the Export to Excel button above the data grid.
If the import completed with warnings or failed, then there is a Messages tab that provides information to help you to address any issues encountered during the import.
You can delete the latest import instance, and the data associated with it by clicking alongside it.
Click  to refresh the contents of these pages.
Duplicate records
The system prevents you from manually creating duplicate transactions or contracts. However, it is possible that duplicates of the same transaction or contract exist in different import sources. In this case, when you import the later import source, the records are merged and the value from the later import is used if there are conflicting values for any of the columns.
For example, if you import contract import 1 and then contract import 2, you see the following result:
|
Import source |
Vendor |
Contract Number |
Business Unit |
Country of Contract |
|---|---|---|---|---|
|
contract import 1 |
Vantosi |
VNT001 |
Sales |
USA |
|
contract import 2 |
Vantosi |
VNT001 |
Finance |
|
|
result |
Vantosi |
VNT001 |
Finance |
USA |
Contracts are considered duplicates if both of these fields match: Vendor and Contract Number.
Transactions are considered duplicates if all of these fields match: Contract Number, Vendor, Quantity, SKU Code, License Product, Purchase Date.