Testing Phase
In Audit Mode we saw the value of configuring the system in a non-blocking, logging-only configuration to see what is going on and to help in our next steps. That mode will have given you a good idea about the type of policy you may require and any possible holes in your security (for example, no encryption).
There are many tests you can perform with Ivanti Device Control to meet your needs. For example, you could configure Read only to devices;. USB Encryption; Read only for CD; Access encrypted device off network, and so on.
Creating a policy
You create policies and manage permissions using the Device Explorer module. There are no permissions set by default, so you need to create them. Through this panel, you can manage and define the default permissions of all machines with the agent installed using the Default settings.
Right-click a device type in the list to access to the available options.
Under Default Settings at the top of the Device Explorer, remember that when Everyone is set to read / write, you are not in a lockdown mode. For example, you can add an Admin Group there with Read / Write to provide the Admin Group with full access while enforcing the policy to everyone else lower down the tree on the individual device classes.
Device Explorer:

Under Default settings:

Remove this setting to enforce a policy lower down at the Class level.
Add/Modify Permissions
One of the right-click options enables you to add or modify permissions.
To add/modify permissions:
- Right-click the required class (branch on the tree), then click Add/Modify Permissions.
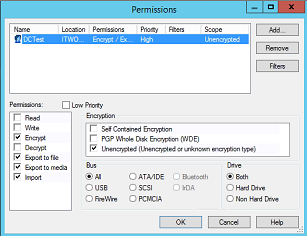
The Permissions dialog appears. - Click Add and then select the required User or Group.
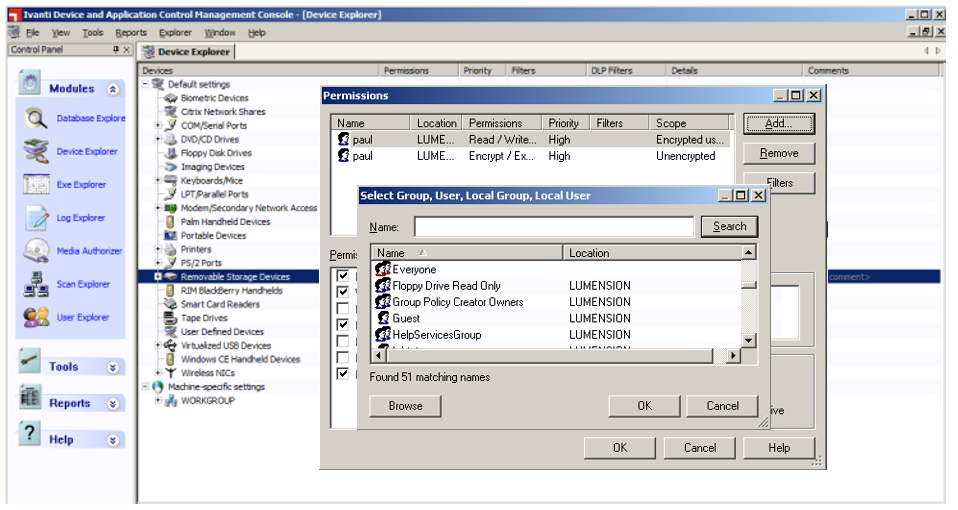
- Select the Permissions you want to apply.
- Modify the priority of the permission.
- Under Encryption, select the type of device it concerns (encrypted ones or not).
- Choose the type of Bus and Drive it concerns.
- Click OK.
The permissions are applied the next time the agent syncs with the console. You can also force the synchronization to one client by clicking Tools > Send Updates to… or to all clients by clicking Tools > Send Updates to All Computers.
The agent icon displays a notification informing settings have changed.
Add / Modify Permissions is just one possible option in here. You could also right-click and create a Copy Limit, add event notification, configure encryption and so on.
Doing this creates policies for the Device Class – but what if you want to be more granular and apply a policy to a specific device?
Adding a specific device
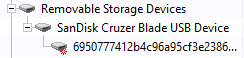
You can also manage the permissions of a device model (for example, allow only SanDisk Cruzer Blade USB devices) or even be more specific by selecting a precise device. To do this, you need to query an appropriate template on the Log Explorer (the user must have tried to access the device, otherwise you would not be able to add it into the Device Explorer). Then right-click the log and click Add Device(s).
Then you can select the device and the device model and click Add Devices, you will see in the Device Explorer that two new lines appeared under the Removable Storage Devices category: a sub-category corresponding to the model of the device and the unique ID of the device.

Now you can attribute permissions either to the sub-category or to the unique device in the same way as before.
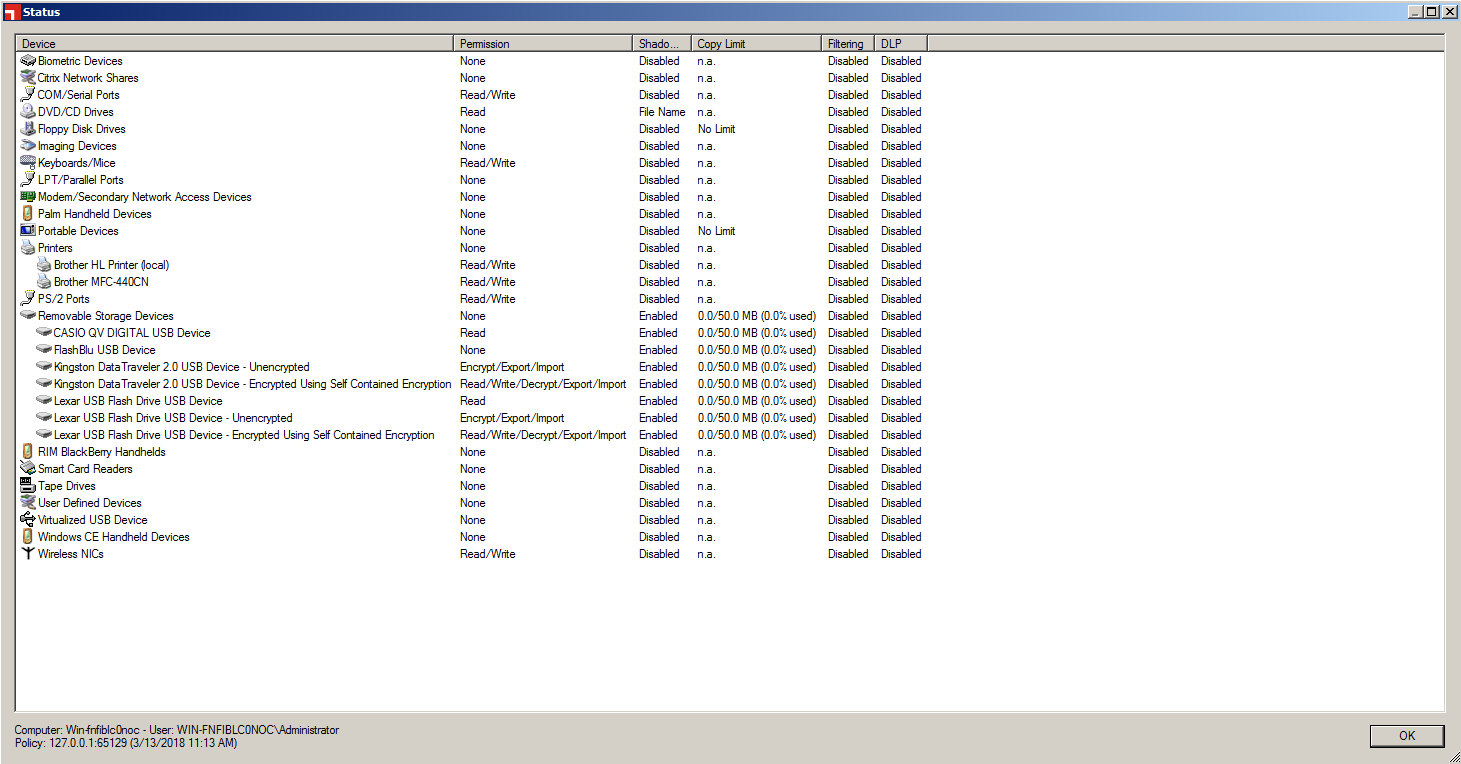
Remember to track the Agent Status of the endpoints to see how your permissions are looking. To make sure the endpoint policy is up to date, select Tools > Send Updates to All Computers.
Agent Status with devices added (Casio, Kingston, Lexar, and so on):
Copy Limit
You can also add a copy limit (to Removable Storage Devices for example). This prevents the user from copying files on the device if this limit is reached or if this action would cause the limit to be exceeded.
To enable a copy limit, right-click the class in Device Explorer, then click Add Copy Limit.
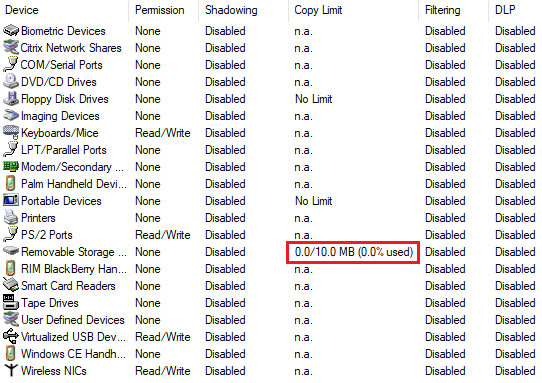
When the limit is enabled, the user is informed through the Status window of its agent. In the example above, the user can copy only 10 Mb to the Removable Storage Device. Note that the policy is applied at the Top Level of the class and not to a specific device.

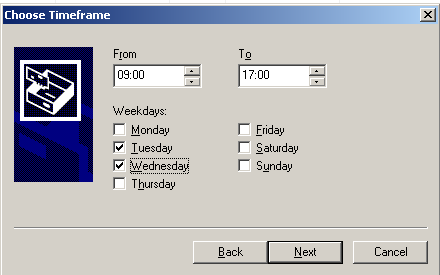
Scheduled Permissions
Scheduled Permissions behave in the same way as other permanent permissions, but you can also define the schedule for which the permission applies. To add a Scheduled Permission, right-click a device, then click Add Schedule. You can then choose the schedule you want.
Online / Offline Permissions
This type of policy enables you to set different permissions for if the device is online or offline. It is often enforced on laptops, as these are portable and can go off network easily. As an example, you could configure the system so that if the laptop is in the office you can burn a CD, but if it is out of the office then the CD drive is denied. Or if it is in the office, the wireless device class is disabled but outside it is enabled.
The agent itself determines its status based on if it can communicate with the Ivanti Application Server. In Tools > Default Options you can also changed the Online State definition.

To create an offline policy:
- Open Device Explorer , right-click a Device Class and select Add/Modify Offline Permissions.
- Add the required user, then select Read Only.
Policy will look similar to the below. The example user Bo Super User has only Read access to Removable Storage Devices when Offline. Disconnect from the network to test.
When making any changes, the endpoint displays a message informing you that the policy has changed.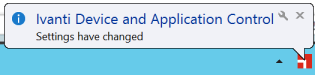
This is useful during testing, but you can hide this option in Tools > Default Options if needed.
Also, hovering over the endpoint agent status classes reveals the policy.

Shadowing – What are my users copying?
The shadowing option enables you to shadow files copied to or from a device. To enable shadowing, right-click the targeted device and then click Add Shadow. You also have to select the devices concerned (as if you were adding a permission) and finally you select the shadow options corresponding to your needs. There are three options: Disabled, FileName and Enabled. When FileName is selected, the content copying is disabled but the name of the file copied is saved in the database. Otherwise, regarding of the option selected, the content copying is enabled or disabled.
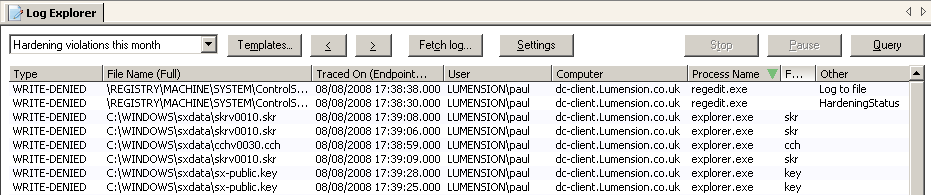
To access shadowed files, open Log Explorer and then select a Shadowing… template. You can see all the files that have been shadowed and you can preview them in the application or save them either to keep a copy or to open them with the correct application.
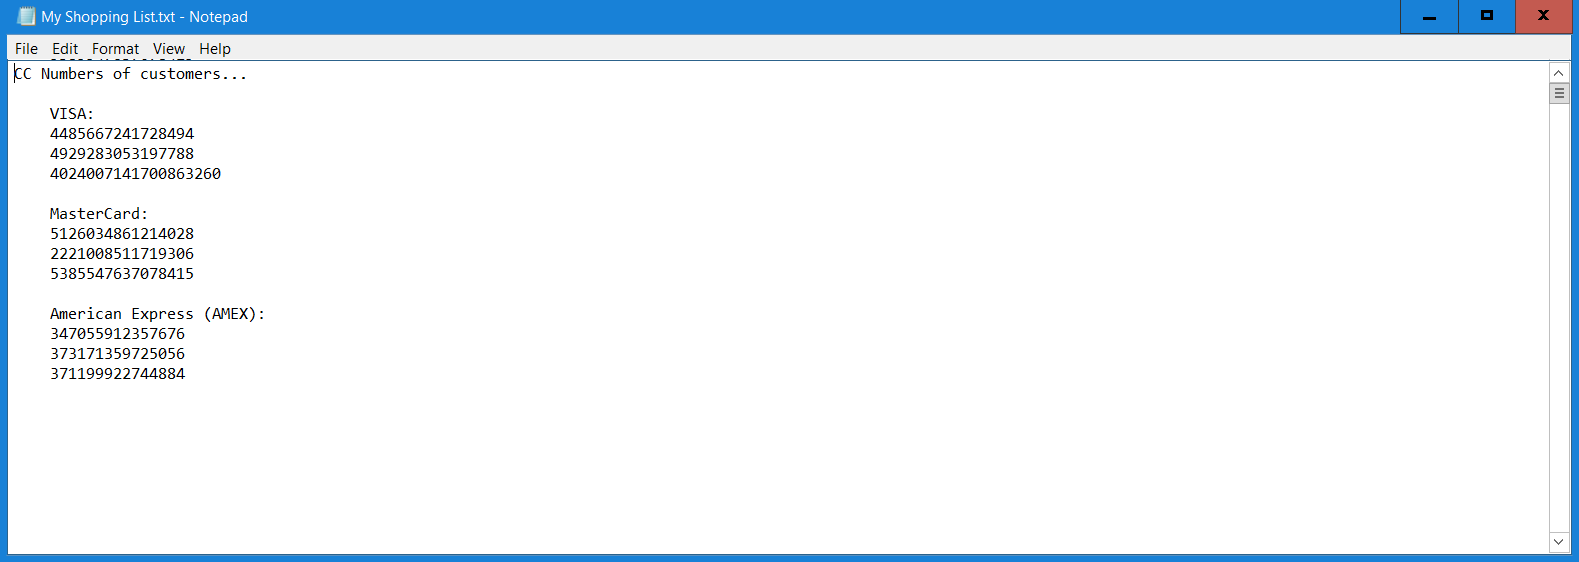
For example, by using shadowing (and the full content technology) you can open my shopping list.txt:

The image above shows the example Log Explorer and Shadowing Today template. You can see if the file was read / written – the date / time, file name and so on. Subsequently (and depending on if you have filename or Full content config), you can right-click the file name and choose Open to see the file contents.
Temporary permissions
Temporary permissions (for example, giving 5 minutes access to a camera) work in the same way as defined above, the main difference between the permanent and the temporary permissions being the persistence over time. The temporary permissions can be applied only to a specific machine (you cannot add a temporary permission in Default settings) and will be immediately synchronized with the client (unlike permanent permissions, which require either an automatic or manual synchronization). These permissions have to last at least five minutes and are automatically removed from Device Explorer after the time expires.
The temporary offline permissions are slightly different from the online permissions because the user has to make a request to get the permission.
To request an offline permission:
- Right-click the client icon and then click Request temporary access offline.
You are notified that you need to contact an administrator (for example by phone) in order to complete the request and then you are invited to complete the request.
- Select the Device Class.
You can select all devices. - Choose the permissions you need.
- Define the Lifetime of the permission.
- Select the user concerned on this computer.
- Click Next and give the Client key to the administrator, which will give you the Unlock Code.
Grant an offline permission
As an administrator, you have to grant the offline permission to the user.
To grant an offline permission:
- Click Tools > Temporary permission offline.
- Complete the form with the same information that the user gave you.
- Click Generate and give the Unlock Key to the user.
The temporary offline permission ends as soon as its lifetime expires or the agent can communicate with the console again (when the computer reconnects to the network).
Removable Media Encryption
Device Control uses encryption to control the use of removable storage media. After a user is assigned authorized access to the encrypted removable storage media, the client provides transparent data encryption and decryption. Encryption provides:

Within the Device Explorer – add the settings in as below. You need the same 2 groups adding (Everyone)
Setting 1 – using a test user CTest, you could replace with a group or individual Active Directory User.

Setting 2 – Using the same user, but with Unencrypted selected this time.
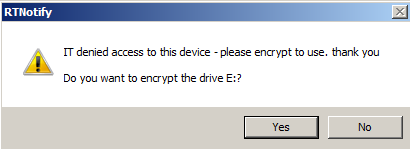
Then when you insert the USB, you are prompted:
Once encrypted, this device can be used off network. Password Recovery and Password complexity are also supported.
CD/DVD Media Encryption
The client has inbuilt CD / DVD Encryption.
To encrypt a CD/DVD:
- On the client machine, right-click the tray icon, then click Create an Encrypted CD / DVD.
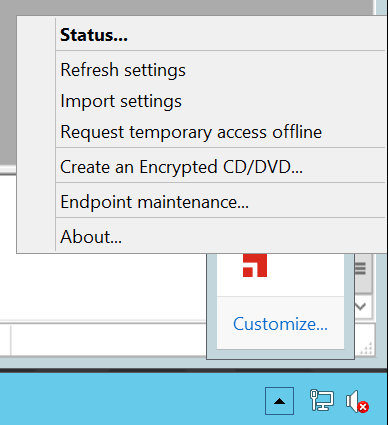
The Ivanti browser opens. - Drag and drop the files in you want to burn, then right-click the cd/dvd drive and select Burn the CD/DVD.
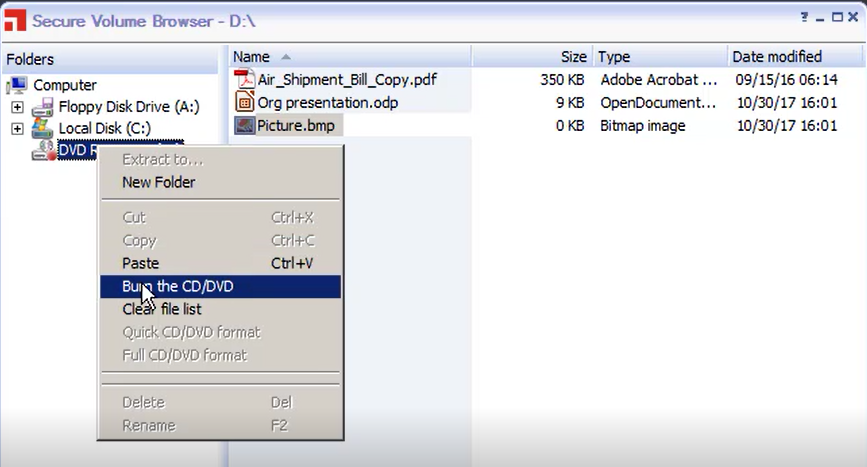
- Follow the wizard through to burn the disc encrypted.
These actions are also logged – see the Devices Encrypted this Month report in the Log Explorer.
Reports (via the Log Explorer)
To help you manage the permissions and the devices on your network, you can generate different reports listing a lot of useful information. You can customize these reports to select only the computers, groups, or users that you want information on. There are several reports about permissions, devices, computers, media, and shadowing that you can see under the Reportssection of your Control Panel. Examples are given below.
Devices Connected

Shadowing

Copy limit met

Client hacking attempts
Denied Devices

Encrypted devices

Log Explorer templates
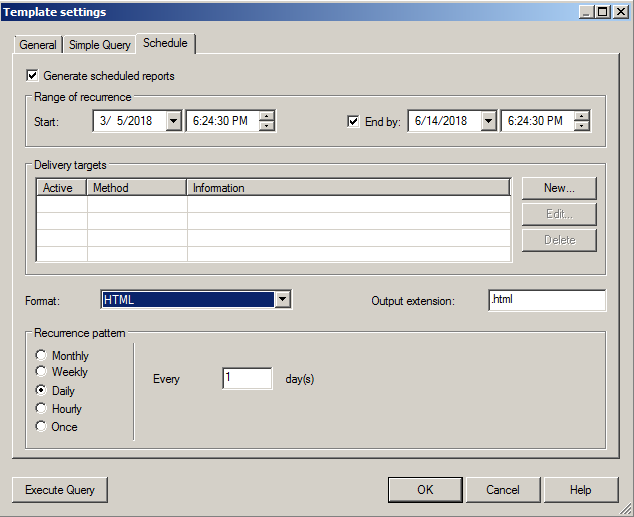
Schedule report delivery
Customizing reports
A number of reports are provided out of the box, so if you need something more specific (such as just looking for *.mp3 transfers), we recommend you clone a current template and use this as the starting point for your custom report.
To customize reports:
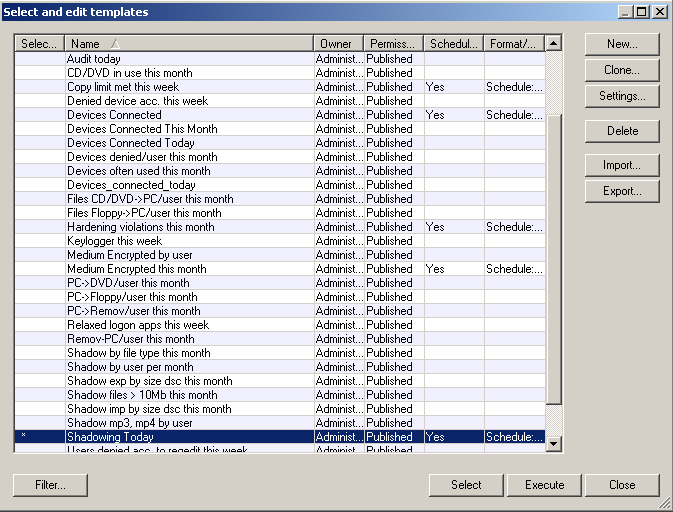
- From the Select and edit templates dialog, click Clone then rename it.
- Click Settings.
The Template settings dialog appears. - Click
 .
.
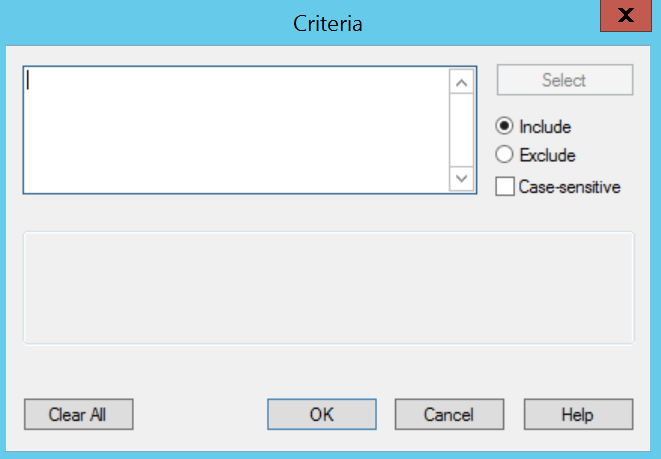
The Criteria dialog appears.
- Add *.mp3 for example, then click OK.