Apply a Local Authorization Policy, if Needed
Prior to locking down endpoints, you can apply a Local Authorization policy that asks the endpoint user to authorize any executables that are not on the whitelist or are not authorized by another Trust policy.
Why Use Local Authorization?
Using Local Authorization on your endpoints provides a number of benefits:
-
Communication. Allowing your users to authorize executables helps users understand that this is a transition stage before a full blocking mode. Prior to this point (in Easy Auditor), users are unaware of the impact of installing and updating software themselves.
Notify users that they are entering this new phase of Application Control so that they know what to expect: productivity will not be affected but applications are now being controlled.
-
Monitoring. You can still monitor any executables that are locally authorized by users, and you have the option to add these executables to a Denied Applications policy if you do not want these applications to be used in your environment. Alternatively, you can add the executables to a Supplemental Easy Lockdown/Auditor policy if you do want these executables to be available to some or all users.
-
Preparation. Using Local Authorization on endpoints in Easy Auditor assures that these endpoints are fully ready to be locked down. It's difficult to move to endpoint lockdown if you are concerned that applications will be blocked across a range of endpoints, resulting in many support requests and lost productivity. Minimize this concern by using Local Authorization to provide your users with the ability to authorize applications that would have been blocked otherwise.
-
Testing. You can also use Local Authorization on test endpoints to identify any executables that would have been blocked if the endpoints were in lockdown.
-
When you receive a Local Authorization prompt on these endpoints, you can immediately update the policies to account for this situation rather than having to wait for the daily or weekly Application Event log query email notification.
-
Occasionally, when you review the Application Event log queries, it's difficult to determine from the blocked executable which application is actually being blocked and what policy needs to be created or updated to address it. Local Authorization helps you identify the associated application quickly and prompts you to update your policies.
-
-
Malware control. Local Authorization controls malware spreading throughout your environment. As each user is asked to authorize any new executable on their endpoint, the spread of malware is limited by the number of users who authorize the new executable.
Before Using Local Authorization
Prior to applying Local Authorization in Easy Auditor, you should un-assign and reassign the Easy Auditor policy so that any system files that were modified while in Easy Auditor are now added to the whitelist. Otherwise, these files could cause problems at boot-up before the user can respond to local authorization prompts. Ensure that you've implemented the necessary policies to account for the modification of these system files in the future.
Do not apply a Local Authorization policy to an endpoint that has Windows Update enabled but doesn't have a Windows Update Trusted Updater policy. Authorizing Windows Updates locally could result in boot-up issues.
Create a Local Authorization Policy
-
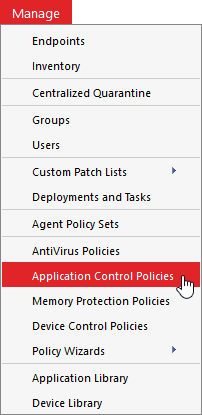
From the Endpoint Security Console, select Manage > Application Control Policies.
-
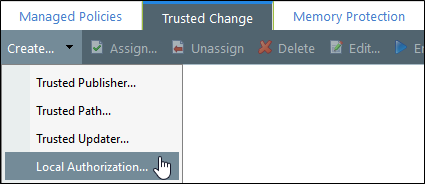
Click the Trusted Change tab.
-
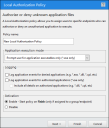
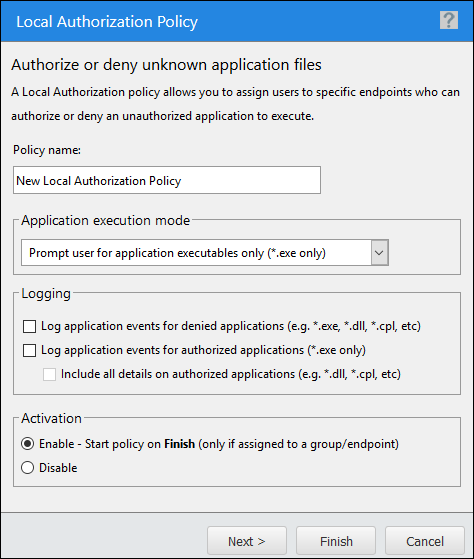
Select Create > Local Authorization to open the Local Authorization Policy wizard.

-
Progress through the wizard. See Creating a Local Authorization Policy in the Application Control Help for detailed steps.
Best Practices with Local Authorization
The following explains how to help users make good authorization decisions, how to adjust logging, and why it's important to maintain a test endpoint when using Local Authorization.
Review Logs when Using Local Authorization
Once you've applied a Local Authorization policy to an endpoint, you'll no longer see any entries in the Easy Auditor: Applications Blocked When Enforcement is Enabled Application Event log query. This is because all "blocked" executables are now presented to the endpoint user for Local Authorization. Going forward, log entries appear in the All Applications Executed by Local Authorization query.
We recommend that you replace your daily/weekly scheduled application event log query with the Local Authorization log query so that you keep receiving email reminders to review the logs and update the policies. Endpoint users may authorize unwanted applications using Local Authorization. Review the logs for these applications and update your Denied Applications policies as needed.
Maintain a Test Endpoint
Executables must be in the Application Library to authorize or deny them. If the executables are not already in the Application Library, maintain a test endpoint that you can add these applications to. As you review the executables that endpoint users authorize or deny via Local Authorization, you may choose to authorize or deny these executables for all users. Maintaining a test endpoint helps facilitate this process.
You can either:
-
Scan the test endpoint with Easy Auditor to add the applications to the Application Library
-
Recommended: Scan the specific installer, executable file, or folder of an application using Application Scan on a target endpoint. Import the results to the Application Library and authorize or deny the files from there.
Complete an Application Scan and Import into the Application Library
-
On the endpoint, select Start > Control Panel.
-
Double-click Ivanti Endpoint Security Agent Control Panel.
-
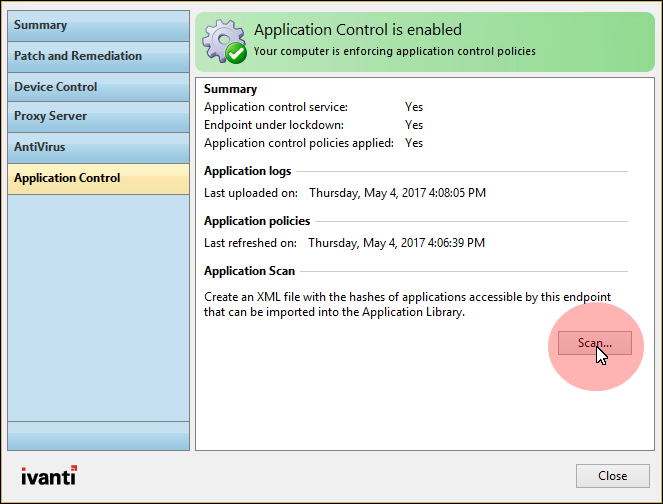
From the main menu, click Application Control.
-
In the Application Control section, click Scan.

-
Complete the Application Scan wizard.
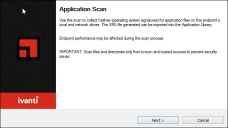
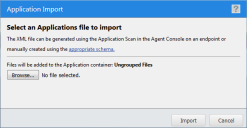
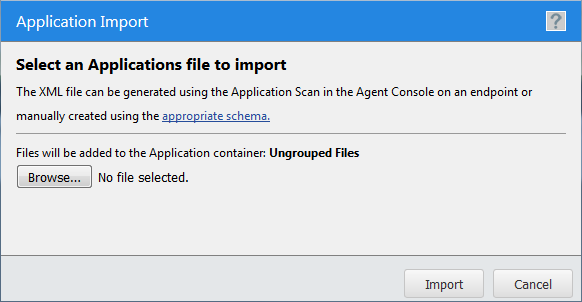
An XML file containing unique hashes (operating system signatures) for the application is generated. You can import it into the Application Library using the Import feature. -
Select Manage > Application Library.
-
In the Application Browser, select Applications.
-
In the toolbar, click Import.

-
Complete the wizard.