Adding Content to a Package
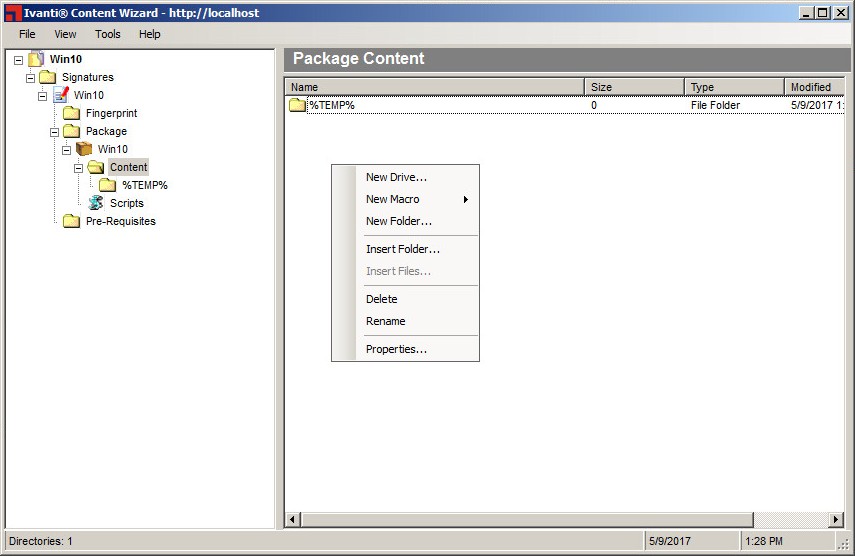
The Package Content page allows you to add files and directories to the package. Right-click inside the Package Content page and select one of the available content types.
When you right-click inside the Package Content page, the following options are available:
|
Option |
Description |
|---|---|
|
New Drive |
Allows you to add a new drive to a package. For more information, see Adding a New Drive to a Package. |
|
New Macro |
Allows you to add a new macro to a package. For more information, see Adding a New Macro to a Package. |
|
New Folder |
Allows you to add a new folder to a package. For more information, see Adding a New Folder to a Package. |
|
Insert Folder |
Allows you to add an existing folder to a package. For more information, see Inserting a Folder into a Package. |
|
Insert Files |
Allows you to add an existing file to a package. For more information, see Inserting a File into a Package. |
|
Delete |
Allows you to delete a file from a package. For more information, see Deleting a File from a Package. |
|
Rename |
Allows you to rename a file within a package. For more information, see Renaming a File in a Package. |
|
Properties |
Allows you to modify the file properties within a package. For more information, see Overwriting the Properties of a File in a Package. |
Adding a New Drive to a Package
Use the New Drive option to deploy a package to a drive other than the C:\ or %TEMP% drives.
Prerequisites:
Create a package for the patch. For more information about creating packages, see Adding Packages.
- Expand the patch properties in the left pane to Content.
Example: New Patch > Signatures > New Signature > Package > New Package > Content.
The Package Content page opens.
- Right-click in the pane inside the Package Content page.
The Content Types menu appears.
- Select New Drive.
The Create Drive dialog opens. - In the Drive or Volume Name field, type the letter you require for the drive name, followed by a colon.
Example: X: - Click OK.
The Create Drive dialog closes.

The drive is added to the Package Content page.
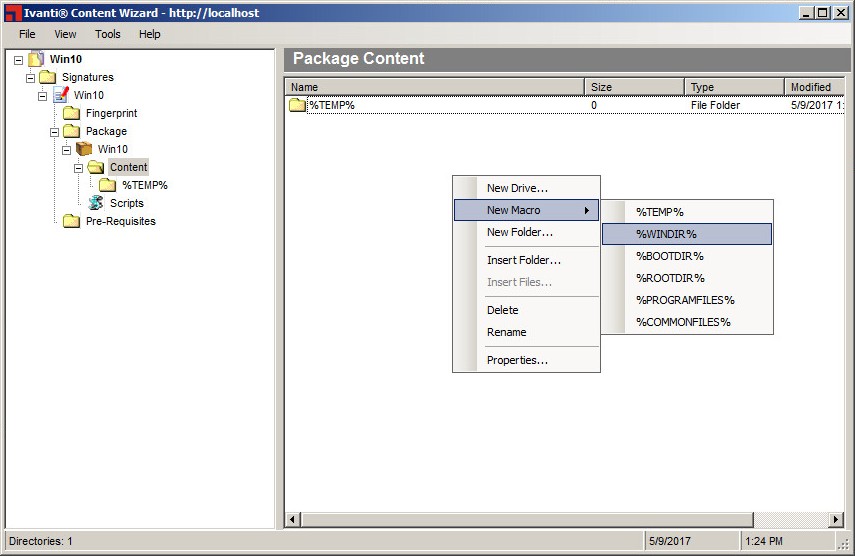
Adding a New Macro to a Package
Use the New Macro option to deploy a package across existing system directories.
Prerequisites:
Create a package for the patch. For more information about creating packages, see Adding Packages.
- Expand the patch properties in the left pane to Content.
Example: New Patch > Signatures > New Signature > Package > New Package > Content.
The Package Content page opens. - Right-click in the pane inside the Package Content page.
The Content Types menu appears.
- Select New Macro.
The Macros Types menu opens.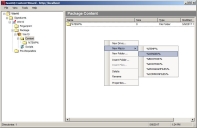
- Select the type of macro to add to the package.
For more information on the types of macros available, see Types of Macros.
The selected macro is added to the Package Content page.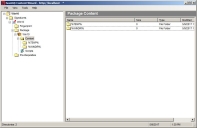

Types of Macros
The New Macro menu allows you to add macros to a package. A macro can be either an environment variable as defined by the operating system, or a macro that only the Agent can expand.
The following predefined macros are available in the New Macro menu:
|
Macro Type |
Description |
|---|---|
|
%TEMP% |
The operating system's temp directory location. This macro expands to C:\Windows\Temp, C:\Temp, C:\WinNT\Temp, or /tmp depending upon the operating system and configuration. |
|
%WINDIR% |
The operating system's windows directory location. This macro typically expands to C:\Windows. |
|
%BOOTDIR% |
The operating system's boot directory location. This macro typically expands to C:\. |
|
%ROOTDIR% |
The operating system's root directory location. This macro typically expands to C:\. |
|
%PROGRAM FILES% |
The operating system's program files location. This macro typically expands to C:\Program Files. |
|
%COMMONFILES% |
The operating system's common files location. This macro typically expands to C:\. |
Adding a New Folder to a Package
Use the New Folder option to create a folder inside the package.
Prerequisites:
Create a package for the patch. For more information about creating packages, see Adding Packages.
- Expand the patch properties in the left pane to Content.
Example: New Patch > Signatures > New Signature > Package > New Package > Content.
The Package Content page opens. - Right-click in the pane inside the Package Content page.
The Content Types menu appears. - Select New Folder.
The Create Folder dialog opens. - In the Folder Name field, type the name of the new folder.
- Click OK.
The Create Folder dialog closes.
The folder is added to the Package Content page.
Inserting a Folder into a Package
Use the Insert Folder option to locate and select an existing directory to add to the package.
Prerequisites:
Create a package for the patch. For more information about creating packages, see Adding Packages.
- Expand the patch properties in the left pane to Content.
Example: New Patch > Signatures > New Signature > Package > New Package > Content.
The Package Content page opens. - Right-click in the pane inside the Package Content page.
The Content Types menu appears. - Select Insert Folder.
The Insert Folder dialog opens. - Select the folder you need for the package.
- Click OK.
The Insert Folder dialog closes and the folder is added to the Package Content window.
Select Insert Folder option inserts the folder and all folder content to the package. To insert individual file content, refer to Inserting a File into a Package for instruction.
Tip: In addition to the procedure described above, you can add folders to a package using drag and drop. Select the folder that you want to add, then drag and drop it into the Package Content window.
The folder is added to the Package Content page.
Inserting a File into a Package
Use the Insert File option to locate and select an existing file to add to a folder in the package.
Prerequisites:
- Create a package for the patch. For more information, see Adding Packages.
- Create a folder for the package. For more information, see Adding a New Folder to a Package.
- Expand the patch properties in the left pane to Content.
Example: New Patch > Signatures > New Signature > Package > New Package > Content.
The Package Content page opens. - In the left pane, select a folder directory beneath Content.
- Right-click in the pane inside the Package Content page.
The Content Types menu appears. - Select Insert Files.
The Open window opens. - Select the file you need for the package.
- Click Open.
The Open window closes and the package is added to the Package Content page.
Tip: The %Temp% folder is the default folder when a new package is created.
A blank Package Content page opens.
The file is added to the Package Content page.
Deleting a File from a Package
Use the Delete option to remove a selected file from a folder in the package.
Prerequisites:
- Create a package for the patch. For more information, see Adding Packages.
- Create a folder for the package. For more information, see Adding a New Folder to a Package.
- Insert files into the package folder. For more information, see Inserting a File into a Package.
- Expand the patch properties in the left pane to Content.
Example: New Patch > Signatures > New Signature > Package > New Package > Content.
The Package Content page opens. - In the left pane under Content select the folder containing the file to be deleted.
The Package Content page for the selected folder opens. - In the pane, select the file you want to delete and right-click.
The Content Types menu appears. - Select Delete.
The file is removed. - Verify that the deleted file does not appear in the Package Content page.
The file is deleted from the selected folder.
Tip: You may select multiple, non-concurrent items by using CTRL+Click within the Package Content page.
Renaming a File in a Package
Use the Rename option to edit the filenames of files in a package.
Prerequisites:
- Create a package for the patch. For more information, see Adding Packages.
- Create a folder for the package. For more information, see Adding a New Folder to a Package.
- Insert files into the package folder. For more information, see Inserting a File into a Package.
- Expand the patch properties in the left pane to Content.
Example: New Patch > Signatures > New Signature > Package > New Package > Content.
The Package Content page opens. - In the left pane under Content select the folder containing the file you want to rename.
The Package Content page for the selected folder opens. - In the pane, select the file you want to rename and right-click.
The Content Types menu appears. - Select Rename.
The Rename dialog opens. - Type the new filename in the Enter new filename: field.
- Click OK.
The Rename dialog closes. - Verify that the new filename appears in the Package Content page.
The filename is changed.
Overwriting the Properties of a File in a Package
Use the Properties option to view and edit file properties in a package.
Prerequisites:
- Create a package for the patch. For more information, see Adding Packages.
- Create a folder for the package. For more information, see Adding a New Folder to a Package.
- Insert files into the package folder. For more information, see Inserting a File into a Package.
- Expand the patch properties in the left pane to Content.
Example: New Patch > Signatures > New Signature > Package > New Package > Content.
The Package Content page opens. - In the left pane under Content select the folder containing the file you want to edit.
The Package Content page for the selected folder opens. - In the pane, select the file you want to edit and right-click.
The Content Types menu appears. - Select Properties.
The Properties dialog opens. - [Optional] Rename the file, if applicable.
- [Optional] Edit the Overwritable check box, if applicable.
- Edit the Compressed check box, if applicable.
- Click Apply.
The file properties are changed. - Click OK.
The Properties dialog closes.
Warning: Removing the check mark from the Overwritable check box prevents subsequent patches that contain the same file from overwriting that file.
The file properties are changed.