Adding a Pre-Requisite
You can add a pre-requisite that you created for a signature from the Pre-Requisite Properties page. You can also import a pre-requisite from an existing vendor list.
Prerequisites:
Specify the patch properties in the Patch Properties page. For more information about creating patch properties, refer to Creating and Editing Patch Properties.
Add a pre-requisite to an applicable signature.
- Expand the patch properties in the left pane to Pre-Requisites.
Example: New Patch > Signatures > New Signature > Pre-Requisites.
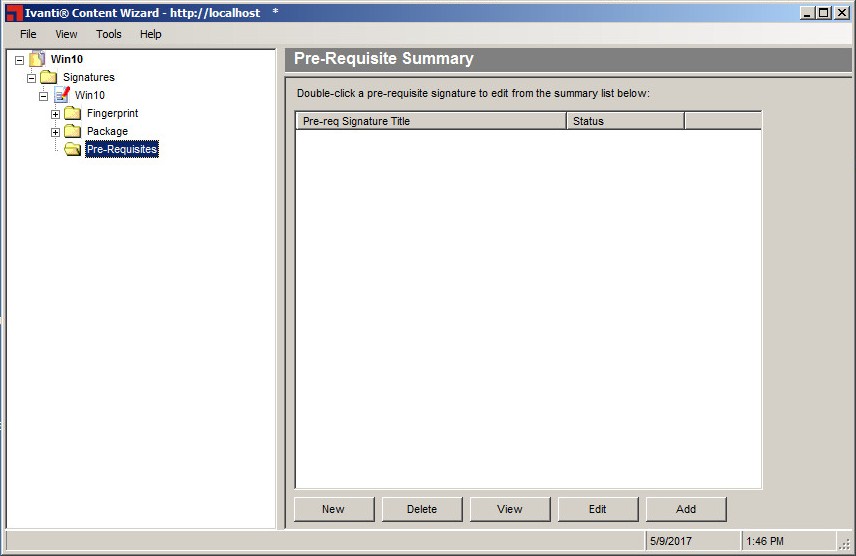
The Pre-Requisite Summary page opens.
- Click Add.
- Remove Detect from Search field.
A blank field allows all pre-requisite signatures to display. - Click Search.
Any signatures already created are displayed in the Add Pre-Requisite Signature window. - Select a pre-requisite from the available list.
- Click OK.
The Add Pre-Requisite Signature window closes and the pre-requisite is added to the pane. - [Optional] Repeat steps 2 through 6, to add additional pre-requisites to the signature as needed.
- Select File > Save.
The pre-requisite is added to the signature.
Tip: Right-click inside the Pre-Requisite Summary page window to bring up a selectable menu that mimics the available buttons.
The Add Pre-Requisite Signature dialog opens with Detect defaulted in the Search
field.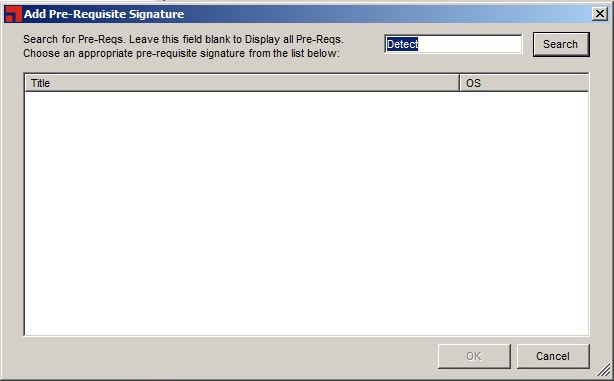
Tip: When searching for a particular pre-requisite, type the name of the signature in the search field and click Search.
Tip: In the event that communication is lost between the agent and server due to a server reboot, you may receive a communication error message after clicking Search. When this occurs, close the Ivanti Content Wizard, and then log in again to reestablish a server connection.