Creating and Editing Patch Properties
Creating patch properties is part of the process that creates a new patch and saves it to the Ivanti Endpoint Security. Once a patch is created, you can subsequently edit its properties using the Patch Properties page.
- Start the Ivanti Content Wizard.
- If the Open Patch page opens, click Cancel. If it doesn't, proceed to the next step.
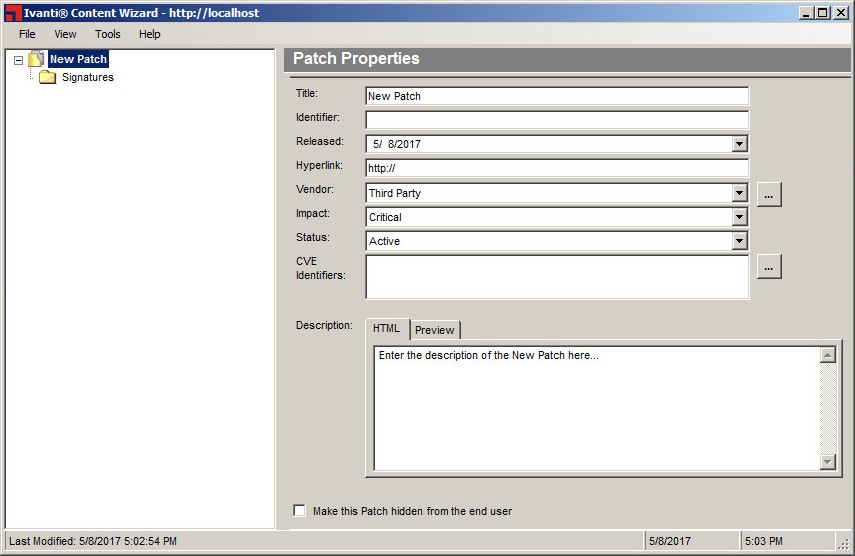
The Patch Properties page opens.
- Type a unique name for the patch in the Title field. The default title is New Patch.
- Type a unique identifier for the patch in the Identifier field.
You may determine the identifier or you may choose to use one supplied by the vendor. - Type the release date for the patch in the Released field.
By default, the current date is specified. You can use the vendor's date if necessary. - Type the vendor's URL in the Hyperlink field.
- Select a vendor from the Vendor drop-down list.
Vendors must be added before they can show up as an item in the Vendor drop-down list. For more information, see Adding a New Vendor. - Select an impact from the drop-down list in the Impact field.
To understand the various impact options available, refer to Understanding Patch Severity Levels. - Select an applicable patch status from the drop-down list in the Status field:
- Active
- Beta
- Pending
To understand the various status options and their meaning, refer to The Patch Properties Page.
- [Optional] Select CVE Identifiers.
- Click the CVE Identifiers button.
The CVE Identifiers dialog opens. - Select File > Add.
The Add CVE Code dialog opens and lists the available CVE Identifiers. - Double-click on the CVE Identifier that is applicable to your needs.
The Add CVE Code dialog closes and the item is added to the CVE Identifiers dialog. - Click Save.
The CVE Identifiers dialog closes and the item is added to CVE Identifiers field. - [Optional] Repeat steps a, b, c, and d to add additional CVE Identifiers.
- Type a description in the Description field.
This description will be visible in the Patches page of the Ivanti Endpoint Security. - [Optional] Select the Make this Patch hidden from the end user check box.
- Select File > Save.
For more information on the various properties and fields in the Patch Properties page, refer to The Patch Properties Page.
If you save the patch without adding a package, you are asked if you want to save without adding a package. Click Yes to proceed.
The patch properties are saved for the new patch.
After Completing This Task:
After creating the patch properties, continue with the other steps involved in patch creation such as adding a signature, fingerprint, and so on. The various steps are detailed in Creating a Linux Patch.