Community Functionality
The Ivanti Content Wizard incorporates community publishing of patches. This allows you to publish or download patches from an internal patch distribution website within your organization.
The Ivanti Content Wizard community functionality allows you to:
- Select a patch (or set of patches) to be packaged for publication to an online community. For additional information, refer to The Community Subscribe Wizard.
- Download a patch that has been published an online community. For additional information, refer to The Community Publish Wizard.
The Community Subscribe Wizard
The Community Subscribe Wizard lets you share custom patches with other Ivanti administrators.
Using the Community Subscribe Wizard you can obtain custom patches posted by other Ivanti administrators from an internal patch distribution website within your organization.
Content downloaded using the Community Subscribe Wizard is used at your own risk. Even when importing content that has been digitally signed and is from a trusted provider, it is essential that you scrutinize the patch for potential problems before deploying it within your network. It is recommended that you use a staged approach, testing for compatibility with a number of test machines, when deploying patches to your network.
Warning: Importing unsigned .plfz files is not recommended.
Create a Subscription Through an Enterprise Distribution Website
The Community Subscribe Wizard lets you create custom policies or software patches and then share those items with other network administrators throughout the enterprise.
Prerequisites:
Setup an enterprise distribution website for your organization. For more information, refer to the following Creating an Enterprise Patch Distribution Website.
- Create a designated folder in the directory <Installation Directory>\Program Files\Apache Software Foundation\Apache2.2\htdocs.
Example: A folder named Patch Files would be located at <Installation Directory>\Program Files\Apache Software Foundation\Apache2.2\htdocs\Patch Files.
For information on installing an Apache server, refer to Installing the Apache Server.
- Populate the designated folder with created custom policies or software patches.
You must put the patch content file (.plfz) and the channel file (.xml) in the designated folder within the directory <Installation Directory>\Program Files\Apache Software Foundation\Apache2.2\htdocs.Example: Populate the <Installation Directory>\Program Files\Apache Software Foundation\Apache2.2\htdocs\Patch Files folder with software patch content.
- Log in to the Ivanti Endpoint Security server from the Ivanti Content Wizard.
- Select Tools > Community Subscribe.
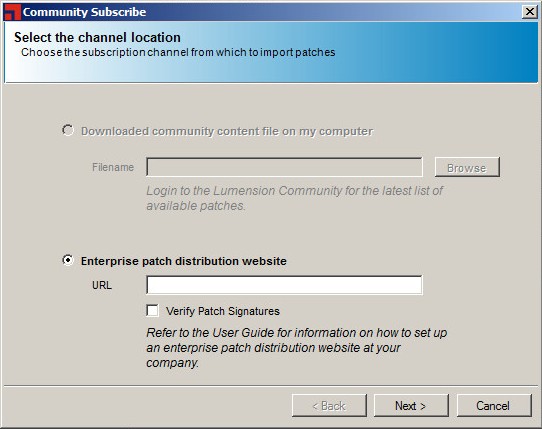
The Select the channel location page of the Community Subscribe window opens. - Select Enterprise patch distribution website.
- Type the distribution website URL.
Example: Type http://localhost:8080/Patch Files.You do not need to specify a filename, just the web directory in which the patch content file (.plfz) and the channel file (.xml) was extracted to.
Example: Patch Files. - [Optional] Select the Verify Patch Signatures check box.
- Click Next.
The Channel Selection page opens. - Select the channel in the left pane.
- Click Next.
The Channel Content page opens. - Select the patch content in the left pane that you wish to import.
- Click Next.
The Importing Content page opens. - [Optional] Click Preview to view the Import Summary page prior to selecting Download.
The Import Summary page displays information concerning the patch. - Click Download.
Ivanti Content Wizard imports the selected content to <Install Location>\HEAT Software\EMSS\Web\LCW-Work\Cache. - When the import completes, the status window displays the completion status.
The status will either be success or failure. - Click Finish.
The Importing Content page closes.
Patch content and channel files are packed in .zip files published from the Ivanti Endpoint Security servers. Both patch content files (.plfz) and channel (.xml) file types are extracted to the designated folder for distribution. To proceed, you must enter a valid web address within your enterprise that contains a web directory folder containing content.
The channel selection name and channel content names are a reflection of content found in the channel file (.xml) within the designated folder in the directory.
Example: <Installation Directory>\Program Files\Apache Software Foundation\Apache2.2\htdocs\Patch Files.
Tip: To select multiple channel content items, hold down CTRL key and then click each item you want to select.
Importation times vary according to patch sizes.
Tip: The file upload process requires access to both the patch content file (.plfz) and the channel file (.xml). If an error occurs, it is often related to file access. Verify that both files exist within the designated folder. For example, <Installation Directory>\Program Files\Apache Software Foundation\Apache2.2\htdocs\Patch Files. Ensure the user has adequate security permissions to access the files and folders within the directory.
The subscription content is imported to <Install Location>\HEAT Software\EMSS\Web\LCW-Work\Cache.
The Community Publish Wizard
The Ivanti Content Wizard Community Publish Wizard lets you post the patches you have created to an internal server within your organization.
You can publish your custom patches to an internal patch distribution web site within your organization using the Community Publish Wizard.
When you publish a patch, it must be digitally signed to provide proof as to the organization that created it. Any patches that the administrator has created and published as signed .cab files can then be posted to the Content Garden section of the community.
You can also use the Community Publish Wizard to distribute patches from a Ivanti Endpoint Security server with an Internet connection to other Ivanti Endpoint Security servers within a closed network segment that would otherwise be unable to access the new patches. When a new set of patches
are published, the wizard converts the desired set of patches into a channel file that can be quickly extracted to a local web server and shared with other Ivanti Endpoint Security Servers that are running the Ivanti Content Wizard.
Publishing Content Through an Enterprise Server
The Community Publish Wizard lets you use an enterprise server to post user-created patches to the Ivanti Connect Community. Each zip file contains a simple .xml file that identifies the channel information (publisher, company, date, graphic, etc.) as well as the exported patches (.plfz files) that were created during the publish process.
Prerequisites:
Setup an enterprise distribution website for your organization. For more information, refer to Creating an Enterprise Patch Distribution Website.
- Log in to the Ivanti Endpoint Security server from the Ivanti Content Wizard.
- Select Tools > Community Publish.
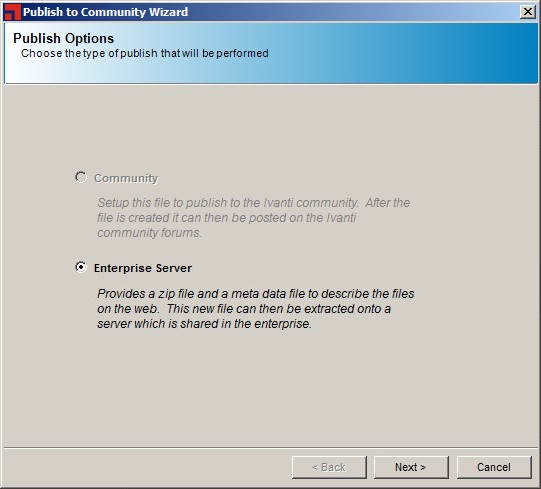
The Publish Options page of the Community Publish window opens. - Select Enterprise Server
.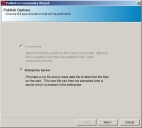
- Click Next.
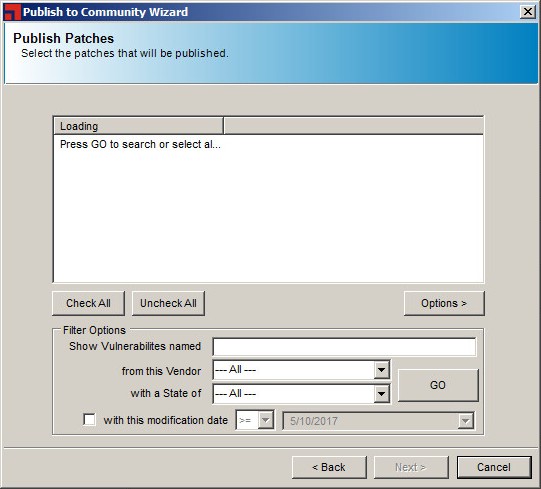
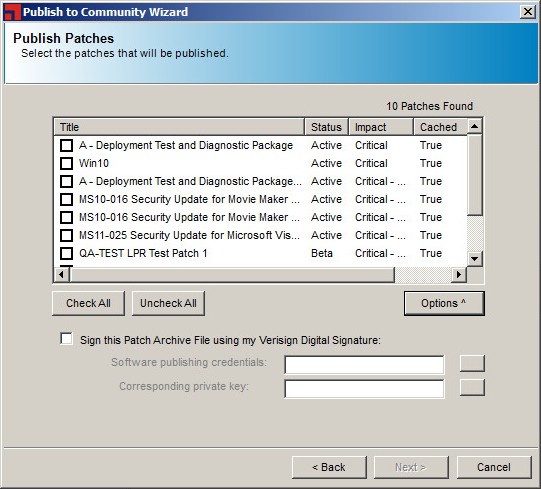
The Publish Patches page opens.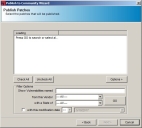
- Click GO.
The list is displayed in the Publish Patches page window.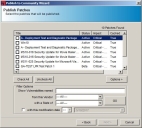
- Select the applicable option for your export needs based on the following table:
- To filter patches, specify the filter options.
- Type the patch name in the Show Vulnerabilities named field.
- If necessary, select with this modification date, select >= or <=, and the date from the drop- down list.
- Click GO.
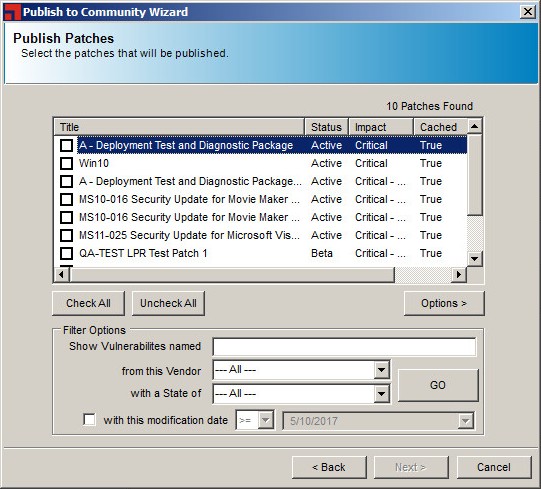
- Select the patches you want to publish.
The sorted list is displayed in the Publish Patches page window.
The underscore character (_) is a special character that matches any single character.
- Click Options.
The Filter Options area closes and is replaced by a Digital Signature area.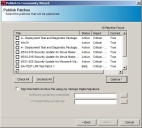
- To include a digital signature, select the Sign this Patch Archive File using My Verisign Digital Signature check box.
The Software publishing credentials and the Corresponding private key fields become active. - In the Software publishing credentials field, click Search.
The Location page opens.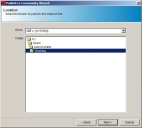
- Locate the Verisign certificate you want to use. The certificate will be in the form of a .spc file.
- Click Next.
The Software publishing credentials field displays the .spc file. - In the Corresponding private key field, click Search.
The Locate Private Key page opens. - Locate the Verisign private key you want to use.
The key will be in the form of a .pvk file. - Click Open.
The Corresponding private key field displays the .pvk file. - Verify the patch information is correct.
- Click Next.
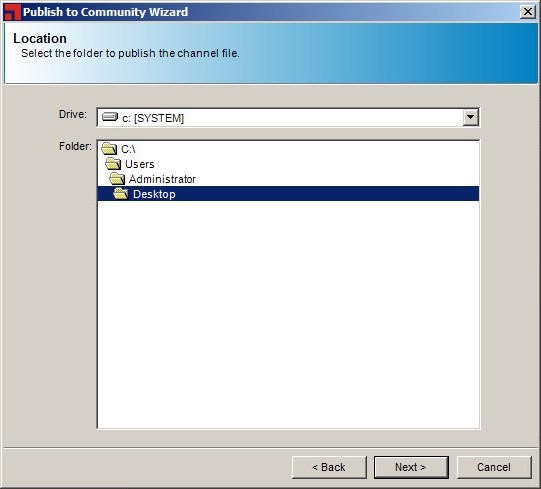
The Location page opens. - Select the folder where the channel file will be saved.
- Click Next.
The Community Info page opens.
- Specify the information associated with the published content.
- Click Browse to insert an image of your company logo.
- Type a Channel Name.
- Select a Publication Date from the drop-down list.
- Type your company name in the Company field.
- Type the patch author's name in the Author field.
- Enter a description of the content in the Description field.
This information will be shown to users importing the channel file.The filename that will be generated will be based on the channel name. The file generated will be a signed .cab file holding a .zip file of the generated channel.xml and .plfz file.
Tip: Choose the image from the local machine, rather than a remote machine.
- Click Next.
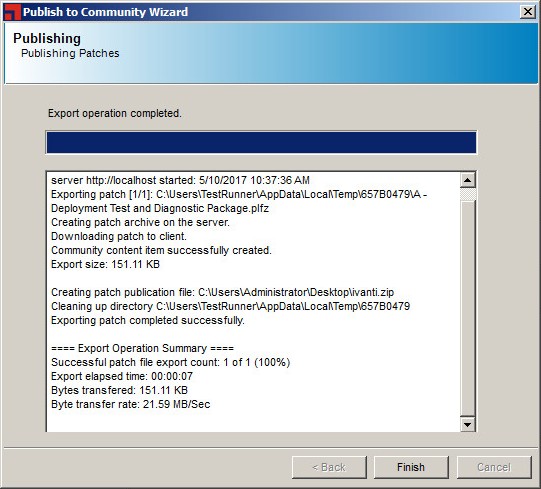
The Publishing page opens.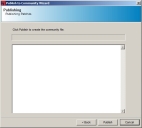
- Click Publish.
Creation of the channel file begins. A progress indicator is displayed during the export process. The lower status window is updated with details as the export is running. - When the export completes, the status window displays the completion status.
The status will either be success or failure. On successful completion, the status window displays the location of the patch publication file.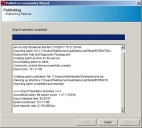
- Click Finish.
The Publishing page closes.
|
Option |
Description |
|---|---|
|
Title (check box) |
Select each individual patch item(s). |
|
Check All (button) |
Selects all patches in the display list. |
|
Uncheck All (button) |
Deselects all patches in the display list. |
If you want to sign a patch with your Verisign digital signature, you must make sure the internet connection is working. This functionality will not work in an AirGap environment because the timestamp part of the signature requires an internet connection.


Publish execution varies based upon the size of the patches selected for publishing.
A channel .zip file is generated.
To evaluate this feature, it is important to make sure that you know the URL of your web directory where the content was published and that you can download the .xml file and .plfz files successfully in a web browser within your company from that website.
After Completing This Task:
Extract your channel .zip file into a web server (Internet Information Server, Apache Server) and thus make these patches available for use by others within your organization.