Adding and Deleting Fingerprints
You can add a single fingerprint or multiple fingerprints to a signature, depending on your signature requirements. The Ivanti Content Wizard is pre-filled with a suitable registry fingerprint that was generated based on the information in the selected installable file.
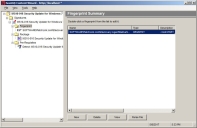
You can add a single fingerprint to a signature from the Fingerprint Summary page.
Prerequisites:
- Create a signature for a patch. For more information about creating signatures, refer to Adding a Signature to a Patch.
Add a new fingerprint and define its properties in the Fingerprint Properties page.
- Expand the patch properties to Fingerprint in the left pane.
Example:Patch Name > Signatures > Signature Title > Fingerprint.
The Fingerprint Summary page opens.
- Select New.
The panel contains a new fingerprint named New Fingerprint.
- Select New Fingerprint within the pane.
- Click View.
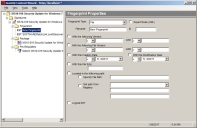
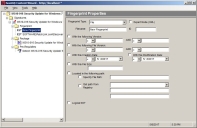
- Select the Fingerprint Type.
By default, the File fingerprint type is selected. For more information on the fingerprint types available, refer to Types of Fingerprints. - Define the appropriate fingerprint properties.
Fingerprint properties are different for different fingerprint types. For detailed information on each fingerprint type, field definitions, and usage suggestions, see Types of Fingerprints. - Select File > Save.
The fingerprint is created for the selected signature.
Tip: Within the pane window you may double-click on a signature to open the Fingerprint page.
The Fingerprint Properties page opens.
You can create multiple fingerprints for a patch signature. This allows you to use multiple methods of detecting the presence of a patch.
Prerequisites:
- Create a signature for a patch. For more information about creating signatures, refer to Adding a Signature to a Patch.
- Create an XML document with the fingerprint details. Write the XML document in Expert XML mode. For more information, see Creating Fingerprints in Expert Mode (XML).
- Expand the patch properties to Fingerprint in the left pane.

Example: Patch Name > Signatures > Signature Title > Fingerprint.
The Fingerprint Summary page opens. - Click Parse File.
The Open window opens. - Select the XML file you have created using Expert XML mode.
For more information on creating XML files in Expert XML mode, see Creating Fingerprints in Expert Mode (XML). - Click Open.
The Open window closes. - Select File > Save.
The fingerprints in the XML file are added to the Fingerprint Summary page.
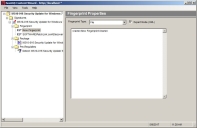
The Expert Mode (XML) check box in the Fingerprint Properties page lets you create an XML document with the fingerprint details. You can then use this document to add multiple fingerprints to a signature.
- Expand the patch properties to Fingerprint Type in the left pane.
Example: Patch Name > Signatures > Signature Title > Fingerprint > Fingerprint Type.
The Fingerprint Properties page displays. - Select the Expert Mode (XML) check box in the Fingerprint Properties page.
A blank field is displayed within the pane.
- Within the pane window type the XML fingerprint code.
- Select File > Save.
Your changes are saved.
The fingerprint properties are created in .xml format.
Deleting a Fingerprint
If you no longer require a particular fingerprint for a signature, you can delete it in the Fingerprint Summary page.
- Expand the patch properties to Fingerprint in the left pane.
Example: Patch Name > Signatures > Signature Title > Fingerprint.
The Fingerprint Summary page opens.
- In the pane select the applicable fingerprint you want to delete.
- Click Delete.
A confirmation message appears. - Click OK.
The confirmation message dialog closes. - Select File > Save.
The fingerprint is deleted and is no longer visible in the Fingerprint Summary page.
Each signature supports multiple fingerprints and each fingerprint may be deleted.