The Ivanti Device Control Workflow
Learn the sequence of specific tasks you need to perform to implement your first device control policy.
Important: While Ivanti Device Control has been designed to minimize the administrative burden of device control, it is important to invest adequate time during its deployment to ensure a successful implementation. Work with your end users and their representatives, together with any IT security personnel, to formulate a business policy regarding the usage of peripheral devices.
Install Module Server Component
Install the Device Control module server component. This component is installed after the initial Ivanti Endpoint Security installation.
If you purchased an Device Control license during your initial Ivanti Endpoint Security purchase, Device Control is installed during the initial Ivanti Endpoint Security installation by default.
For more information, see Step 1: Install the Device Control Module Server Component.
Add the Module Endpoint Component to Agents
Add the Device Control module endpoint component to agents you want to support Device Control functions. Each agent you add the endpoint component to consumes an Device Control license. For more information, see Step 2: Add the Device Control Module to Endpoints.
Observe Ongoing Data Flow and Device Usage
Observe ongoing data flow and device usage. By default, the module runs in an "Audit Mode" which enables endpoint users to operate devices but records device connections and other events related to those devices. Discuss valid device uses with key end user representatives. For more information, see Step 3: Create a Device Event Log Query.
Organize Devices and Media in Collections
Organize the various devices and media in your network into collections to make them more manageable. For more information, see Step 4: Create Device and Media Collections and Step 5: Add Devices and Media to Collections.
Define Device Usage and Data Flow Policies
Define device usage and data flow policies. Assign permissions to users, endpoints, and groups to use only the types you allow. For more information, see Step 6: Create Device Control Policies.
Implement and Manage Device Control Policies
Maintain your Device Control policies by actively monitoring device events in your network and updating policies for device classes and collections accordingly. For more information, see Step 7: Edit a Policy.
Use In-depth Reports to Identify Gaps and Track Compliance
Use in-depth Device Control reports module to identify gaps and track compliance in the areas of Device and Media Collections, Device Control Options, Device Permissions, Endpoint Permissions, and User Permissions. For more information, see Step 8: Generate Ivanti Device Control Reports.
Step 1: Install the Device Control Module Server Component
After logging in to Ivanti Endpoint Security, the first step in implementing Device Control features and functions is to install the server module
Prerequisites:
You must be licensed for Ivanti Device Control.
Install the Device Control module server component using the Ivanti Installation Manager.
For additional information refer to Using Ivanti Installation Manager in the Endpoint Security User Guide.
- Select Tools > Launch Installation Manager.
Installation Manager opens to the New/Update Components tab. - Select the Device Control check box for your version number of Ivanti Endpoint Security.
- Click Install.
The Install/Update Components dialog opens. - Click Install.
A dialog opens, notifying you that installing the module may cause logged-in users to lose their work. - Click OK.
The installation begins. - Click Finish.
Select the Launch Ivanti Endpoint Security check box to relaunch Ivanti Endpoint Security after clicking Finish.
The Device Control module server component is installed. To begin using the module, reopen the Ivanti Endpoint Security.
After Completing This Task:
Continue to Step 2: Add the Device Control Module to Endpoints.
Step 2: Add the Device Control Module to Endpoints
After installing the Device Control server module, add the Device Control module to your managed network endpoints.
Prerequisites:
- Complete Step 1: Install the Device Control Module Server Component
- The Ivanti Endpoint Security Agent is installed on target endpoints.
- Select Manage > Endpoints.
The Endpoints page opens to the All tab. - From the list, select the endpoints to which you want to add the Device Control module endpoint component to.
- Click Manage Modules.
The Add/Remove Modules dialog opens. - Select the Device Control check box for all endpoints you want to install the component on.
- Click OK.
The Device Control module endpoint component begins installing, as denoted by the DCInstalled column pending status. The process is completed when the status changes to Yes.
After Completing This Task:
- Reboot target endpoints to complete the installation.
For additional information on how to perform the reboot using agent policy sets, refer to the Reboot Behavior Defaults option, described under "Creating an Agent Policy Set" in the Endpoint Security User Guide. - Continue to Step 6: Create Device Control Policies.
Step 3: Create a Device Event Log Query
Schedule a query that records specific device-related actions in your network. This includes queries for granted and blocked actions.
Prerequisites:
Complete Step 2: Add the Device Control Module to Endpoints.
- Select Review > Device Event Log Queries.
- The Device Event Log Queries page opens.
- Click Create.
The Device Event Log Query wizard opens.
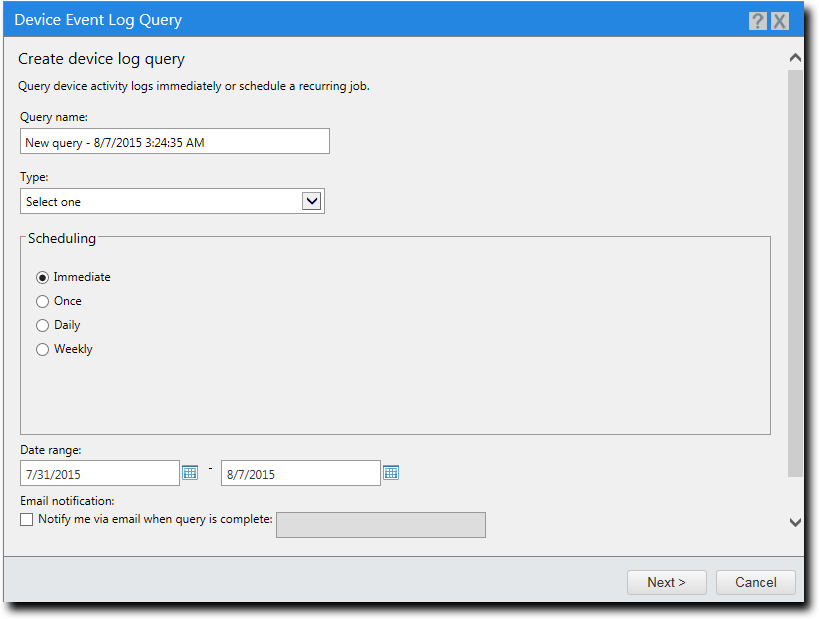
- Type the Query name.
- Select the Type.
- Select the desired scheduling option. You can choose from the following options:
Option
Description
Immediate
The query will run immediately after creation.
Once
The query will run once at a specified time.
Daily
The query will run every day at the selected time.
Weekly
The query will run every week at the selected time.
- [Optional] Select the Notify me via email when query is complete check box.
Ensure that you provide a valid email address in the associated field. - Click Next.
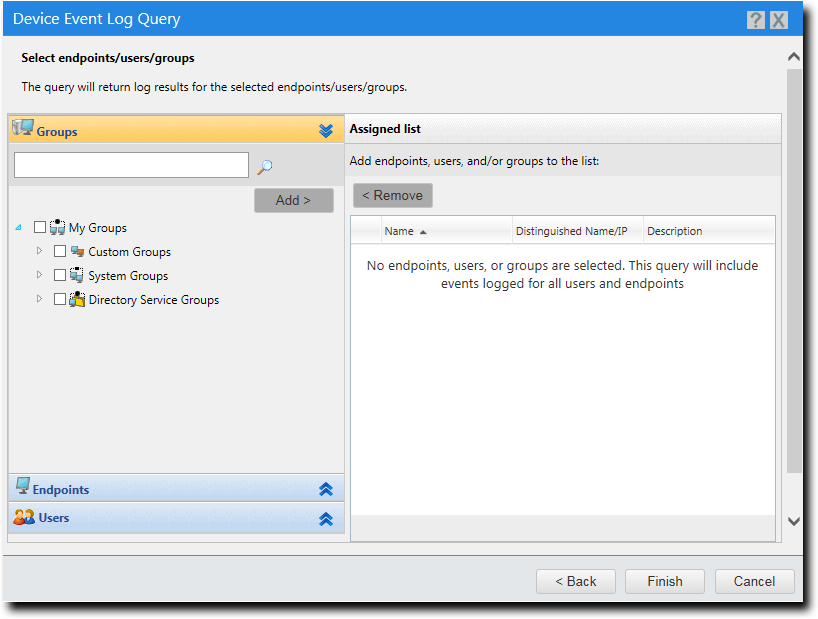
The Select endpoints/users/groups page opens.
- Select the groups, endpoints, or users the policy will apply to. Use any of the following methods:
The built-in user groups Administrators, Everyone, Power Users, and Users and Active Directory groups are not supported in log queries and will be removed from the query.
- Select a group or groups from the Groups list.
- Click Add.
- Select an endpoint or endpoints from the Endpoints list.
- Click Add.
- Select users or usergroups from the Users list.
- Click Add.
- Select a group or groups from the Groups list.
- Click Remove.
- Select an endpoint or endpoints from the Endpoints list.
- Click Remove.
- Select users or usergroups from the Users list.
- Click Remove.
- Click Finish.
The Device Event Log Query wizard closes.
Depending on the option you choose, additional settings are available in the right-side box.
The start and end dates are the date range for which you want the query results. If you choose Immediate or Once , specify the start and end dates in the Date range fields.
|
Option |
Description |
|---|---|
|
To add groups of endpoints |
Active Directory groups are not supported in log queries. |
|
To add individual endpoints |
|
|
To add individual users or user groups |
The Built-in Users and Groups Administrators, Everyone, Power Users, and Users are not supported in log queries. |
|
To remove groups of endpoints |
|
|
To remove individual endpoints |
|
|
To remove individual users or user groups |
|
The selected groups, users, or endpoints are displayed in the Assigned List.
A new query is created and runs. When the query completes, its summary is displayed in the Completed tab.
After Completing This Task:
Continue to Step 4: Create Device and Media Collections.
Step 4: Create Device and Media Collections
Create collections of devices and media through the Device Library page.
Prerequisites:
Complete Step 3: Create a Device Event Log Query.
Creating a Device Collection
The Device Library page allows you to create a collection of devices. Use the right-click menu or Add Collection Icon in the Device Browser to create the collection for the desired device class.
- Select Manage > Device Library.
The Device Library page opens. - Select a device class in the Device Browser.
The Add Collection Icon becomes active. - Click the Add Collection icon.
A New Device Collection entry is added to the device class. - Type a name for the device collection.
A device collection is created for the selected device class.
Creating a Media Collection
The Device Library page allows you to create a collection of media such as CDs and DVDs. Use the right-click menu or Add Collection Icon in the Device Browser to create the collection for the desired media type.
Prerequisites:
To add CDs and DVDs to collections, you first need to install the MediaHasher control. This will allow Ivanti Device Control to calculate the unique hash ID of each CD and DVD you are adding.
- Select Manage > Device Library.
The Device Library page opens. - Select a device class in the Device Browser.
The Add Collection Icon becomes active. - Click the Add Collection icon.
A New Collection entry is added to the media type. - Type a name for the media collection.
A media collection is created for the selected media type.
After Completing This Task:
Continue to Step 5: Add Devices and Media to Collections.
Step 5: Add Devices and Media to Collections
Add specific devices and media to collections so they are in manageable groups.
Prerequisites:
Complete Step 4: Create Device and Media Collections.
Adding a Device to a Collection
Device collections in the Device Browser allow you to organize your devices into manageable groups. Once a collection is created, you can add specific devices to it.
- Select Manage > Device Library.
The Device Library page opens. - Select the collection to which you want to add the device.
- Expand the device class.
- Click the desired collection.
A list of devices already in the collection are displayed in the Device Control section.
- Click Add.
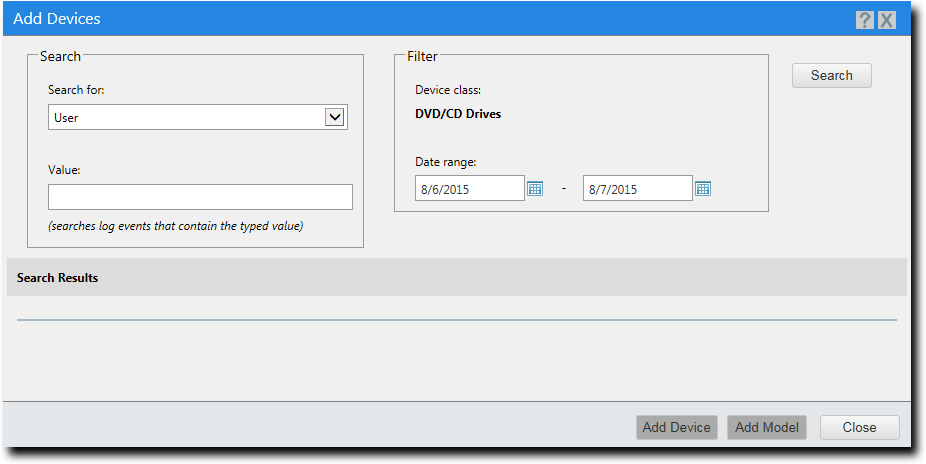
The Add Devices dialog opens.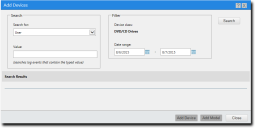
- Search for the device you want to add to the collection.
- Select a search criteria from the Search For drop-down list.
You can select from User, Endpoint IP Address, Endpoint Name, Device Model, and Device Unique Id. - [Optional] Type a search term in the Value field.
- [Optional] Select a beginning and end date from the calendar icons in the Date Range fields.
- Click Search.
A list of devices corresponding to the search criteria appear in the Search Results field.
- Select a search criteria from the Search For drop-down list.
- Select the device you want to add to the collection.
- Click Add Device.
A pop-up message appears stating all selected items are now in the device collection. - Click OK.
The pop-up message closes. - Click Close.
The Add Devices dialog closes.
The selected device appears in the list of devices of the collection. The Type column entry for that device is Instance.
Adding Media to a Collection
Media collections in the Device Browser allow you to organize your media for better control over access rights. Once a collection is created, you can add specific media to it.
- Select Manage > Device Library.
The Device Library page opens. - Select the collection to which you want to add the medium.
- Expand the media type.
- Click the desired collection.
A list of media already in the collection are displayed in the Device Control section.
- Click Add.
The Add CD/DVD dialog opens. - Select the medium you want to add to the collection.
- Select a drive from the Drive drop-down list.
- Type a unique name in the Display name field.
- [Optional] Type any comments in the Comment field.
- Click OK.
The Add CD/DVD dialog closes.
After Completing This Task:
Continue to Step 6: Create Device Control Policies.
Step 6: Create Device Control Policies
Use policies to administer control over device classes, device collections, and media collections in your network.
Prerequisites:
Complete Step 5: Add Devices and Media to Collections.
Device class policies are policies that apply to an entire device class. You can create a device class policy if you have Manage Global Device Control Policies access rights.
Prerequisites:
You must have Manage Global Device Control Policies access rights.
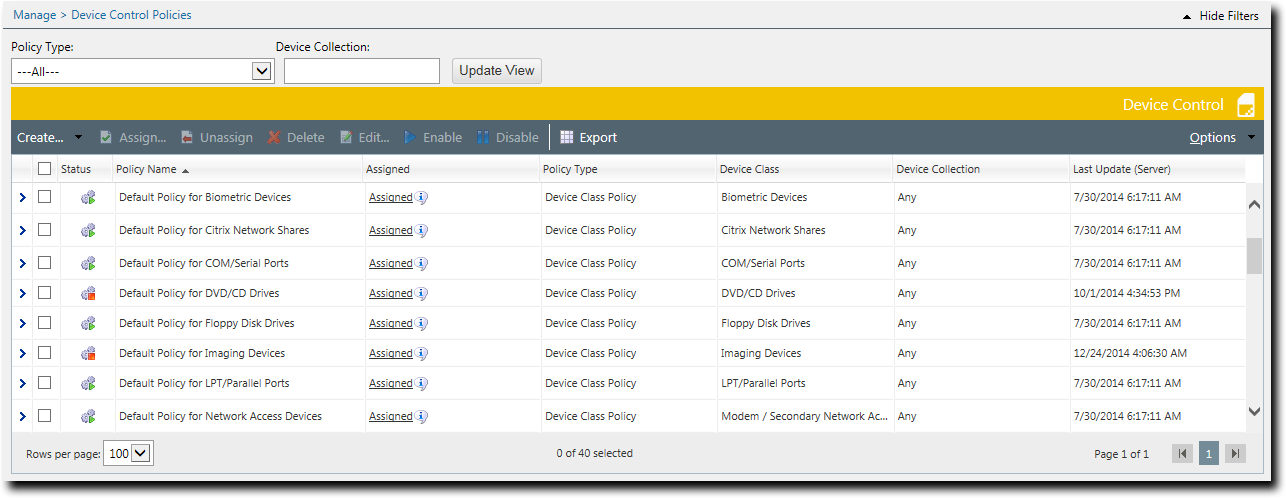
- Select Manage > Device Control Policies.
The Device Control Policies page opens.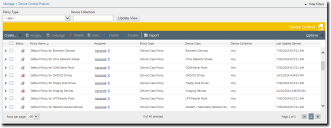
- Click Create > Create class policy.
The Device Class Policy wizard appears.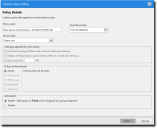
- Specify the policy details.
- Enter the Policy name.
- Select the Override priority.
You can choose between Normal (Default) and High (Overrides Normal Priority). - Select the Device class to which the policy will apply.
- Specify the policy rules.
Option
Description
Permission settings (Define read, write and other permissions.)
Enables the Permission Settings panel later in the wizard, where you can define which permissions users will have based on this policy.
Shadow settings (Store a copy of data written to or read from devices.)
Enables the Shadow Settings panel later in the wizard.
File shadowing lets you to track the data that is being read, written to, or written from a device. It can be enabled for:
- COM/Serial Ports
- DVD/CD Drives
- Floppy Disk Drives
- LPT/Parallel Ports
- Modem / Secondary Network Access Device
- Portable Devices
- Printers
- Removable Storage Devices
For Printers specifically, shadowing involves storing a copy of all information sent to a printer during a print job governed by this policy. This information can later be viewed administratively via log queries by sending the same content to the same printer or another printer of the same model.
See File Shadowing for more information.
Daily copy limit
Sets the amount of data (in MB) per day that a user can copy.
- Floppy Disk Drives
- Portable Devices
- Removable Storage Devices
Only one copy limit setting per device class will be enforced. For example, copy limits configured for removable storage devices apply to hard drives and non-hard drives. To avoid ambiguity, it is recommended that you do not combine copy limit policies and permissions policies.
- Select the desired policy enforcement option.
Option
Description
Always
The policy applies at all times.
Online only
The policy applies only when the endpoint/user/group is connected to the server.
Offline only
The policy applies only when the endpoint/user/group is disconnected from the server.
Scheduled
The policy applies only during a set schedule.
Temporary
The policy allows one-time access for a specified period.
- Select whether you want the policy to be applicable immediately.
Option
Description
Enable
Activates the policy immediately when you finish configuring it. (default)
Disable
Lets you to delay when the policy takes effect. You can activate the policy later on the Manage > Device Control Policies page by selecting it and clicking Enable.
- Click Next.
If you selected Permission settings on the Policy Details panel, the Permission Settings panel displays.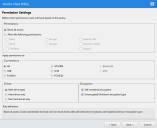
- [Optional] Specify the permission users will have based on this policy.
Option
Description
Block all access
Restricts the use of all devices of this class to prevent information from getting out.
Allow the following permissions
Select the types of permissions to allow. Available permissions (dependent on the type of device):
- Read
- Write
- FireWire
- ATA/IDE
- SCSI
- PCMCIA
- Bluetooth
- IrDA
See Permission Settings for a Policy for more information.
- Select the Connections to which the permissions are to apply.
Dependent on the type of device class policy you are creating, the available connections are:- All
- USB
- FireWire
- ATA/IDE
- SCSI
- PCMCIA
- Bluetooth
- IrDA
- If you are creating a Removable Storage Devices device class policy, select the type of Drives to which the permissions are to apply.
Option
Description
Both drive types
Permissions are applied to both hard drives and non-hard drives.
Hard drives only
Permissions are only applied to hard disk drive (HDD) drives.
Non hard drives only
Permissions are only applied to non hard disk drives, for example solid-state drives (SSD).
- [Optional] If you are creating a Removeable Storage Devices or DVD/CD Drives device class policy, select the type of Encryption to which the permissions are to apply.
Option
Description
Self contained encryption
Encryption is self-contained on the device, allowing only those with an encryption key to access the information.
Unencrypted/Unknown encryption type
Information is either unencrypted or encrypted with an unknown type of encryption.
- Review the phrase in the Rule definition section to ensure you have selected the permissions and connections you want.
- Click Next.
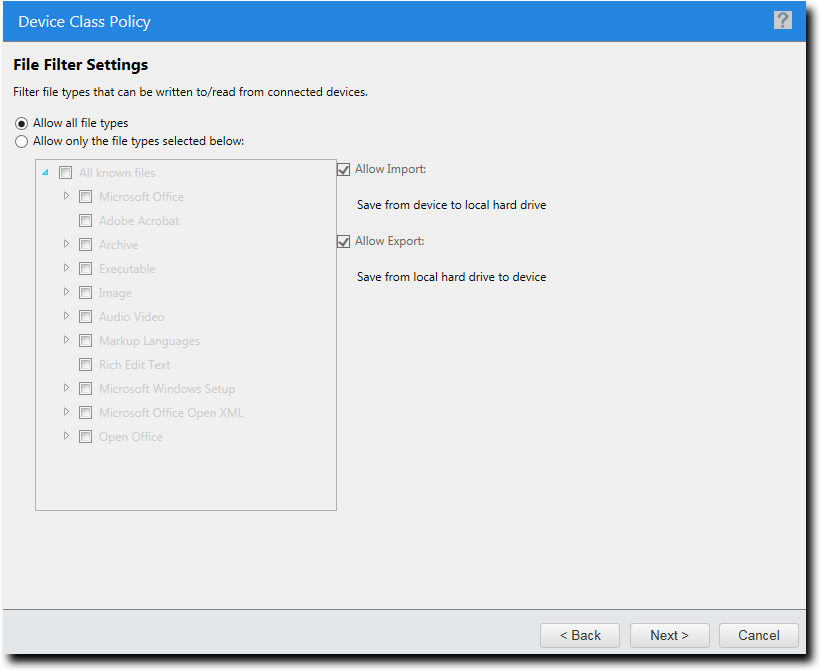
If you selected File Filters on the Policy Details panel, the File Filters panel displays.
- Specify the file filtering options.
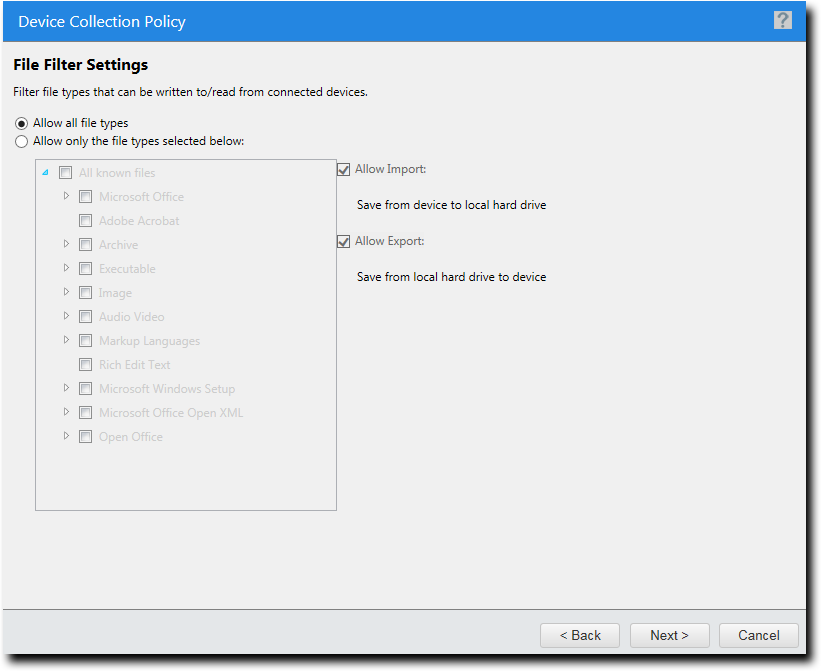
Option
Description
Allow all file types
All files types can be accessed.
Allow only the file types selected below
Only file types you select from a list can be accessed.
Allow Import
User can copy files from the external device to the local hard drive.
Allow Export
User can copy files from the local hard drive to the external device.
- Click Next.
If you selected Shadow settings on the Policy Details panel, the Shadow Settings panel displays. - Specify the shadow settings.
Shadow files are stored in <install_dir>\DeviceControl\Shadow.Device Class Policy Type
Options
- COM/Serial Ports
- DVD/CD Drives
- Floppy Disk Drives
- LPT/Parallel Ports
- Modem / Secondary Network Access Device
- Portable Devices
- Removable Storage Devices
For both the Read and Write sections:
Do not shadow: No content is shadowed.
Full file content: Saves a copy of the entire file.
File name only: Records only the file name.
Printers
Do not shadow printed content: This setting can be used to prevent shadowing for specific assignment targets. For example, if you shadow printed content for a specific AD Group you can prevent shadowing for a specific user within that group by selecting this setting and assigning the policy to that user.
Shadow printed content: This setting is used to store a copy of all information sent to a printer during a print job governed by this policy. This information...
- Review the phrase in the Rule definition section to ensure you have selected the shadow settings you want.
- Click Next.
The Assign policy page opens.This page is skipped when the wizard is launched from the Groups, Endpoints, or Users page of the Manage menu.
- Select the group, endpoint, or user to which the policy applies.
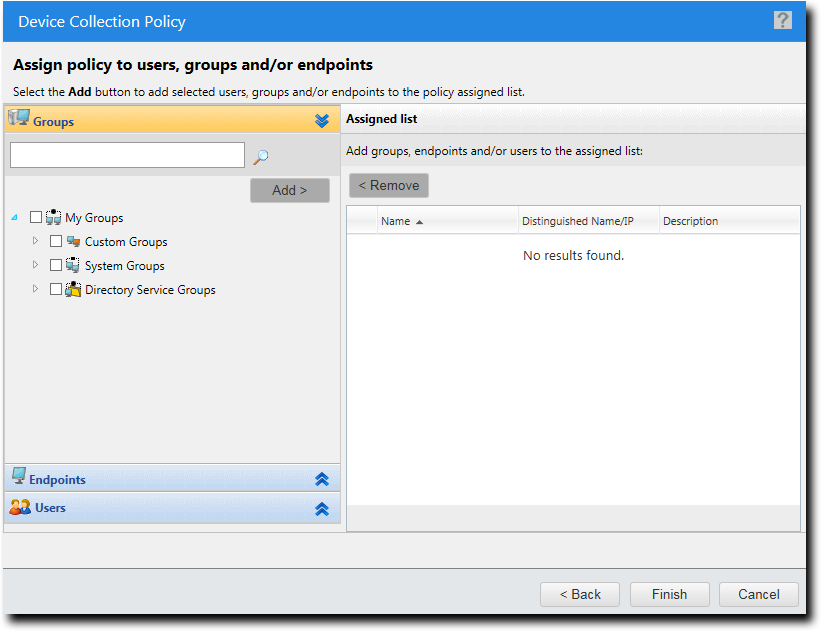
- Select a group or groups from the Groups list.
- Click Add.
- Select an endpoint or endpoints from the Endpoints list.
- Click Add.
- Select users or usergroups from the Users list.
- Click Add.
- Select a group or groups from the Groups list.
- Click Remove.
- Select an endpoint or endpoints from the Endpoints list.
- Click Remove.
- Select users or usergroups from the Users list.
- Click Remove.
- Click Finish.
The Device Class Policy wizard closes.

Depending on the option you choose, additional settings are available in the right-side box.

For more information on file filters, see File Type Filtering.

|
Option |
Description |
|---|---|
|
To add groups of endpoints |
|
|
To add individual endpoints |
|
|
To add individual users or user groups |
|
|
To remove groups of endpoints |
|
|
To remove individual endpoints |
|
|
To remove individual users or user groups |
|
The selected groups, users, or endpoints are displayed in the Assigned List.
A new policy is created for the selected device class. The policy is displayed in the Device Control Policies page.
Device collection policies allow you to define access rights for specific devices rather than an entire device class. Use the Device Collection Policy wizard to create policies for device collections.
- Select Manage > Device Control Policies.
The Device Control Policies page opens. - Click Create > Device collection policy.
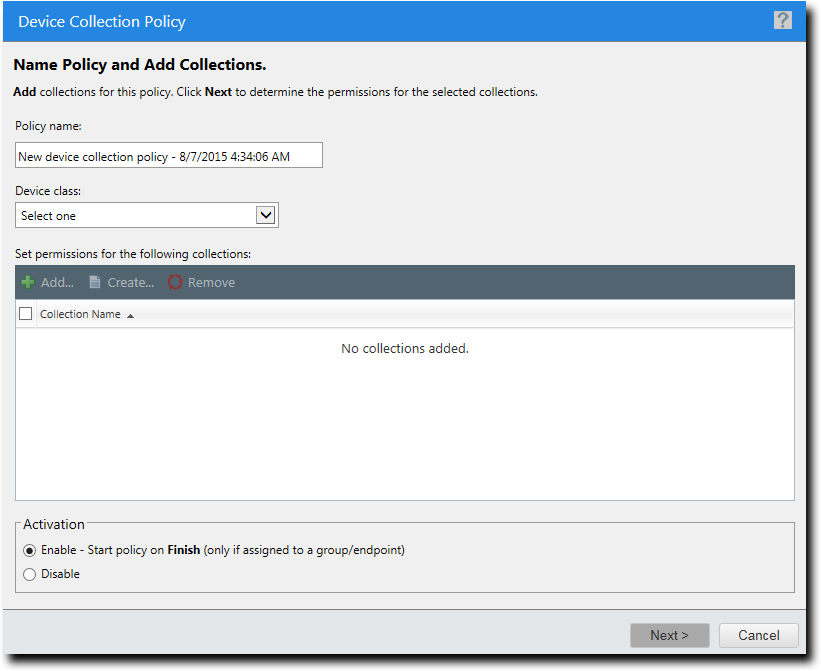
The Device Collection Policy wizard appears.
- Type a name for the policy in the Policy Name field.
- Select the class to which the policy will apply from the Device class drop-down list.
The device collection section becomes active.You can either add an existing collection or create a new one.
- [Optional] To add an existing collection:
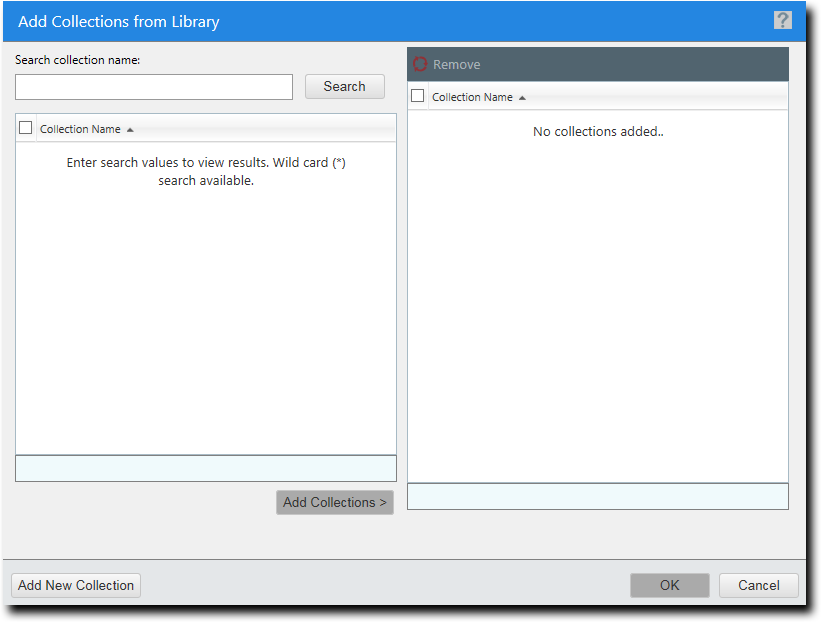
- Click Add.
The Add Collections from Library dialog opens.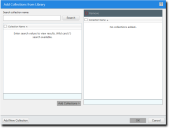
- Type a collection name in the Search collection name field and click Search.
A list of collections is displayed. - Select the collection you want to add.
- Click Add Collections.
- Click OK.
The Add Collections from Library dialog closes. - [Optional] Select the Disable option to delay the activation of the policy.
By default, the Enable option is selected, which activates the policy immediately upon completing the creation process.
- Click Add.
- [Optional] To create a new collection:
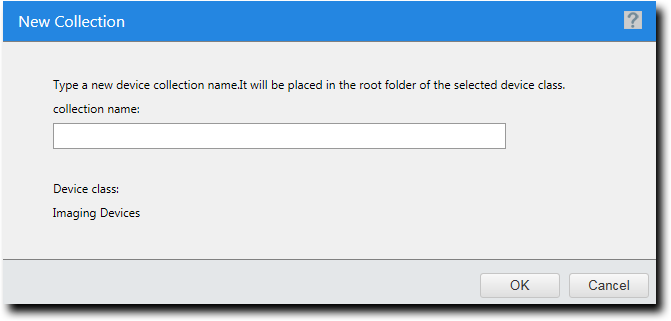
- Click Add New Collection.
The New Collection dialog displays.
- Type the name of the collection in the Collection name field.
- Click OK.
The New Collection dialog and the collection appears in the collections list.
- Click Add New Collection.
- Click Next.
The Device Collection Policy dialog opens.
- [Optional] Select the Permission settings check box to define read, write, and other permissions.
- [Optional] Select the Shadow settings check box to define read, write, and other permissions.
Shadow settings can only be enabled for the COM/Serial Ports, CD/DVD Drives, Floppy Disk Drives, LPT/Parallel Ports, and Removable Storage Devices classes. - [Optional] Select the Daily copy limit check box. Specify a copy limit value in the text box.
- Select the desired policy enforcement option. You can choose from the following options:
Option
Description
Always
The policy will apply at all times.
Online only
The policy will apply only when the endpoint/user/group is connected to the server.
Offline only
The policy will apply only when the endpoint/user/group is disconnected from the server.
Scheduled
The policy will apply only during a set schedule. To set the schedule:
- Enter the start time in the From field.
- Enter the end time in the To field.
- Select the check boxes for the days of the week in which the policy will be applied.
Temporary
The policy will give one-time access for a specified period. To specify the enforcement period:
- Select the Immediately option to begin enforcing the policy upon completion of the policy creation process.
- Select the date and time option and enter a date (mm/dd/yyyy format) and a time (hh:mm AM/PM format) to designate an enforcement start time in the future.
- Enter a date (mm/dd/yyyy format) and a time (hh:mm AM/PM format) to designate an enforcement end time in the future.
You can click on the clock icon to view and select a list of times in half hour increments and the calendar icon to view and select dates using a calendar.
- Click Next.
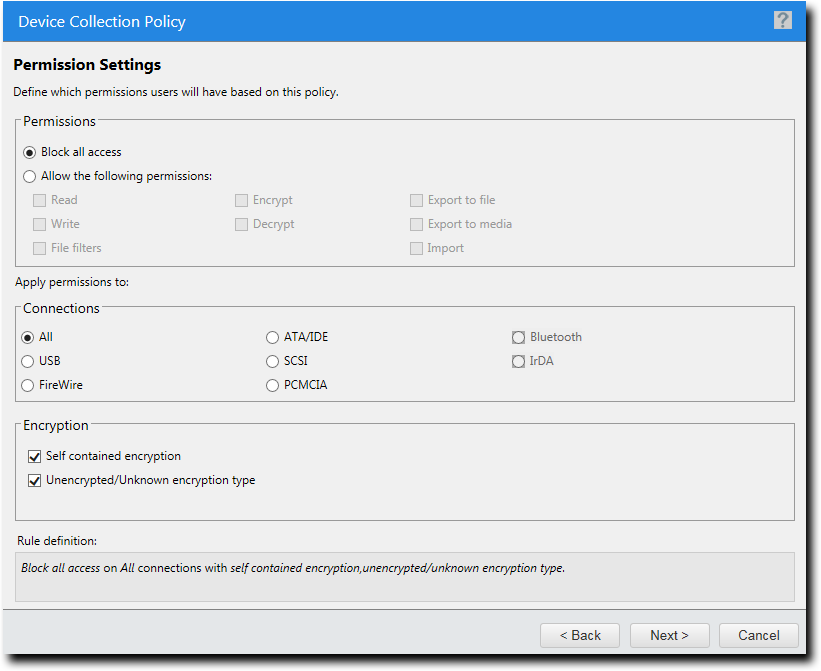
The Permission Settings page opens.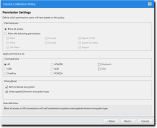
- Specify the permission details.
For more information on setting permissions, refer to Permission Settings for a Policy.- Select the Allow access with following radio button and then select the desired permissions check boxes. The available permissions vary according to device class.
- Select the connections you want to apply the permissions to in the Connections group box. The available connections vary according to device class.
- Select the applicable drives in the Drives group box. The availability of drives varies according to device class.
- [Optional] Specify the type of encryption in the Encryption group box. The availability of encryption options varies according to device class.
- Click Next.
The File Filters page opens.This page will only appear if you select File Filters in the Permission Settings page.
- Specify the file filtering options.
For more information on file filters, see File Type Filtering. - Click Next.
The Shadow Settings page opens.This page will only appear if you select Shadow settings in the Policy details page
- Specify the shadow settings.
Shadow files are stored in <install_dir>\DeviceControl\Shadow.Device Class Policy Type
Options
- COM/Serial Ports
- DVD/CD Drives
- Floppy Disk Drives
- LPT/Parallel Ports
- Modem / Secondary Network Access Device
- Portable Devices
- Removable Storage Devices
For both the Read and Write sections:
Do not shadow: No content is shadowed.
Full file content: Saves a copy of the entire file.
File name only: Records only the file name.
Printers
Do not shadow printed content: This setting can be used to prevent shadowing for specific assignment targets. For example, if you shadow printed content for a specific AD Group you can prevent shadowing for a specific user within that group by selecting this setting and assigning the policy to that user.
Shadow printed content: This setting is used to store a copy of all information sent to a printer during a print job governed by this policy. This information...
- Click Next.
The Assign policy page opens.This page is skipped when the wizard is launched from the Groups, Endpoints, or Users page of the Manage menu.
- Select the group, endpoint, or user the policy will apply to.
- Click Finish.
The Device Collection Policy wizard closes.

A new policy is created for the selected device collection. The policy is displayed in the Device Control Policies page.
Media collection policies are policies created to grant permissions to media collections in the Device Library.
- Select Manage > Device Control Policies.
The Device Control Policies page opens. - Click Create > Create media collection policy.
The Media Collection Policy wizard appears.
- Type the Policy name.
- To add an existing collection, click Add.
The Add Collections from Library dialog opens. - Type a collection name in the Search collection name field.
- Click Search.
A list of collections is displayed. - Select the collection you want to add.
- Click Add Collections.
The selected collection is added to the right side of the dialog. - Click OK.
The Add Collections from Library dialog closes. - Select whether you want the policy to be applicable immediately.
The Enable radio button is selected by default. If you do not want the policy to be auto-enabled, select Disable.You must manually select enable before the policy will be applicable.
- Click Next.
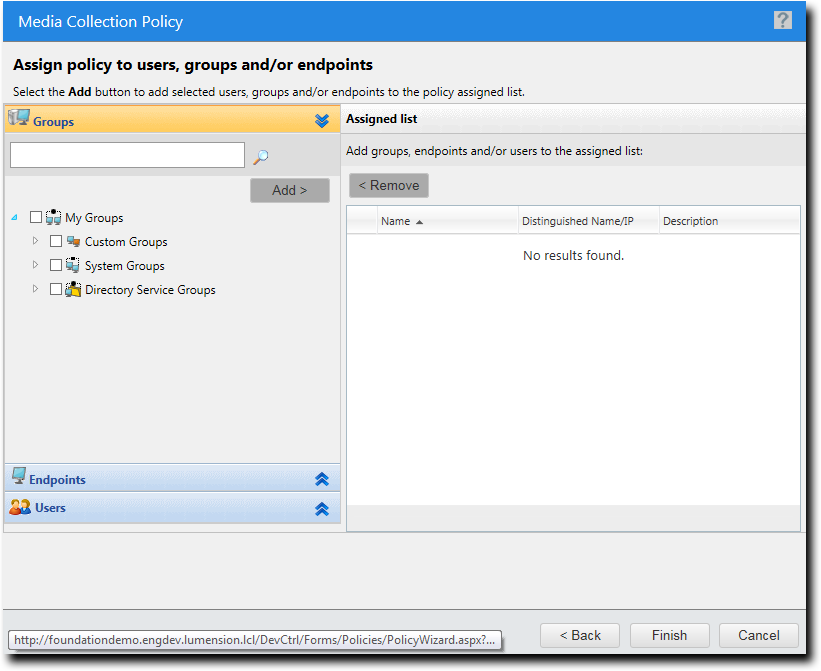
The Assign policy page opens.This page is skipped when the wizard is launched from the Groups, Endpoints, or Users page of the Manage menu.
- Select the group, endpoint, or user the policy will apply to.
- Click Finish.
A new policy is created for the selected media collection. The policy is displayed in the Device Control Policies page.

Step 7: Edit a Policy
Edit a policy as desired. While editing a policy, you can define permissions, specify shadowing and logging options, change assigned users and endpoints.
Prerequisites:
Complete Step 6: Create Device Control Policies.
- Select Manage > Device Control Policies.
The Device Control Policies page opens. - Select the policy you want to edit.
Filter the Policy Name and Device Class or Device Collection columns to locate the policies.
- Click Edit.
The Policy Wizard dialog opens.The policy wizard that opens will depend on the type of policy you are editing.
- Edit the policy details as desired.
- Click Finish.
The Policy Wizard dialog closes.
The selected policy is edited.
After Completing This Task:
Continue to Step 8: Generate Ivanti Device Control Reports.
Step 8: Generate Ivanti Device Control Reports
All Ivanti Device Control reports are accessible from the Reports menu. Select from the available report templates to view the details of that report.
Prerequisites:
- Complete Step 7: Edit a Policy.
- Review the Available Ivanti Device Control Reports.
Configuration:
- Select Reports > Device Control.
The Reports page opens. - From the display list, select the report you want to generate.
- Filter the report by selecting user or endpoint groups.
Not all reports will provide you with filtering options. Some reports do not have selection parameters.
- Click Generate Report.
The selected report opens in a new window.