Organizing Application Library by Application
Application Library files can be organized in Application categories.
Once the Application Library contains a number of executable files, the first stage in organizing them is to group them into distinct applications.
- In Application Browser, you create application containers for each software program. You can nest these containers up to three deep to create a logical structure.
- In the Application Control list, you select all the application's executable files and move them into its application container. Applications often have large numbers of executables, apart from the principal .exe file, and all of them must be moved.
- Sometimes the same file is used by more than one application. After you move the file to the first application container, you can copy it to other application containers.
When you have grouped all files into applications, you can start creating application groups to represent application usage in your organization. See Organizing Application Library by Application Group for more information.
Creating Applications
Application Browser allows you to create nested applications that help you organize and manage the files in Application Library.
- Select Manage > Application Library.
The Application Library page is displayed. - In Application Browser, click Ungrouped Files.
The Application Control list displays all files that have not yet been associated with an application. - Create the applications you need:
- Right-click APPLICATIONS.
- Select New from the contextual menu.
- Type a name for the new application.
- You can repeat this procedure to create all the application containers you need at this first level.
One or more application containers are added to the Application Browser.
- If required, create nested applications at the second level:
- Right-click one of the applications that have already been created.
- Select New from the contextual menu.
- Type a name for the new application.
- You can repeat this procedure to create all the applications you need at this level.
One or more new applications are added to the Application Browser at the second level.
- If required, create nested applications at the third level:
- Right-click one of the second-level applications already created.
- Select New from the contextual menu.
- Type a name for the new application.
- You can repeat this procedure to create all the applications you need at this level.
One or more new applications are added to the Application Browser at the third level.
Based on the files displayed and the company's software licenses, determine the applications needed and the best way to organize them. Applications can be nested up to three deep.
Application names must be unique at each level. For example, if you create two first-level applications called (say) Browsers and Business Applications, you cannot have a second-level application called Microsoft under both of them. This restriction is necessary because applications are subsequently organized into application groups.
The Application Browser has a set of application containers that provide an appropriate structure to organize and manage the files in Application Library.
Adding Files to an Application
You can add executable files associated with a particular software program to an appropriate application container.
- Select Manage > Application Library.
The Application Library page is displayed. - In the Application Browser, select one of the FILES containers: By Path, By Company, By Product, Unknown Files.
- In the Application Control list, select the files you want to add to the application.
- Select Add > Files To Application.
The Add To Application dialog opens.
- Do one of:
- Click the drop-down button and select an application from the list.
- If the list does not contain the application you need, type its name in the Application Name field. This adds a new application container to the APPLICATIONS root folder.
- Click OK.
The files are added to the application container.
Sort the files by folder to help identify the files for a particular application.
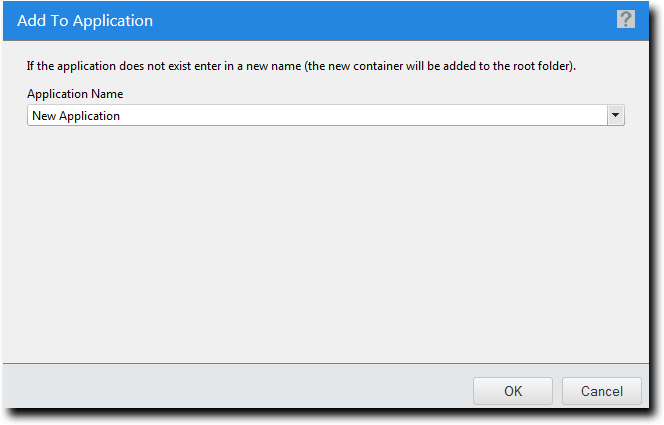
The dialog displays an alphabetically ordered flat list of all the applications that have been defined under APPLICATIONS. Ensure that the container you select is the correct one for the files you are moving.
The files will remain in the original FILES container.
Moving Files to Applications
You can move all the executable files associated with a particular software program into an appropriate application container.
- Select Manage > Application Library.
The Application Library page is displayed. - In the Application Browser, select the Ungrouped Files container (under APPLICATIONS).
- In the Application Control list, select the files you require for a particular application.
- Click Move.
The Move Files to Application dialog opens. - Select an Application from the list.
- Click OK.
The files are moved from Ungrouped Files to an application container.
Sort the files by folder to help identify the files for a particular application.
The dialog displays an alphabetically ordered flat list of all the applications that have been defined under APPLICATIONS. Depending on how you have defined and nested these containers, not all of them may be suitable for holding application files. Ensure that the container you select is the correct one for the files you are moving.
Copying Files into Applications
You can copy files from one application container to another.
Application suites from certain manufacturers often contain files that are used by more than one application. In this case, you must copy the file(s) into each relevant application container.
- Select Manage > Application Library.
The Application Library page is displayed. - In the Application Browser, select the application container that contains the file(s) you want to copy.
- In the Application Control list, select the file(s) that you want to copy.
- Click Copy.
The Copy to Application dialog opens. - Select an Application from the list.
- Click OK.
The selected files are copied from the source application container to the target container.
The dialog displays an alphabetically ordered flat list of all the application containers that have been created. Depending on how you have defined and nested them, they may not all be suitable for holding application files. Ensure that the container you select is the correct one for the files you are moving.
Moving an Application to an Application
You can associate an application container with an existing application container.
- Select Manage > Application Library.
The Application Library page is displayed. - In the Application Browser, select an application container.
- Right-click the application container and select Move.
The Move to Application dialog opens. The dialog displays an alphabetically ordered flat list of all the applications that have been defined under APPLICATIONS. - Select an Application from the list.
- Click OK.
The application container becomes a subgroup of the application container you moved it to.
Select an Applications File to Import
Use this window to import Applications into the Application Library using a valid XML file.
Generating the file using the Application Scan in the Agent Control Console
You can scan the applications on an endpoint to generate a list of applications installed on it.
- On the endpoint, select Start > Control Panel.
- Double-click Agent Control Panel.
- From the main menu, click Application Control.
- Click Scan.
Creating the file manually using the appropriate schema
You can create your own XML file using the following schema:
<?xml version="1.0"?>
<xs:schema id="NewDataSet" xmlns="" xmlns:xs="http://www.w3.org/2001/XMLSchema" xmlns:msdata="urn:schemas-microsoft-com:xml-msdata">
    <xs:element name="appdiscovery">
        <xs:complexType>
            <xs:sequence>
                <xs:element name="publishers" minOccurs="0" maxOccurs="unbounded">
                    <xs:complexType>
                        <xs:sequence>
                            <xs:element name="publisher" minOccurs="0" maxOccurs="unbounded">
                                <xs:complexType>
                                    <xs:attribute name="publishername" type="xs:string" />
                                    <xs:attribute name="issuer" type="xs:string" />
                                    <xs:attribute name="version" type="xs:string" />
                                    <xs:attribute name="serialnumber" type="xs:string" />
                                    <xs:attribute name="validfrom" type="xs:string" />
                                    <xs:attribute name="validto" type="xs:string" />
                                    <xs:attribute name="subject" type="xs:string" />
                                    <xs:attribute name="thumbprint" type="xs:string" />
                                    <xs:attribute name="certificateformat" type="xs:string" />
                                    <xs:attribute name="certificatebinary" type="xs:string" />
                                </xs:complexType>
                            </xs:element>
                        </xs:sequence>
                    </xs:complexType>
                </xs:element>
                <xs:element name="files" minOccurs="0" maxOccurs="unbounded">
                    <xs:complexType>
                        <xs:sequence>
                            <xs:element name="file" minOccurs="0" maxOccurs="unbounded">
                                <xs:complexType>
                                    <xs:sequence>
                                        <xs:element name="hash" minOccurs="0" maxOccurs="unbounded">
                                            <xs:complexType>
                                                <xs:attribute name="algorithm" type="xs:string" />
                                                <xs:attribute name="base64" type="xs:string" />
                                            </xs:complexType>
                                        </xs:element>
                                        <xs:element name="info" minOccurs="0" maxOccurs="unbounded">
                                            <xs:complexType>
                                                <xs:attribute name="key" type="xs:string" />
                                                <xs:attribute name="value" type="xs:string" />
                                            </xs:complexType>
                                        </xs:element>
                                        <xs:element name="signature" minOccurs="0" maxOccurs="unbounded">
                                            <xs:complexType>
                                                <xs:attribute name="thumbprint" type="xs:string" />
                                                <xs:attribute name="iscertificatevalid" type="xs:string" />
                                            </xs:complexType>
                                        </xs:element>
                                    </xs:sequence>
                                    <xs:attribute name="name" type="xs:string" />
                                    <xs:attribute name="size" type="xs:string" />
                                    <xs:attribute name="type" type="xs:string" />
                                    <xs:attribute name="creation" type="xs:string" />
                                    <xs:attribute name="lastaccessed" type="xs:string" />
                                    <xs:attribute name="lastmodified" type="xs:string" />
                                    <xs:attribute name="archive" type="xs:string" />
                                    <xs:attribute name="isfiletrusted" type="xs:string" />
                                    <xs:attribute name="sourceguid" type="xs:string" />
                                </xs:complexType>
                            </xs:element>
                        </xs:sequence>
                    </xs:complexType>
                </xs:element>
            </xs:sequence>
            <xs:attribute name="version" type="xs:string" />
            <xs:attribute name="timestamp" type="xs:string" />
            <xs:attribute name="agentname" type="xs:string" use="required" />
            <xs:attribute name="endpointguid" type="xs:string" />
            <xs:attribute name="jobname" type="xs:string" />
            <xs:attribute name="jobid" type="xs:string" />
            <xs:attribute name="SystemFile" type="xs:string" use="optional"  />
        </xs:complexType>
    </xs:element>
    <xs:element name="NewDataSet" msdata:IsDataSet="true" msdata:UseCurrentLocale="true">
        <xs:complexType>
            <xs:choice minOccurs="0" maxOccurs="unbounded">
                <xs:element ref="appdiscovery" />
            </xs:choice>
        </xs:complexType>
    </xs:element>
</xs:schema>