Working with Easy Auditor
An Easy Auditor policy authorizes applications currently on an endpoint by adding them to the whitelist, without blocking applications that are installed afterwards.
An Easy Auditor policy has three main functions:
- Adding applications currently on the endpoint to the endpoint's whitelist
- Allowing non-authorized applications to run (application control enforcement is off)
- Enabling logging (optional)
- log non-authorized applications (this is on by default for Easy Auditor)
- log authorized applications (initial executable only)
- log all associated executables and library files
Warning: Logging authorized applications will generate very large log files. This option should only be used for trouble-shooting purposes.
You can use Easy Auditor to start implementing application control on the network. It creates a whitelist of authorized applications without blocking any later applications or updates. This allows you to build up a picture of application usage on the network without affecting users' ability to run the applications they need.
Easy Auditor is similar to Easy Lockdown in that both create a whitelist of permitted applications, but the crucial difference between them is that Easy Auditor subsequently permits non- authorized applications to run, whereas Easy Lockdown blocks them.
Creating an Easy Auditor Policy
You can create an Easy Auditor policy and assign it to endpoints or groups. It creates a whitelist on each endpoint of the applications installed on that endpoint, without blocking non-authorized applications and updates that are subsequently installed.
Tip: Easy Auditor carries out an application scan of the endpoint, which can impact its performance. To lessen this impact, you can do the following:
- Reduce the scan time by excluding certain files from the scan (although these files will not then be added to the endpoint whitelist). See Excluding Files with ACAPPSCANEXCLUDE for more information.
- Reduce the effect on users by running the scan outside business hours.
- Select Manage > Policy Wizards > Easy Auditor.
The Easy Auditor Wizard opens to the Name and Logging Options page.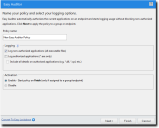
- Type a Policy Name for the new Easy Auditor policy.
- Select the Logging options. As the focus of Easy Auditor is recording application activity on the endpoint, you must select at least one logging option.
- Select an option under Activation.
- Click Next.
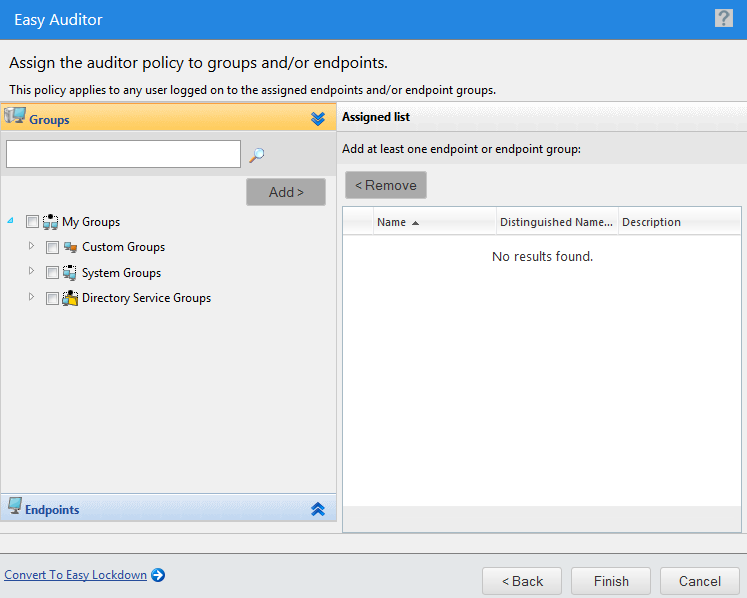
- Build a list of targets (groups or endpoints) for the policy, using any of the following methods:
- Select a group or groups from the Groups list.
- Click Add >.
- Select an endpoint or endpoints from the Endpoints list.
- Click Add >.
- Select a group or groups from the Assigned List.
- Click < Remove.
- Select an endpoint or endpoints from the Assigned List.
- Click < Remove.
- Click Finish.
The Easy Auditor policy is created and assigned to the selected groups or endpoints. The new policy is displayed on the Managed Policies tab, with a Policy Type of Easy Auditor.

Try to give the policy a descriptive name. For example, if this Easy Auditor policy relates to a group of endpoints used by the product managers you could name it Product Management - Audit.
An authorized application is one that was added to the endpoint's whitelist when Easy Auditor was applied, or one that is authorized through any trust mechanism. A non-authorized application is one that is not on the whitelist and is not authorized through any trust mechanism.
Log non-authorized applications (all executable files)
All non-authorized applications the user attempts to run are logged. By default, this option is selected for Easy Auditor.
All executable file types will be logged, not just .exe files.
This option also logs Trusted Updater policy "Added to whitelist" events.
Log authorized applications (*.exe only)
All authorized applications the user runs are logged.
Only the initial executable is logged. Use the Include all details option below to log subsequent executable files or dependent libraries loaded later.
This option also logs all events related to Trusted Updater, Trusted Publisher, and Trusted Path policies.
Include all details on authorized applications (e.g. *.dll, *.cpl, etc.)
Detailed information on authorized applications is logged (every executable file and library loaded will be logged). This option is only available if the Log authorized applications option is selected.
Caution: The authorized application options should only be used for monitoring a limited number of endpoints for a short time. If selected for multiple endpoints for multiple days, the database will quickly grow to an unmanageable size.
To create a log query and view the log results refer to Using Application Control Log Queries.
These logging options can affect other Application Control policies. See Logging Managed Policies for more information.
|
Option |
Description |
|---|---|
|
Enable |
The policy will be enabled once it is created, as long as you assign it to a group or endpoint. |
|
Disable |
The policy will be disabled once created, even if it is assigned to a group or endpoint. You can enable it at a later time. |
If you click Finish at this point, the policy will be created but not assigned to any endpoints. You can assign the policy to endpoints at a later time.
If you think that an Easy Lockdown policy is more appropriate at this point than Easy Auditor you can quickly switch to the relevant wizard by clicking Convert to Easy Lockdown. See Creating an Easy Lockdown Policy for more information.
The Easy Auditor Wizard opens to the Assign Groups and Endpoints page.
|
Method |
Steps |
|---|---|
|
To add groups of endpoints: |
|
|
To add individual endpoints: |
|
|
To remove groups of endpoints: |
|
|
To remove individual endpoints: |
|
Use the double-arrows (![]()
![]() ) to switch between groups and endpoints.
) to switch between groups and endpoints.
The selected groups and endpoints are displayed in the Assigned List.
Assigning an Easy Auditor Policy
You can select an Easy Auditor policy and assign it to endpoints and/or groups of endpoints.
- Select Manage > Application Control Policies.
The Managed Policies tab on the Application Control Policies page is displayed.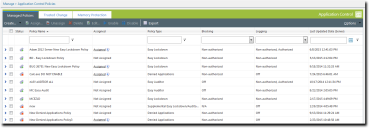
- Select an Easy Auditor policy.
- Click Assign.
The Assign Easy Auditor dialog is displayed. - Build a list of targets (groups or endpoints) for the policy, using any of the following methods:
- Select a group or groups from the Groups list.
- Click Add >.
- Select an endpoint or endpoints from the Endpoints list.
- Click Add >.
- Select a group or groups from the Assigned List.
- Click < Remove.
- Select an endpoint or endpoints from the Assigned List.
- Click < Remove.
- Click OK.
The Easy Auditor policy is assigned to selected endpoints and/or groups of endpoints.
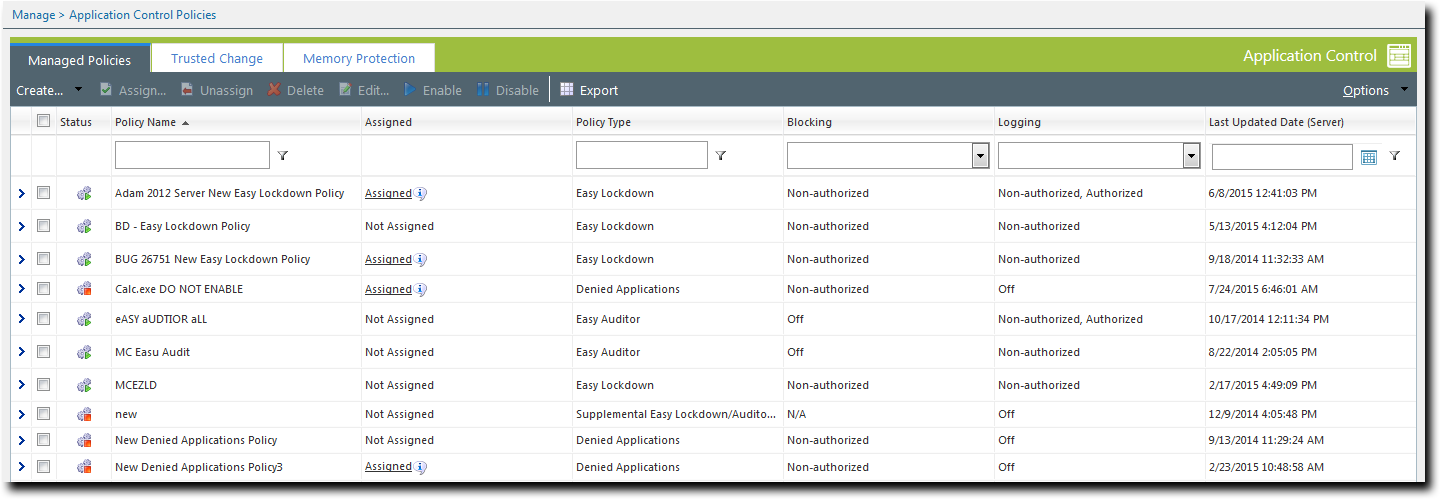
Filter the Policy Name and Policy Type columns to locate the policy.
The selected policy is highlighted.
|
Method |
Steps |
|---|---|
|
To add groups of endpoints: |
|
|
To add individual endpoints: |
|
|
To remove groups of endpoints: |
|
|
To remove individual endpoints: |
|
Use the double-arrows (![]()
![]() ) to switch between groups and endpoints.
) to switch between groups and endpoints.
The selected groups and endpoints are displayed in the Assigned List.
Assigning an Easy Auditor Policy to a Group
You can assign an Easy Auditor policy to a group of selected endpoints using the Assign Policy dialog.
The Assign Policy dialog is also used to assign an Easy Auditor policy to a selected endpoint. See Assigning an Easy Auditor Policy to an Endpoint if you are assigning the policy to an endpoint.
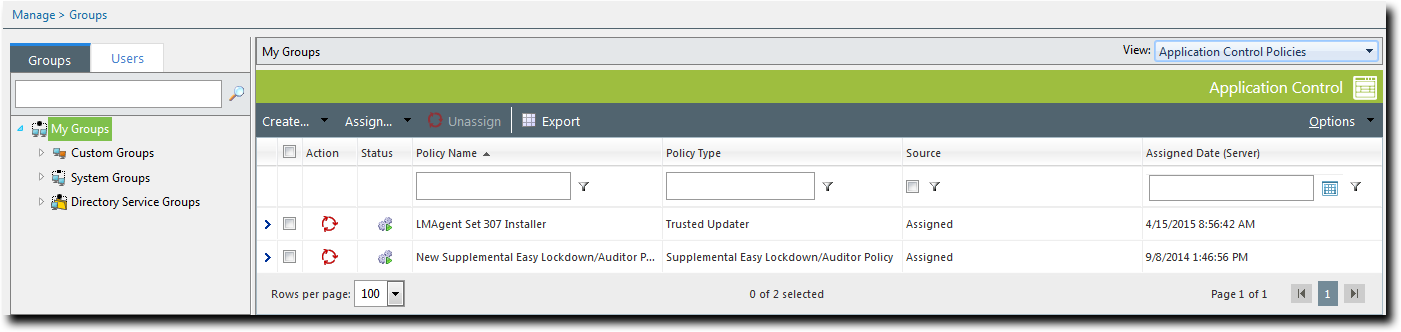
- Select Manage > Groups.
The Groups page is displayed. - Select a group from the Browser tree.
- From the View list, select Application Control Policies.
The Application Control policies for the selected group are displayed.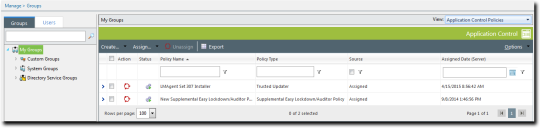
- Select Assign > Easy Auditor.
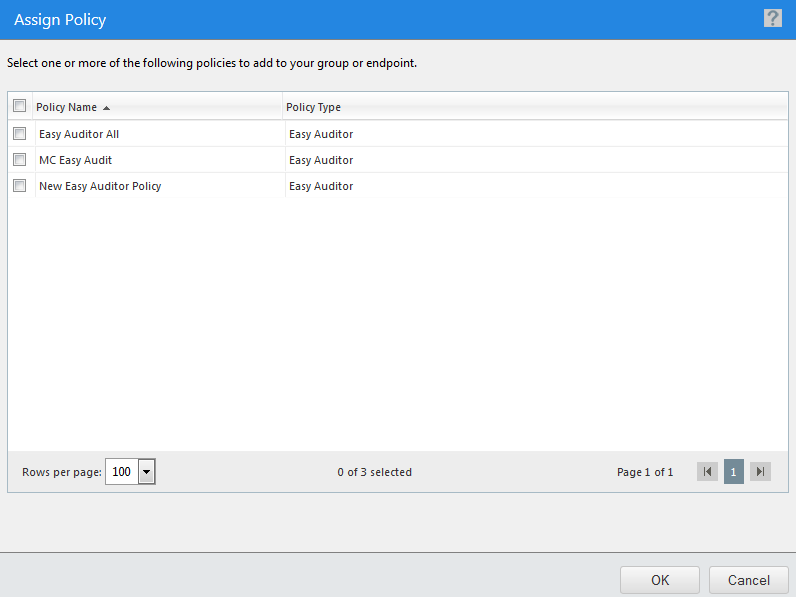
The Assign Policy dialog is displayed.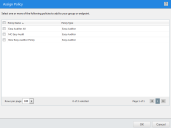
- Select an Easy Auditor policy.
- Click OK.
The Easy Auditor policy is assigned to the group.
Inherited policies can not be selected. In addition, the Source column reads Inherited.
Assigning an Easy Auditor Policy to an Endpoint
You can assign an Easy Auditor policy to a selected endpoint.
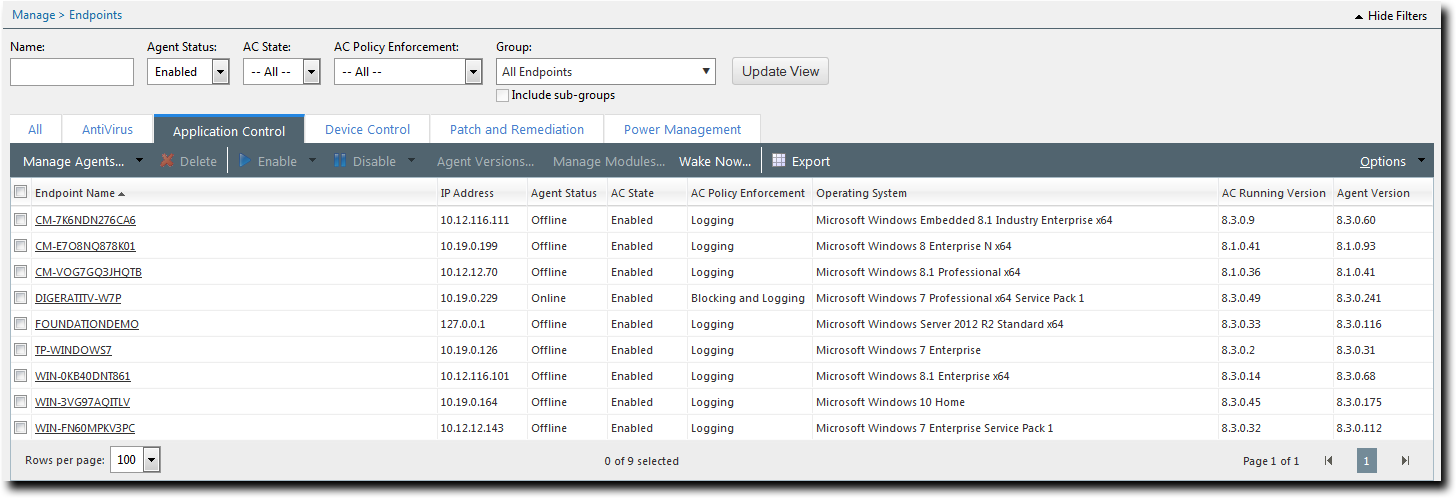
- Select Manage >Endpoints.
The Endpoints page opens to the All tab. - In the Endpoint Name column, click an endpoint link.
Detailed information for the selected endpoint is displayed. - Select the Application Control Policies tab.
A list of Application Control policies assigned to the endpoint is displayed.
- Select Assign > Easy Auditor.
The Assign Policy dialog is displayed. - Select an Easy Auditor policy.
- Click OK.
The Easy Auditor policy is assigned to the endpoint.
Unassigning an Easy Auditor Policy
You can unassign an Easy Auditor policy, removing the association between it and any endpoints. Policies that are no longer assigned remain in the system as unassigned policies, which you can re- assign to endpoints at a later time.
- Select Manage > Application Control Policies.
A list of policies is displayed. - Select one or more Easy Auditor policies.
- Click Unassign.
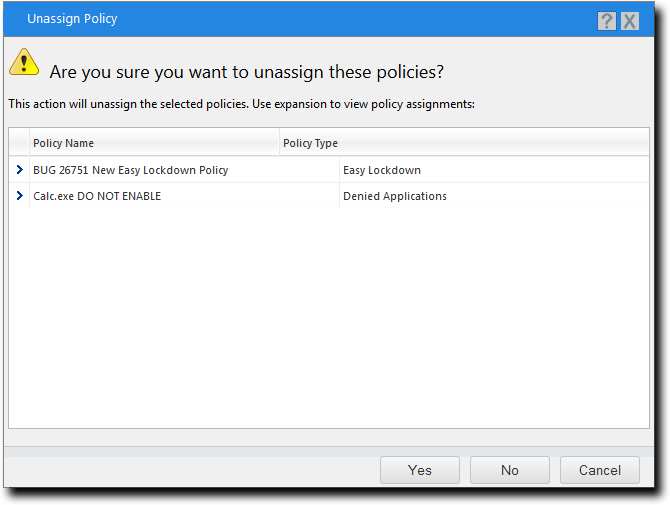
One of two confirmation dialogs is displayed, depending on whether you selected a single policy or multiple policies.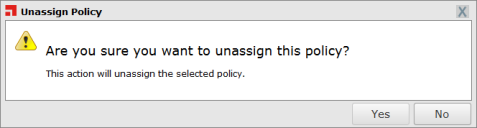
- Click Yes.
One or more Easy Auditor policies are unassigned.
Filter the Policy Name and Policy Type columns to locate the policy.
The selected policies are highlighted.

Editing an Easy Auditor Policy
You can edit an Easy Auditor policy and, for example, change the logging options or the endpoints to which it is assigned.
- Select Manage > Application Control Policies.
A list of policies is displayed. - Select an Easy Auditor policy.
- Click Edit.
The Easy Auditor Wizard opens to the Name and Logging Options page. - [Optional] Edit the Policy Name.
- Select the Logging options. As the focus of Easy Auditor is recording application activity on the endpoint, you must select at least one logging option.
- [Optional] Edit the Activation options.
- Click Next.
The Easy Auditor Wizard opens to the Assign Groups and Endpoints page. - [Optional] Edit the list of targets (groups or endpoints) for the policy, using any of the following methods:
- Select a group or groups from the Groups list.
- Click Add >.
- Select an endpoint or endpoints from the Endpoints list.
- Click Add >.
- Select a group or groups from the Assigned List.
- Click < Remove.
- Select an endpoint or endpoints from the Assigned List.
- Click < Remove.
- Click Finish.
The Easy Auditor policy is edited.
Filter the Policy Name and Policy Type columns to locate the policy.
The selected policy is highlighted.
Give the policy a descriptive name. For example, if this Easy Auditor policy relates to a group of endpoints used by the product managers you could name it Product Management - Audit.
An authorized application is one that was added to the endpoint's whitelist when Easy Auditor was applied, or one that is authorized through any trust mechanism. A non-authorized application is one that is not on the whitelist and is not authorized through any trust mechanism.
Log non-authorized applications (all executable files)
All non-authorized applications the user attempts to run are logged. By default, this option is selected for Easy Auditor.
All executable file types will be logged, not just .exe files.
This option also logs Trusted Updater policy "Added to whitelist" events.
Log authorized applications (*.exe only)
All authorized applications the user runs are logged.
Only the initial executable is logged. Use the Include all details option below to log subsequent executable files or dependent libraries loaded later.
This option also logs all events related to Trusted Updater, Trusted Publisher, and Trusted Path policies.
Include all details on authorized applications (e.g. *.dll, *.cpl, etc.)
Detailed information on authorized applications is logged (every executable file and library loaded will be logged). This option is only available if the Log authorized applications option is selected.
Caution: The authorized application options should only be used for monitoring a limited number of endpoints for a short time. If selected for multiple endpoints for multiple days, the database will quickly grow to an unmanageable size.
To create a log query and view the log results refer to Using Application Control Log Queries.
These logging options can affect other Application Control policies. See Logging Managed Policies for more information.
|
Option |
Description |
|---|---|
|
Enable |
The policy will be enabled once it is created, as long as you assign it to a group or endpoint. |
|
Disable |
The policy will be disabled once created, even if it is assigned to a group or endpoint. You can enable it at a later time. |
|
Method |
Steps |
|---|---|
|
To add groups of endpoints: |
|
|
To add individual endpoints: |
|
|
To remove groups of endpoints: |
|
|
To remove individual endpoints: |
|
Use the double-arrows (![]()
![]() ) to switch between groups and endpoints.
) to switch between groups and endpoints.
Disabling an Easy Auditor Policy
You can disable Easy Auditor policies without deleting them. The details of the policies are retained and you can enable them again at a later time.
- Select Manage > Application Control Policies.
A list of policies is displayed. - Select the enabled Easy Auditor policy or policies that you want to disable.
- Click Disable.
One or more Easy Auditor policies are disabled.
Filter the Policy Name and Policy Type columns to locate the policy.
The selected policies are highlighted.
Enabling an Easy Auditor Policy
You can enable an Easy Auditor policy that is currently disabled.
- Select Manage > Application Control Policies.
A list of Application Control Policies is displayed. - Select the disabled Easy Auditor policy or policies that you want to enable.
- Click Enable.
One or more Easy Auditor policies are enabled.
Filter the Policy Name and Policy Type columns to locate the policy.
The selected policies are highlighted.
Deleting an Easy Auditor Policy
You can delete an Easy Auditor policy, as long as it is not assigned to an endpoint.
- Select Manage > Application Control Policies.
A list of Application Control Policies is displayed. - Select an Easy Auditor policy that is not assigned to an endpoint (Assigned column value of Not Assigned).
- Click Delete.
A confirmation dialog is displayed. - Click Yes.
The Easy Auditor policy is deleted.
Filter the Policy Name and Policy Type columns to locate the policy.
The selected policy is highlighted.
If the policy is currently in use, a message is displayed telling you that the policy can not be deleted until it has been unassigned.
Exporting an Easy Auditor Policy
You can export a list of policies to a CSV (Comma Separated Value) file.
To export data, refer to Exporting Data.
The list of policies is saved as a CSV file with the following columns:
|
Name |
Description |
|---|---|
|
Status |
Enabled or Disabled |
|
Policy Name |
The name of the policy |
|
Assigned |
Assigned/Not Assigned (if assigned, export includes the groups and endpoints that the policy is assigned to) |
|
Policy Type |
The type of policy (Easy Lockdown, Trusted Updater, and so on) |
|
Blocking |
Off, On, Authorized, Non-authorized, or (Authorized, Non-authorized) |
|
Logging |
Authorized, Non-authorized, or Off |
|
Last Updated Date |
The date the policy was last changed |