Working with Easy Lockdown
An Easy Lockdown policy authorizes applications currently on an endpoint by adding them to a whitelist, and blocks any applications that are installed afterwards.
An Easy Lockdown policy has three main functions:
- Allowing applications currently on the endpoint to run by adding them to the endpoint's whitelist
- Applying application control enforcement - non-authorized applications are blocked
- Enabling logging (optional; no logging options are selected for Easy Lockdown by default)
- log non-authorized applications
- log authorized applications (initial executable only)
- log all associated executables and library files
You can use Easy Lockdown to consolidate application control on the network after an appropriate evaluation period. It creates a whitelist of authorized applications and blocks any later applications.
Easy Lockdown is similar to Easy Auditor in that both create a whitelist of permitted applications, but the crucial difference between them is that Easy Lockdown subsequently blocks all non-authorized applications, whereas Easy Auditor permits them.
Easy Lockdown is performed when an Easy Lockdown policy is assigned to selected groups or endpoints. It is also performed when a disabled Easy Lockdown policy is enabled.
Important: You should only apply Easy Lockdown when you are confident that it will not adversely affect endpoints or users. This usually means having appropriate trust mechanisms in place to authorize applications and updates that are necessary for the continuing operation of the endpoints and installed software.
Easy Lockdown in Practice
Thorough preparation is the key to successfully applying Easy Lockdown to an endpoint.
Applying Easy Lockdown is a major step in implementing application control as it authorizes a set of approved applications on the endpoint's whitelist. Therefore, before you apply Easy Lockdown, you should carry out a thorough auditing process to evaluate the patterns of software use on the endpoint.
After evaluating the audit results you should:
- Install all applications that will be needed on the endpoint.
- Uninstall all unwanted and unnecessary applications.
- Identify applications that are revised frequently or that self-update dynamically. Ensure that you have trust mechanisms in place that will automate these processes.
- Identify web applications and other programs which use ActiveX controls and change frequently. If digitally signed, these are ideal candidates for a Trusted Publisher policy.
- Run an antivirus scan to ensure that no malware or viruses are present on the endpoints.
Installing or uninstalling software at a later stage may require removing and re-applying Easy Lockdown. This can entail considerable effort, and should be avoided if possible.
If a program attempts to install a new ActiveX control on a locked-down endpoint, you will see a warning that the ActiveX control failed to load. You then have a problem because the control is only partially installed. See Handling Partial ActiveX Installation for information on how to handle this.
These actions provide the basis for successfully applying Easy Lockdown, and reduce the administrative overhead after lockdown.
You can convert an existing Easy Auditor policy to an Easy Lockdown policy. This can save time if a lot of effort has been invested in creating the group/endpoint assignments. See Converting Easy Auditor to Easy Lockdown for more information.
Handling Partial ActiveX Installation
If an attempt is made to install a new ActiveX control on a locked-down endpoint, the control will only partially install and an error message is displayed.
You can have ActiveX controls on an endpoint's whitelist just like any other type of executable file. But if you try to install a new ActiveX control after Easy Lockdown (or run an application that attempts to install such a control), you will see a message such as "ActiveX control failed to load! The <control name> could not get user credentials. Please check browser security settings."

Important: If you see this message, there is no point attempting to change the browser settings. Application Control will simply continue to block the unauthorized control.
What happens here is that the ActiveX control is only partially installed and is stuck in an unregistered intermediate state. You will continue to see the warning message in the browser even if you remove Easy Lockdown.
At this point, you need to do the following:
- Open the folder "C:\WINDOWS\Downloaded Program Files".
- Identify and delete the ActiveX control identified in the warning message.
You now have the following options to get the ActiveX control working:
Authorize with Trusted Publisher: If the ActiveX control has been digitally signed, it can be added to a Trusted Publisher policy that allows it to execute on the endpoint. For more information, see Working with Trusted Publisher.
Authorize with Trusted Path: The ActiveX control can be kept in a location designated as a Trusted Path. For more information, see Working with Trusted Path.
Remove/Re-apply Easy Lockdown:
- Remove Easy Lockdown from the endpoint.
- Re-install the ActiveX control. The control should install and register itself correctly.
- Re-apply Easy Lockdown to the endpoint.
Caution: Removing and re-applying Easy Lockdown can pose a considerable security risk. In the period since the original lockdown, dangerous or unapproved software may have been downloaded or copied to the endpoint. Easy Lockdown should always be preceded by an auditing process to ensure that undesirable files are not added to the endpoint's whitelist.
Creating an Easy Lockdown Policy
You can create an Easy Lockdown policy and assign it to endpoints or groups. It creates a whitelist on each endpoint of the applications installed on that endpoint, and blocks all non-authorized applications and updates that are subsequently installed.
Important: You should only apply Easy Lockdown when you are confident that it will not adversely affect endpoints or users. This usually means having appropriate trust mechanisms in place to authorize applications and updates that are necessary for the continuing operation of the endpoints and installed software.
Tip: Easy Lockdown carries out an application scan of the endpoint, which can impact its performance. To lessen this impact, you can do the following:
- Reduce the scan time by excluding certain files from the scan (although these files will not then be added to the endpoint whitelist). See Excluding Files with ACAPPSCANEXCLUDE for more information.
- Reduce the effect on users by running the scan outside business hours.
- Select Manage > Policy Wizards > Easy Lockdown.
The Easy Lockdown Wizard opens to the Name and Logging Options page.
- Type a Policy Name for the new Easy Lockdown policy.
- Select the Logging options.
- Select an option under Activation.
- Click Next.
- Build a list of targets (groups or endpoints) for the policy, using any of the following methods:
- Select a group or groups from the Groups list.
- Click Add >.
- Select an endpoint or endpoints from the Endpoints list.
- Click Add >.
- Select a group or groups from the Assigned List.
- Click < Remove.
- Select an endpoint or endpoints from the Assigned List.
- Click < Remove.
- Click Finish.
The Easy Lockdown policy is created and assigned to the selected groups or endpoints. The policy is displayed on the Managed Policies tab, with a Policy Type of Easy Lockdown.
The new policy is sent to the endpoint(s) or group(s), each endpoint is scanned, and a unique whitelist is created for each endpoint. Once the whitelist is created, enforcement will start and new or changed executables will not be allowed to run on the endpoints (unless explicitly permitted by a trust mechanism).
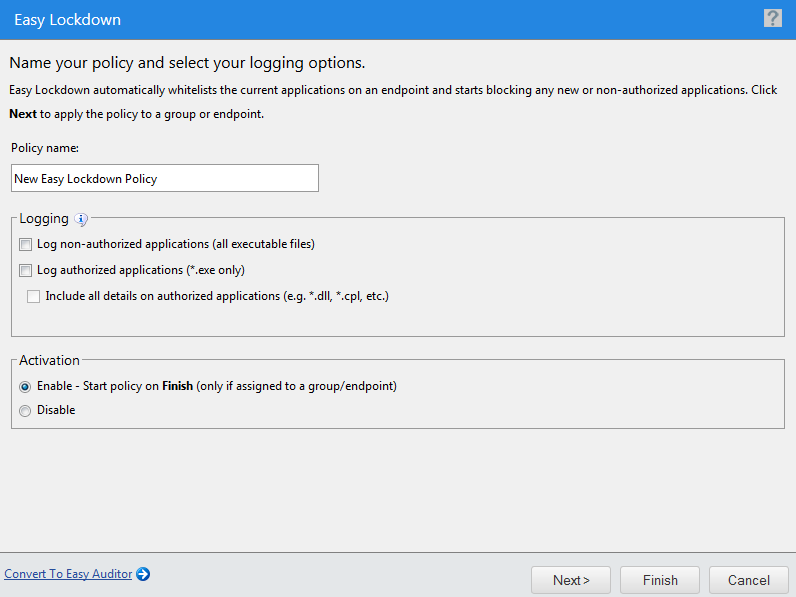
Give the policy a descriptive name. For example, if this Easy Lockdown policy relates to a group of endpoints used by the product managers you could name it Product Management - Lockdown.
An authorized application is one that was on the endpoint when Easy Auditor or Easy Lockdown was applied, or one that is authorized through any trust mechanism. A non-authorized application is one that was not part of the lockdown and is not authorized through any trust mechanism.
Log non-authorized applications (all executable files): All non-authorized applications the user attempts to run are logged. By default, this option is not selected for Easy Lockdown.
All executable file types will be logged, not just .exe files.
This option also logs Trusted Updater policy "Added to whitelist" events.
Log authorized applications (*.exe only): All authorized applications the user runs are logged.
Only the initial executable is logged. Use the Include all details option below to log subsequent executable files or dependent libraries loaded later.
This option also logs all events related to Trusted Updater, Trusted Publisher, and Trusted Path policies.
Include all details on authorized applications (e.g. *.dll, *.cpl, etc.): Detailed information on authorized applications is logged (every executable file and library loaded will be logged). This option is only available if the Log authorized applications option is selected.
Caution: The authorized application options should only be used for monitoring a limited number of endpoints for a short time. If selected for multiple endpoints for multiple days, the database will quickly grow to an unmanageable size.
To create a log query and view the log results refer to Using Application Control Log Queries.
These logging options can affect other Application Control policies. See Logging Managed Policies for more information.
|
Option |
Description |
|---|---|
|
Enable |
The policy will be enabled once it is created, as long as you assign it to a group or endpoint. |
|
Disable |
The policy will be disabled once created, even if it is assigned to a group or endpoint. You can enable it at a later time. |
If you click Finish at this point, the policy will be created but not assigned to any endpoints. You can assign the policy to endpoints at a later time.
At this point, if you think that an Easy Auditor policy is more appropriate than Easy Lockdown you can quickly switch to the relevant wizard by clicking Convert to Easy Auditor. See Creating an Easy Auditor Policy for more information.
The Easy Lockdown Wizard opens to the Assign Groups and Endpoints page.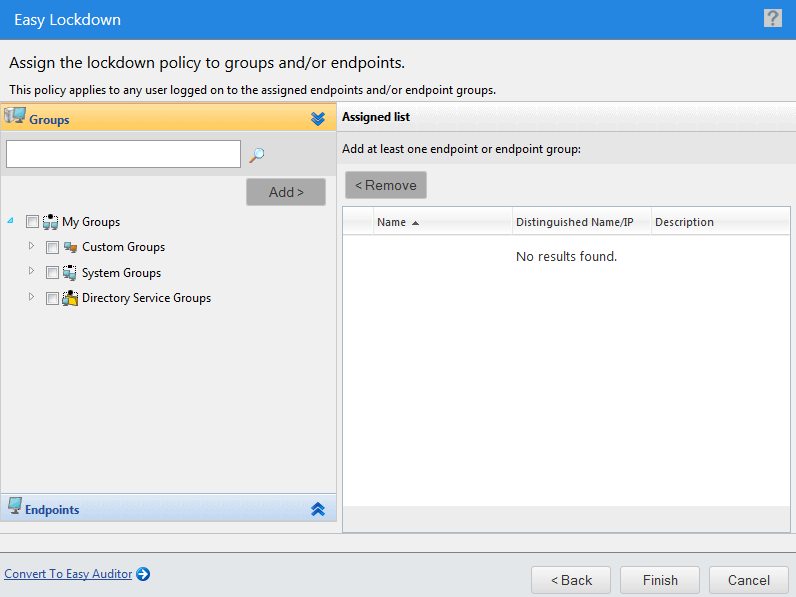
|
Method |
Steps |
|---|---|
|
To add groups of endpoints: |
|
|
To add individual endpoints: |
|
|
To remove groups of endpoints: |
|
|
To remove individual endpoints: |
|
Use the double-arrows (![]()
![]() ) to switch between groups and endpoints.
) to switch between groups and endpoints.
The selected groups and endpoints are displayed in the Assigned List.
If an application is installed while Easy Lockdown is running, there is no guarantee that all of its files will be added to the endpoint’s whitelist. This can lead to unpredictable results when the application is launched, so ensure that no applications are installed during Easy Lockdown.
If an application is installed during Easy Lockdown and then fails to operate correctly, you must regenerate the whitelist. Disable, then enable the Easy Lockdown policy (or alternatively unassign, then assign the policy). The application should then work normally.
Converting Easy Auditor to Easy Lockdown
You can convert an existing Easy Auditor policy to an Easy Lockdown policy. This may save time if a lot of work has already been done creating the group/endpoint assignments.
It can be convenient to convert an existing Easy Auditor policy to Easy Lockdown rather than creating an Easy Lockdown policy from scratch. You may have invested a lot of time and effort creating the group and endpoint assignments, and fine-tuning them over the length of time the Easy Auditor policy has been in use. Converting the policy avoids repeating this work.
When activated, the Easy Lockdown policy carries out a scan to generate a new whitelist, and then starts enforcing application control. The new whitelist is necessary because applications may have been added to the endpoint after the original Easy Auditor policy was created. While these applications
can run under Easy Auditor, they are not on the endpoint's whitelist, so they will not run under Easy Lockdown.
You can also convert an existing Easy Lockdown policy to an Easy Auditor policy, but this is less likely to provide a benefit.
Converting an Easy Auditor Policy
You can convert an existing Easy Auditor policy to an Easy Lockdown policy. This regenerates the whitelist on each endpoint and enforces application control, thereby blocking non-authorized applications.
- Select Manage > Application Control Policies.
The Managed Policies page opens. - Select the Easy Auditor policy you want to convert to Easy Lockdown.
- Click Edit.
The Easy Auditor Wizard page opens. - Click Convert to Easy Lockdown.
The Easy Auditor Wizard changes to the Easy Lockdown Wizard. - If required, change the name for the new Easy Lockdown policy.
- If required, change the Logging options. By default, Easy Lockdown does not have any logging options selected.
- Select an option under Activation.
- Click Next.
The Easy Lockdown Wizard opens to the Assign Groups and Endpoints page. - If required, modify the list of targets (groups or endpoints) for the policy.
- Select a group or groups from the Groups list.
- Click Add >.
- Select an endpoint or endpoints from the Endpoints list.
- Click Add >.
- Select a group or groups from the Assigned List.
- Click < Remove.
- Select an endpoint or endpoints from the Assigned List.
- Click < Remove.
- Click Finish.
The Easy Lockdown policy is created and assigned to the selected groups or endpoints. The new policy is displayed on the Managed Policies tab, with a Policy Type of Easy Lockdown. If the Activation option is set to Enable, the policy is applied immediately, a new whitelist is generated, and application control is enforced.
An authorized application is one that was added to the endpoint's whitelist when Easy Lockdown was applied, or one that is authorized through any trust mechanism. A non-authorized application is one that is not on the whitelist and is not authorized through any trust mechanism.
Log non-authorized applications (all executable files): All non-authorized applications the user attempts to run are logged.
All executable file types will be logged, not just .exe files.
This option also logs Trusted Updater policy "Added to whitelist" events.
Log authorized applications (*.exe only): All authorized applications the user runs are logged.
Only the initial executable is logged. Any subsequent executable files or dependent libraries loaded by the initial executable are not logged. Use the Include all details option below to log those events as well.
This option also logs all events related to Trusted Updater, Trusted Publisher, and Trusted Path policies.
Include all details on authorized applications (e.g. *.dll, *.cpl, etc.): Detailed information on authorized applications is logged (every executable file and library loaded will be logged). This option is only available if the Log authorized applications option is selected.
Caution: This option should only be used for monitoring a limited number of endpoints for a short time. If this option is selected for multiple endpoints for multiple days, the database will quickly grow to an unmanageable size.
To create a log query and view the log results refer to Using Application Control Log Queries.
These logging options can affect other Application Control policies. See Logging Managed Policies for more information.
|
Option |
Description |
|---|---|
|
Enable |
The policy will be enabled once it is created, as long as you assign it to a group or endpoint. |
|
Disable |
The policy will be disabled once created, even if it is assigned to a group or endpoint. You can enable it at a later time. |
A common reason for converting an Easy Auditor policy to Easy Lockdown is to make use of the work that has been put into creating the group/endpoint assignments. It is unlikely, therefore, that you will be making major modifications to this list.
|
Method |
Steps |
|---|---|
|
To add groups of endpoints: |
|
|
To add individual endpoints: |
|
|
To remove groups of endpoints: |
|
|
To remove individual endpoints: |
|
Use the double-arrows (![]()
![]() ) to switch between groups and endpoints.
) to switch between groups and endpoints.
The selected groups and endpoints are displayed in the Assigned List.
Assigning an Easy Lockdown Policy
You can select an Easy Lockdown policy and assign it to endpoints and/or groups of endpoints.
Important: You should only apply Easy Lockdown when you are confident that it will not adversely affect endpoints or users. This usually means having appropriate trust mechanisms in place to authorize applications and updates that are necessary for the continuing operation of the endpoints and installed software.
- Select Manage > Application Control Policies.
The Managed Policies tab on the Application Control Policies page is displayed.
- Select an Easy Lockdown policy.
- Click Assign.
The Assign Easy Lockdown dialog is displayed. - Build a list of targets (groups or endpoints) for the policy, using any of the following methods:
- Select a group or groups from the Groups list.
- Click Add >.
- Select an endpoint or endpoints from the Endpoints list.
- Click Add >.
- Select a group or groups from the Assigned List.
- Click < Remove.
- Select an endpoint or endpoints from the Assigned List.
- Click < Remove.
- Click OK.
The Easy Lockdown policy is assigned to endpoints and/or groups of endpoints.
Filter the Policy Name and Policy Type columns to locate the policy.
The selected policy is highlighted.
|
Method |
Steps |
|---|---|
|
To add groups of endpoints: |
|
|
To add individual endpoints: |
|
|
To remove groups of endpoints: |
|
|
To remove individual endpoints: |
|
Use the double-arrows (![]()
![]() ) to switch between groups and endpoints.
) to switch between groups and endpoints.
The selected groups and endpoints are displayed in the Assigned List.
Assigning an Easy Lockdown Policy to a Group
You can assign an Easy Lockdown policy to a group of selected endpoints using the Assign Policy dialog.
The Assign Policy dialog is also used to assign an Easy Lockdown policy to a selected endpoint. See Assigning an Easy Lockdown Policy to an Endpoint if you are assigning the policy to an endpoint.
Important: You should only apply Easy Lockdown when you are confident that it will not adversely affect endpoints or users. This usually means having appropriate trust mechanisms in place to authorize applications and updates that are necessary for the continuing operation of the endpoints and installed software.
- Select Manage > Groups.
The Groups page is displayed. - Select a group from the Browser tree.
- From the View list, select Application Control Policies.
The Application Control policies for the selected group are displayed.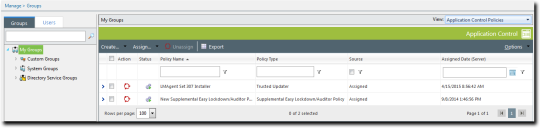
- From the toolbar, select Assign > Easy Lockdown.
The Assign Policy dialog is displayed. - Select an Easy Lockdown policy.
- Click OK.
The Easy Lockdown policy is assigned to the group.
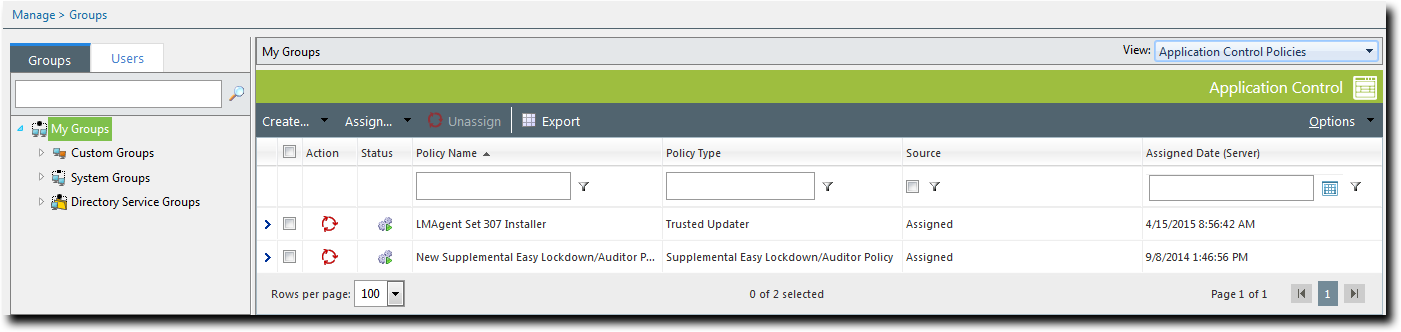
Inherited policies can not be selected. In addition, the Source column reads Inherited.
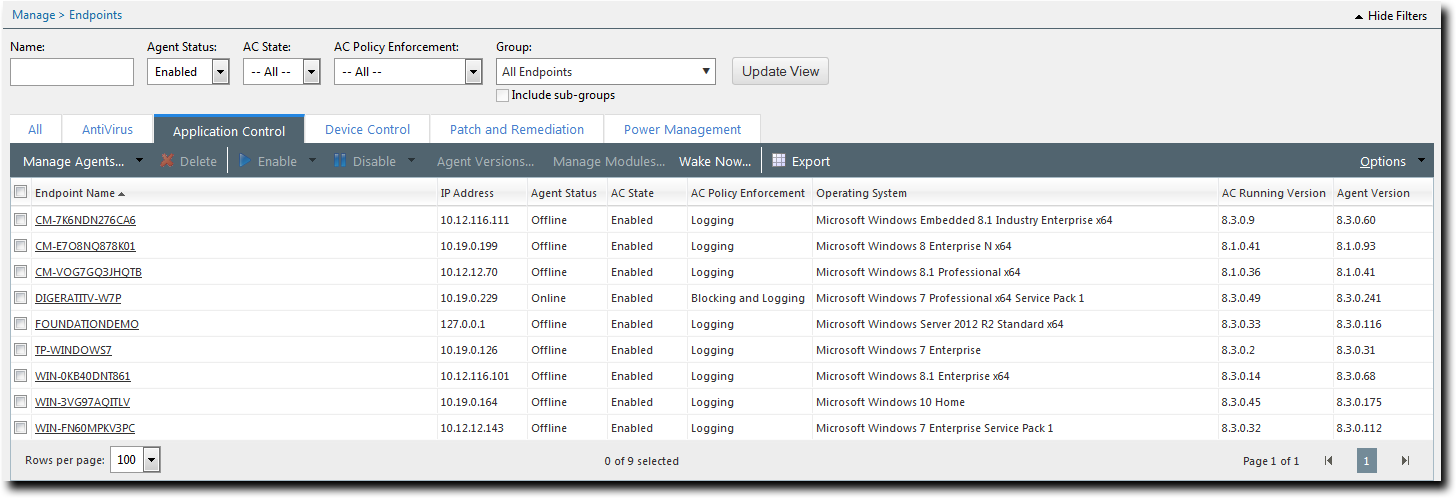
Assigning an Easy Lockdown Policy to an Endpoint
You can assign an Easy Lockdown policy to a selected endpoint.
Important: You should only apply Easy Lockdown when you are confident that it will not adversely affect endpoints or users. This usually means having appropriate trust mechanisms in place to authorize applications and updates that are necessary for the continuing operation of the endpoints and installed software.
- Select Manage > Endpoints.
The Endpoints page opens to the All tab. - In the Endpoint Name column, click an endpoint link.
Detailed information for the selected endpoint is displayed. - Select the Application Control Policies tab.
A list of Application Control policies assigned to the endpoint is displayed.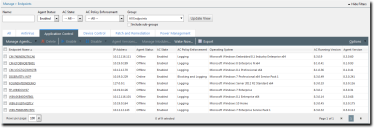
- From the toolbar, select Assign > Easy Lockdown.
The Assign Policy dialog is displayed. - Select an Easy Lockdown policy.
- Click OK.
The Easy Lockdown policy is assigned to the endpoint.
Unassigning an Easy Lockdown Policy
You can unassign an Easy Lockdown policy, removing the association between it and any endpoints. Policies that are no longer assigned remain in the system as unassigned policies, which you can re- assign to endpoints at a later time.
When you unassign an Easy Lockdown policy from an endpoint, enforcement is no longer applied and the whitelist is effectively discarded. When you assign (or re-assign) an Easy Lockdown policy, a new whitelist is generated.
- Select Manage > Application Control Policies.
A list of policies is displayed. - Select one or more Easy Lockdown policies.
- Click Unassign.
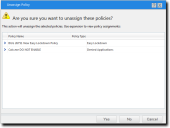
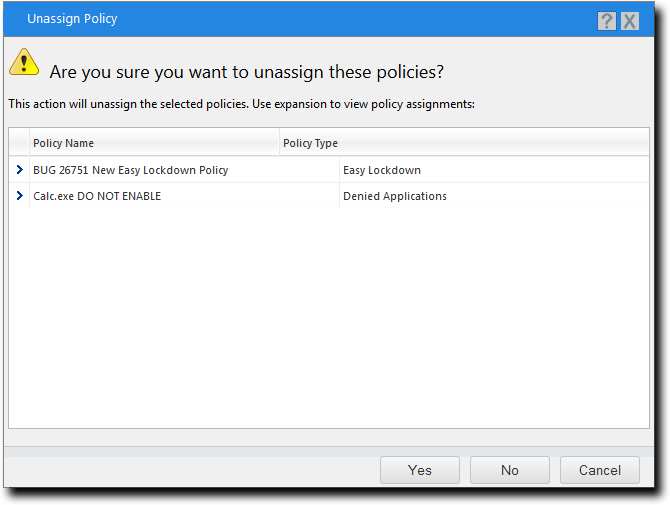
One of two confirmation dialogs is displayed, depending on whether you selected a single policy or multiple policies.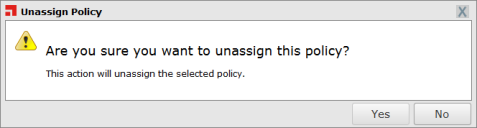
- Click Yes.
One or more Easy Lockdown policies are unassigned.
Filter the Policy Name and Policy Type columns to locate the policy.
The selected policy or policies are highlighted.

Editing an Easy Lockdown Policy
You can edit an Easy Lockdown policy and, for example, change the logging options or the endpoints to which it is assigned.
- Select Manage > Application Control Policies.
A list of application control policies is displayed. - Select an Easy Lockdown policy.
- Click Edit.
The Easy Lockdown Wizard opens to the Name and Logging Options page. - [Optional] Edit the Policy Name.
- [Optional] Edit the Logging options.
- [Optional] Edit the Activation options.
- Click Next.
The Easy Lockdown Wizard opens to the Assign Groups and Endpoints page. - [Optional] Edit the list of targets (groups or endpoints) for the policy, using any of the following methods:
- Select a group or groups from the Groups list.
- Click Add >.
- Select an endpoint or endpoints from the Endpoints list.
- Click Add >.
- Select a group or groups from the Assigned List.
- Click < Remove.
- Select an endpoint or endpoints from the Assigned List.
- Click < Remove.
- Click Finish.
The Easy Lockdown policy is edited.
Filter the Policy Name and Policy Type columns to locate the policy.
The selected policy is highlighted.
Try to give the policy a descriptive name. For example, if this Easy Lockdown policy relates to a group of endpoints used by the product managers you could name it Product Management - Lockdown.
An authorized application is one that was on the endpoint when Easy Auditor or Easy Lockdown was applied, or one that is authorized through any trust mechanism. A non-authorized application is one that was not part of the lockdown and is not authorized through any trust mechanism.
|
Log non-authorized applications (all executable files) |
All non-authorized applications the user attempts to run are logged. By default, this option is not selected for Easy Lockdown. All executable file types will be logged, not just .exe files. This option also logs Trusted Updater policy "Added to whitelist" events. |
|
Log authorized applications (*.exe only): |
All authorized applications the user runs are logged. Only the initial executable is logged. Use the Include all details option below to log subsequent executable files or dependent libraries loaded later. This option also logs all events related to Trusted Updater, Trusted Publisher, and Trusted Path policies. |
|
Include all details on authorized applications (e.g. *.dll, *.cpl, etc.) |
Detailed information on authorized applications is logged (every executable file and library loaded will be logged). This option is only available if the Log authorized applications option is selected. |
Caution: The authorized application options should only be used for monitoring a limited number of endpoints for a short time. If selected for multiple endpoints for multiple days, the database will quickly grow to an unmanageable size.
To create a log query and view the log results refer to Using Application Control Log Queries.
These logging options can affect other Application Control policies. See Logging Managed Policies for more information.
|
Option |
Description |
|---|---|
|
Enable |
The policy will be enabled once it is created, as long as you assign it to a group or endpoint. |
|
Disable |
The policy will be disabled once created, even if it is assigned to a group or endpoint. You can enable it at a later time. |
|
Method |
Steps |
|---|---|
|
To add groups of endpoints: |
|
|
To add individual endpoints: |
|
|
To remove groups of endpoints: |
|
|
To remove individual endpoints: |
|
Use the double-arrows (![]()
![]() ) to switch between groups and endpoints.
) to switch between groups and endpoints.
Disabling an Easy Lockdown Policy
You can disable Easy Lockdown policies without deleting them. The details of the policies are retained and you can enable them at a later time.
When you disable an Easy Lockdown policy on an endpoint, enforcement is no longer applied and the whitelist is effectively discarded. When you enable (or re-enable) an Easy Lockdown policy, a new whitelist is generated.
- Select Manage > Application Control Policies.
A list of Application Control policies is displayed. - Select the enabled Easy Lockdown policies that you want to disable.
- Click Disable.
The selected Easy Lockdown policies are disabled.
Filter the Policy Name and Policy Type columns to locate the policy.
The selected policies are highlighted.
Enabling an Easy Lockdown Policy
You can enable an Easy Lockdown policy that is currently disabled.
Important: You should only apply Easy Lockdown when you are confident that it will not adversely affect endpoints or users. This usually means having appropriate trust mechanisms in place to authorize applications and updates that are necessary for the continuing operation of the endpoints and installed software.
- Select Manage > Application Control Policies.
A list of policies is displayed. - Select the disabled Easy Lockdown policy or policies that you want to enable.
- Click Enable.
The selected Easy Lockdown policies are enabled.
Filter the Policy Name and Policy Type columns to locate the policy.
The selected policies are highlighted.
If an application is installed while Easy Lockdown is running, there is no guarantee that all of its files will be added to the endpoint’s whitelist. This can lead to unpredictable results when the application is launched, so ensure that no applications are installed during Easy Lockdown.
If an application is installed during Easy Lockdown and then fails to operate correctly, you must regenerate the whitelist. Disable, then enable the Easy Lockdown policy (or alternatively unassign, then assign the policy). The application should then work normally.
Deleting an Easy Lockdown Policy
You can delete an Easy Lockdown policy, as long as it is not assigned to an endpoint.
- Select Manage > Application Control Policies.
A list of Application Control Policies is displayed. - Select an Easy Lockdown policy that is not assigned to an endpoint (Assigned column value of Not Assigned).
- Click Delete.
A confirmation dialog is displayed. - Click Yes.
The Easy Lockdown policy is deleted.
Filter the Policy Name and Policy Type columns to locate the policy.
The selected policy is highlighted.
If the policy is currently in use, a message is displayed telling you that the policy can not be deleted until it has been unassigned from the endpoints or groups indicated.
Exporting Easy Lockdown Policies
You can export a list of policies to a CSV (Comma Separated Value) file. To export data, refer to Exporting Data.
The list of policies is saved as a CSV file with the following columns:
|
Name |
Description |
|---|---|
|
Status |
Enabled or Disabled |
|
Policy Name |
The name of the policy |
|
Assigned |
Assigned/Not Assigned (if assigned, export includes the groups and endpoints that the policy is assigned to) |
|
Policy Type |
The type of policy (Easy Lockdown, Trusted Updater, and so on) |
|
Blocking |
Off, On, Authorized, Non-authorized, or (Authorized, Non-authorized) |
|
Logging |
Authorized, Non-authorized, or Off |
|
Last Updated Date |
The date the policy was last changed |