Working with Trusted Path
A Trusted Path policy allows an administrator to designate a file system path so that any executable files residing at this path are allowed to run on all endpoints that are assigned the Trusted Path policy.
The Trusted Path may be a shared resource such as a network drive/share that is protected by file system security. Optionally, trusted paths may be created such that all executables in a parent folder and all child folders are allowed to run. Trusted Paths may be helpful to users as a temporary trusted change activity involving frequently-changing executables (for example, development or testing of new applications or IT services).
Adding Trusted Paths allows executable files that are found within specified folders to run. You may optionally limit execution to files containing a specific owner attribute.
Trusted Path policies are displayed on the Trusted Change tab of the Application Control Policies page. You can filter the Policy Type column to display only Trusted Path policies.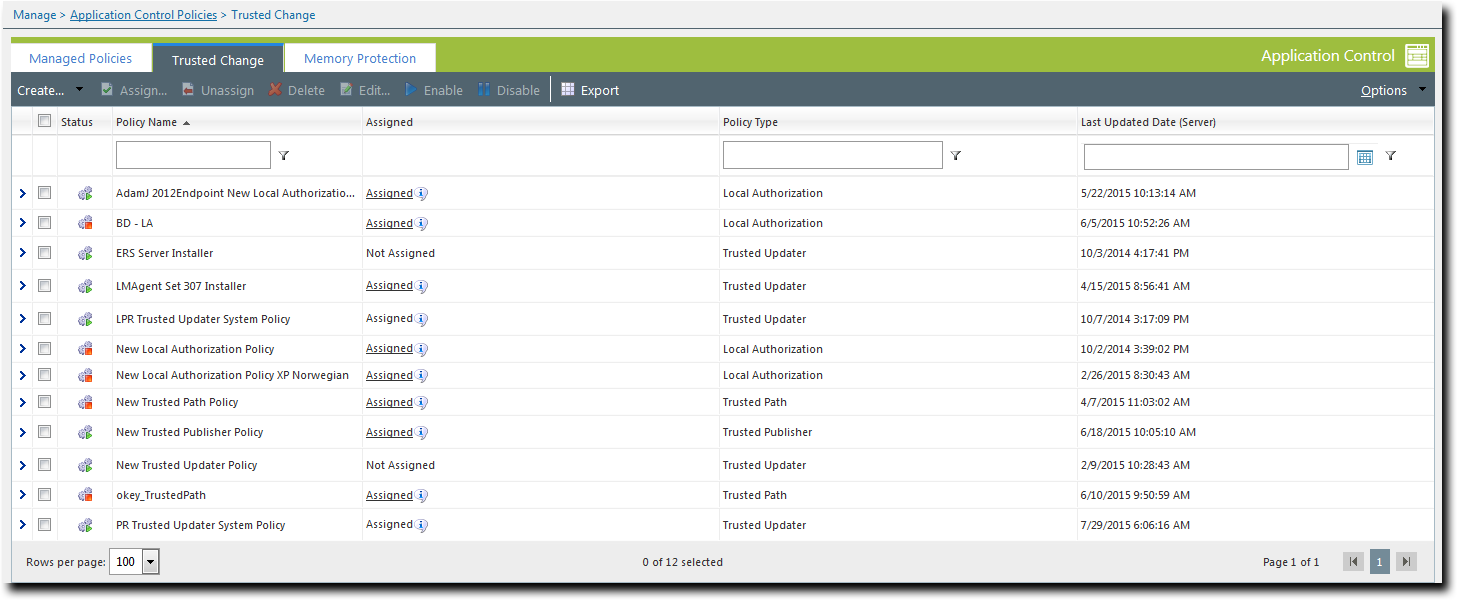
Trusted Path in Practice
A Trusted Path policy allows executable files resident in a specified file system path to run. Trusted Path is the preferred trust mechanism for the following scenarios:
- Build output locations for in-house software development
- Unsigned executables which change frequently
- Applications that cannot be authorized through other trust policies
This trust mechanism is ideal for handling large numbers of executable files that don’t have certificates and that are likely to change.
Caution: In theory you can run an installer program in a Trusted Path but this is NOT recommended. It could overwrite shared files (.exes or .dlls) on the whitelist and this could stop other programs from running, or even cause the endpoint to fail.
Trusted Path can also be used when the other trust mechanisms are not suitable. For example, some applications dynamically create temporary executable files, and these files will be blocked on a locked- down endpoint. In this scenario, Trusted Publisher will not enable the application to run (as the temporary executable will still be blocked), and Trusted Updater is not recommended (as the original file is not an installer or an updater). Trusted Path is the best trust mechanism to use in this situation.
Trusted Path has an Authorized Owner feature which allows administrators to limit execution of the files in the path to specific users (the file's owner). This can be used as a security feature to restrict use of Trusted Path.
Trusted Path and ASP.NET Applications
An IIS web server on a locked-down endpoint can run ASP.NET applications only if an appropriate Trusted Path policy is applied.
Internet Information Services (IIS) is a web server that can use various technologies to produce dynamic web pages and applications. ASP.NET is one such technology, but if you try to run an ASP.NET application on a locked-down endpoint, the website throws errors.
This happens because the ASP.NET process creates and tries to run temporary executable files. Because these files are not on the endpoint's whitelist, Ivanti Application Control prevents them from executing and generates a Denied Application Event log.
You can enable ASP.NET applications to run on a locked-down endpoint by creating trusted paths where the temporary ASP.NET executables can run. To do this, create a Trusted Path policy with the following characteristics:
Trusted Paths:
- %SystemRoot%\WINDOWS\Microsoft.Net\Framework\v4.0.30319\Temporary ASP.NET Files\root
- %SystemRoot%\WINDOWS\Microsoft.Net\Framework64\v4.0.30319\Temporary ASP.NET Files\root
- %SystemRoot%\WINDOWS\Microsoft.Net\Framework\v2.0.50727\Temporary ASP.NET Files\root
- %SystemRoot%\WINDOWS\Microsoft.Net\Framework64\v2.0.50727\Temporary ASP.NET Files\root
Important: Be sure to create all four paths and select the Include sub-folders check box in each case.
Authorized Owner:
- Set the Authorized Owner for each path to Network Service (this can be found in the Built-in Users and Groups list).
User:
- Set the User to Network Service.
See Creating a Trusted Path Policy for details of creating a Trusted Path policy.
Creating a Trusted Path Policy
A Trusted Path policy specifies one or more paths that are allowed to run executable files on an endpoint.
- Select Manage > Application Control Policies.
- Click the Trusted Change tab.
- Click Create > Trusted Path.
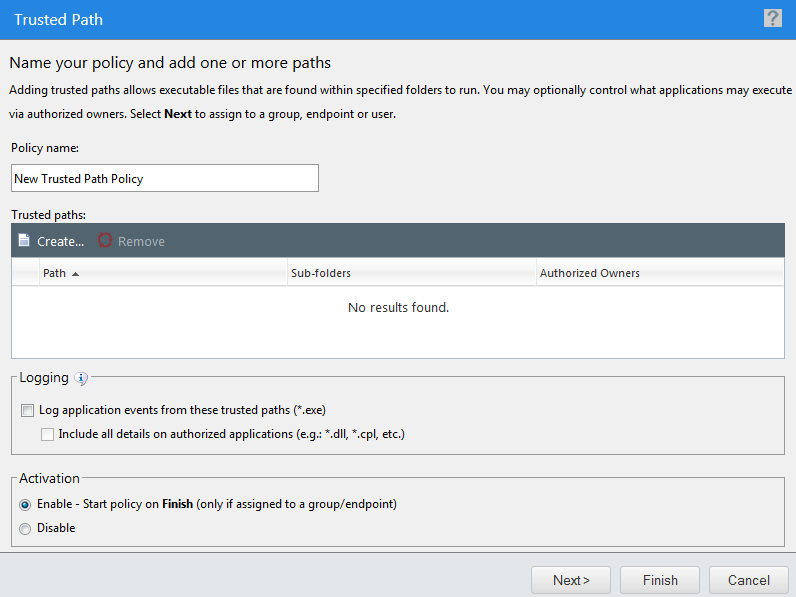
The Trusted Path Wizard opens to the Name your policy and add one or more paths page.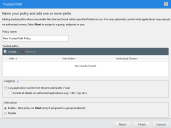
- Type a name for the new policy in the Policy name field.
- Click Create.
The New Trusted Path dialog is displayed.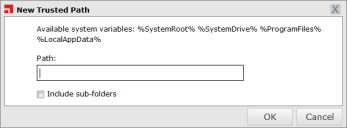
- Type the name of the trusted path.
- You must enter a valid path (a unique directory in the file system).
Important: Do not enter a file path (that is, a path ending in a file name). If you do, the complete string entered will be treated as a path name, with unpredictable results.
- Alternatively, you can use the system variables %SystemRoot%, %SystemDrive%, %ProgramFiles%, or %LocalAppData%.
- [Optional] Select the Include sub-folders check box to include any sub-folders in the trusted path.
- Click OK.
The New Trusted Path dialog is closed, and the new trusted path appears in the Trusted paths list. - [Optional] Add one or more Authorized Owners to this trusted path.
If an Authorized Owner is specified, an executable file in the trusted path can only run if the file's owner matches an Authorized Owner on the list. The user running the file must also be assigned the Trusted Path policy.
If no Authorized Owner is specified, any user that the policy is assigned to can run the executable files in the path. - Click the Authorized Owners ellipses [...] button for the path.
The Add Users dialog opens. - Type a full or partial user name in the User name field.
- Click Search.
- Select the required user(s) from the results list.
- Click Add Users.
- Click OK.
The Add Users dialog closes and the specified users are displayed in the Authorized Owners column for that trusted path. - [Optional] Repeat the previous steps to add more trusted paths to the list. A Trusted Path policy can have multiple trusted paths.
- If you want to log the activity of applications that reside in the policy's trusted path(s), select the Logging options:
- Select an option under Activation.
- Click Next to assign the policy to endpoints.
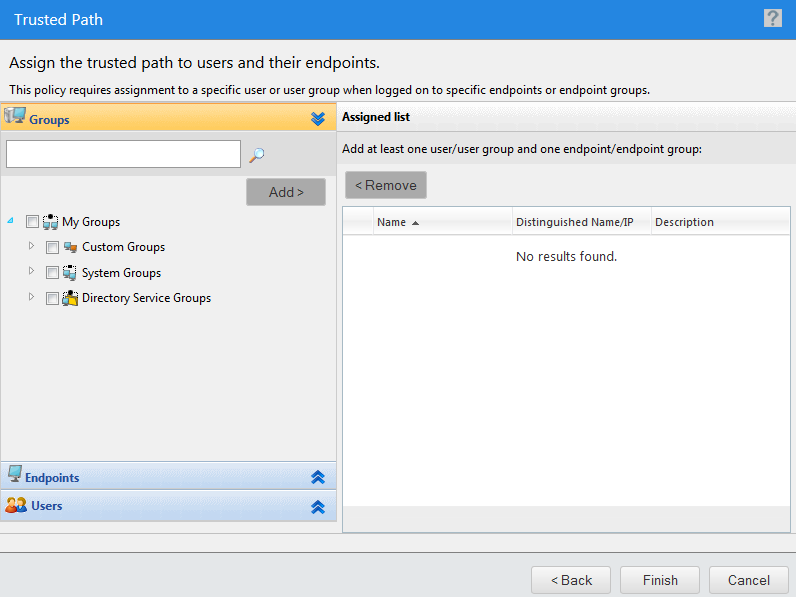
- The policy must be assigned to at least one endpoint or endpoint group. Assign the policy to endpoints:
- Select a group or groups from the Groups list.
- Click Add >.
- Select an endpoint or endpoints from the Endpoints list.
- Click Add >.
- Select a group or groups from the Assigned list.
- Click < Remove.
- Select an endpoint or endpoints from the Assigned list.
- Click < Remove.
- The policy must be assigned to at least one user or user group. Assign the policy to users:
- Select one or more users from the Users list.
- Click Add >.
- Select one or more users from the Assigned list.
- Click < Remove.
- Click Finish.
The Trusted Path policy is created and assigned to groups, endpoints, or users.
Give the policy a descriptive name. For example, if this Trusted Path policy relates to a path that contains applications used by the accounting department you could name it Accounting Applications.

Note:
Specifying an Authorized Owner is optional, but the policy must be assigned to at least one user, which is done on the next page of the Trusted Path Wizard.
You can optionally define in which domain to search for users by clicking the ellipses [...] button beside the Domain field.
|
Option |
Description |
|---|---|
|
Log application events from these trusted paths (*.exe). |
Log the activity of applications that reside in the trusted path. |
|
Include all details on authorized applications (e.g. *.dll, *.cpl, etc.) |
Log the activity of applications that reside in the trusted path. In addition, log the activity of all the executable files (such as DLLs) associated with those applications. |
Even if not selected here, logging may occur when other policy types (such as Easy Auditor) have logging enabled.
|
Option |
Description |
|---|---|
|
Enable |
The policy will be enabled once it is created, as long as you assign it to a group or endpoint. |
|
Disable |
The policy will be disabled once created, even if it is assigned to a group or endpoint. You can enable it at a later time. |
If you click Finish at this point, the policy will be created but not assigned to any endpoints. You can assign the policy to endpoints at a later time.
The Trusted Path Wizard opens to the Assign the trusted path to groups, endpoints and/or users page.
|
Method |
Steps |
|---|---|
|
To add groups of endpoints: |
|
|
To add individual endpoints: |
|
|
To remove groups of endpoints: |
|
|
To remove individual endpoints: |
|
Use the double-arrows (![]()
![]() ) to switch between groups and endpoints.
) to switch between groups and endpoints.
The selected groups and/or endpoints are displayed in the Assigned list.
|
Method |
Steps |
|---|---|
|
To add users: |
If you cannot locate a specific user, click the Add Individual User button. See Adding an Individual User to a Policy for more information. |
|
To remove users: |
|
Important: Both a user/user group AND an endpoint/endpoint group must be assigned.
The selected users are displayed in the Assigned list.
Trusted Path Precedence
When multiple Trusted Path policies and paths are assigned you can determine which one allowed application execution by examining their precedence.
If there are multiple Trusted Path policies, the first policy whose path\pattern matches that of the file execution request is the one that allows that request to succeed. If logging is enabled, the event is logged and reported when a relevant query is run. However, the query result does not show which policy permitted the application to run.
You can determine the policy that allowed the application to run by examining the Trusted Path policy precedence:
- The Trusted Path policy that was created first is evaluated first.
- Other policies are evaluated in the order in which they were created.
- If a Trusted Path policy has more than one trusted path, the path that was created first is evaluated first.
- Other paths are evaluated in the order in which they were created.
- If a Trusted Path policy is assigned to multiple users and groups (such as Administrators or Power Users) these assignments are not necessarily evaluated in the order in which they were created.
Adding an Authorized Owner to a Trusted Path
You can add one or more Authorized Owners to a trusted path using the Add Users dialog.
If an Authorized Owner is specified, an executable file in the trusted path can only run if the file's owner matches an Authorized Owner on the list. The user running the file must also be assigned the Trusted Path policy.
The Add Users dialog is accessed by clicking an Authorized Owners ellipses (...) button on the Trusted paths list.
- Search for users using either of the following methods:
- Type a user name in the Username field.
- Click Search.
- Select one or more users.
- Click Add Users.
The users are added to the selection list. - Click OK.
The Add Users dialog closes and you return to the Trusted Path Wizard. The trusted path is now restricted to authorized owner(s) that you specified.
|
Option |
Steps |
|---|---|
|
Search for all users |
Leave the Username field blank and click Search. This returns all existing users in the current domain. |
|
Search for one or more selected users |
Sub-string matching is supported, so you do not have to type the full name. Typing a partial name may result in multiple matches |
One or more users appear in the results list.
If you cannot find the user(s) you want, try searching other available domains. Select a searchable domain controller from the Domain drop-down list.
Assigning a Trusted Path Policy
You can select a Trusted Path policy and assign it to endpoints/endpoint groups and users/user groups.
- Select Manage > Application Control Policies.
- Click the Trusted Change tab.
- Select a Trusted Path policy.
- Click Assign.
The Trusted Path dialog is displayed. - The policy must be assigned to at least one endpoint or endpoint group. Assign the policy to endpoints:
-
Select a group or groups from the Groups list.
-
Click Add >.
-
Select an endpoint or endpoints from the Endpoints list.
-
Click Add >.
-
Select a group or groups from the Assigned list.
-
Click < Remove.
-
Select an endpoint or endpoints from the Assigned list.
-
Click < Remove.
- The policy must be assigned to at least one user or user group. Assign the policy to users:
- Select one or more users from the Users list.
- Click Add >.
- Select one or more users from the Assigned list.
- Click < Remove.
- Click OK.
The Trusted Path policy is assigned to endpoints, groups of endpoints, or users.
Filter the Policy Name and Policy Type columns to locate the policy.
The selected policy is highlighted.
|
Method |
Steps |
|---|---|
|
To add groups of endpoints: |
|
|
To add individual endpoints: |
|
|
To remove groups of endpoints: |
|
|
To remove individual endpoints: |
|
Use the double-arrows (![]()
![]() ) to switch between groups and endpoints.
) to switch between groups and endpoints.
The selected groups and/or endpoints are displayed in the Assigned list.
|
Method |
Steps |
|---|---|
|
To add users: |
If you cannot locate a specific user, click the Add Individual User button. See Adding an Individual User to a Policy for more information. |
|
To remove users: |
|
Important: Both a user/user group AND an endpoint/endpoint group must be assigned.
The selected users are displayed in the Assigned list.
Assigning a Trusted Path Policy to a Group
You can assign a Trusted Path policy to group of selected endpoints using the Assign Policy dialog.
The Assign Policy dialog is also used to assign a Trusted Path policy to a selected endpoint. See Assigning a Trusted Path Policy to an Endpoint if you are assigning the policy to an endpoint.
- Select Manage > Groups.
The Groups page is displayed. - Select a group from the Browser tree.
- From the View list, select Application Control Policies.
The Application Control policies for the selected group are displayed.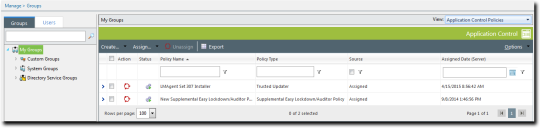
- From the toolbar, select Assign > Trusted Path.
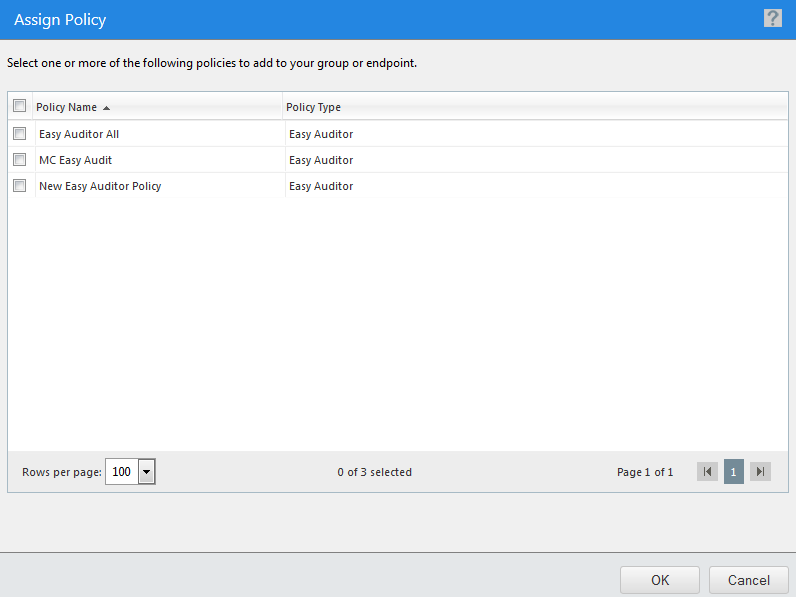
The Assign Policy dialog is displayed.
- Select one or more Trusted Path policies.
- Click OK.
One or more Trusted Path policies are assigned to the group.
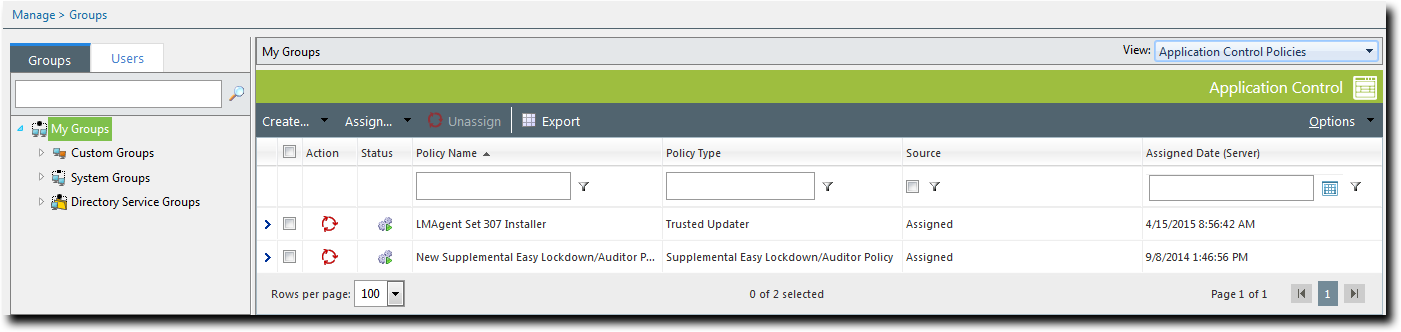
Inherited policies cannot be selected. In addition, the Source column reads Inherited.
The purpose of a Trusted Path policy is to enable one or more specified users to run executables in a designated file system path on a locked-down endpoint. You should ensure that the policy you are assigning to the group is already assigned to the relevant user(s).
Assigning a Trusted Path Policy to an Endpoint
You can assign a Trusted Path policy to a selected endpoint.
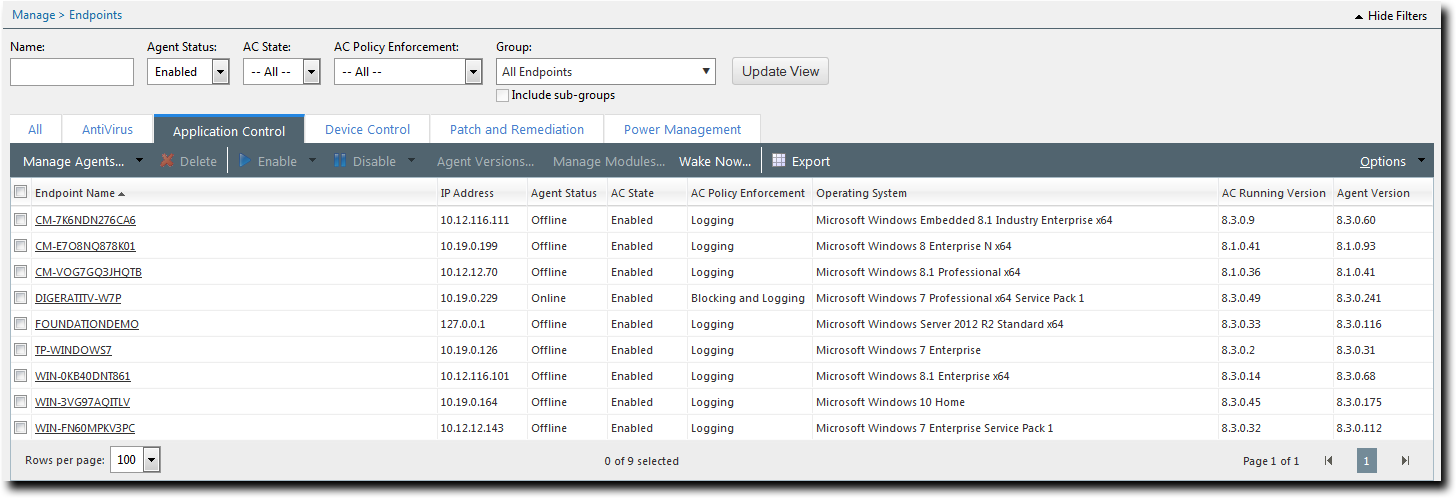
- Select Manage > Endpoints.
The Endpoints page opens to the All tab. - In the Endpoint Name column, click an endpoint link.
Detailed information for the selected endpoint is displayed. - Select the Application Control Policies tab.
A list of Application Control policies assigned to the endpoint is displayed.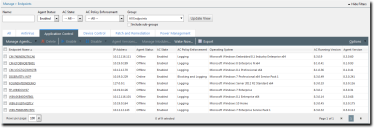
- From the toolbar, select Assign > Trusted Path.
The Assign Policy dialog is displayed. - Select one or more Trusted Path policies.
- Click OK.
One or more Trusted Path policies are assigned to the endpoint.
The purpose of a Trusted Path policy is to enable one or more specified users to run executables in a designated file system path on a locked-down endpoint. You should ensure that the policy you are assigning to the endpoint is already assigned to the relevant user(s).
Unassigning a Trusted Path Policy
You can unassign a Trusted Path policy, removing the association between it and its endpoints and users. Policies that are no longer assigned remain in the system as unassigned policies, which you can re-assign to endpoints and users at a later time.
- Select Manage > Application Control Policies.
- Click the Trusted Change tab.
- Select one or more Trusted Path policies.
- Click Unassign.
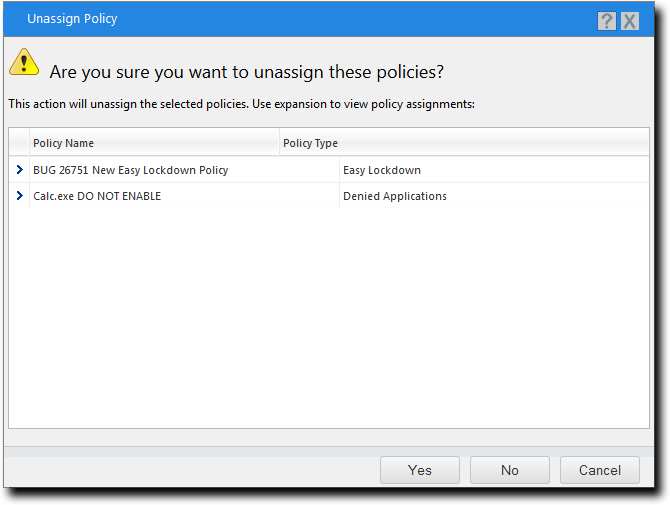
One of two confirmation dialogs is displayed, depending on whether you selected a single policy or multiple policies.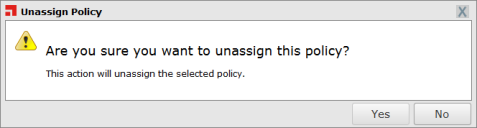
- Click Yes.
One or more Trusted Path policies are unassigned.
Filter the Policy Name and Policy Type columns to locate the policy.
The selected policies are highlighted.

Editing a Trusted Path Policy
You can edit a Trusted Path policy. For example, you may want to add or remove trusted paths, or change its assignment.
- Select Manage > Application Control Policies.
- Click the Trusted Change tab.
- Select a Trusted Path policy.
- Click Edit.
The Trusted Path Wizard opens to the Name Policy and Add Trusted Paths page. - [Optional] Edit the Policy Name.
- To add a new trusted path:
- Click Create.
The New Trusted Path dialog is displayed. - Type the name of the trusted path.
- Wild card (*) is supported.
- System variables %SystemRoot%, %SystemDrive%, %ProgramFiles%, and %LocalAppData% are supported.
- The path is validated before the dialog closes.
- Click OK.
The New Trusted Path dialog is closed and the trusted path is added to the list.
Note:
- Click Create.
- To remove an existing trusted path:
- Select the trusted path.
- Click Remove.
The Remove Trusted Path dialog is displayed. - Click Yes.
The Remove Trusted Path dialog is closed and the trusted path is removed from the list.
- [Optional] Add or remove Authorized Owners for this trusted path.
- Click the Authorized Owners ellipses [...] button for the path.
The Add Users dialog opens. - To add an Authorized Owner, search for the required user(s) in the User name field.
- Select the required user(s) and click Add Users.
- To remove an Authorized Owner, select it on the right-hand list and click Remove.
- Click OK.
The Add Users dialog closes and the list of Authorized Owners for that trusted path is updated.
- Click the Authorized Owners ellipses [...] button for the path.
- [Optional] Change the Logging options.
- [Optional] Edit the Activation options.
- Click Next.
The Trusted Path Wizard opens to the Assign the trusted path to groups, endpoints and/or users page.
- The policy must be assigned to at least one endpoint or endpoint group. Assign the policy to endpoints:
-
Select a group or groups from the Groups list.
-
Click Add >.
-
Select an endpoint or endpoints from the Endpoints list.
-
Click Add >.
-
Select a group or groups from the Assigned list.
-
Click < Remove.
-
Select an endpoint or endpoints from the Assigned list.
-
Click < Remove.
- The policy must be assigned to at least one user or user group. Assign the policy to users:
- Select one or more users from the Users list.
- Click Add >.
- Select one or more users from the Assigned list.
- Click < Remove.
- Click Finish.
The Trusted Path policy has been edited.
Filter the Policy Name and Policy Type columns to locate the policy.
The selected policy is highlighted.
|
Option |
Description |
|---|---|
|
Enable |
The policy will be enabled once it is created, as long as you assign it to a group or endpoint. |
|
Disable |
The policy will be disabled once created, even if it is assigned to a group or endpoint. You can enable it at a later time. |
|
Method |
Steps |
|---|---|
|
To add groups of endpoints: |
|
|
To add individual endpoints: |
|
|
To remove groups of endpoints: |
|
|
To remove individual endpoints: |
|
Use the double-arrows (![]()
![]() ) to switch between groups and endpoints.
) to switch between groups and endpoints.
The selected groups and/or endpoints are displayed in the Assigned list.
|
Method |
Steps |
|---|---|
|
To add users: |
If you cannot locate a specific user, click the Add Individual User button. See Adding an Individual User to a Policy for more information. |
|
To remove users: |
|
Important: Both a user/user group AND an endpoint/endpoint group must be assigned.
The selected users are displayed in the Assigned list.
Disabling a Trusted Path Policy
You can disable policies without deleting them. The details of the policies are retained and you can enable the policies at a later time.
- Select Manage > Application Control Policies.
- Click the Trusted Change tab.
- Select the enabled Trusted Path policy or policies that you want to disable.
- Click Disable.
One or more Trusted Path policies are disabled.
Filter the Policy Name and Policy Type columns to locate the policy.
The selected policies are highlighted.
Enabling a Trusted Path Policy
You can enable a Trusted Path policy that is currently disabled.
- Select Manage > Application Control Policies.
- Click the Trusted Change tab.
- Select the disabled Trusted Path policy or policies that you want to enable.
- Click Enable.
One or more Trusted Path policies are enabled.
Filter the Policy Name and Policy Type columns to locate the policy.
The selected policies are highlighted.
Deleting a Trusted Path Policy
You can delete a Trusted Path policy, as long as it is not assigned to an endpoint or a user.
- Select Manage > Application Control Policies.
- Click the Trusted Change tab.
- Select a Trusted Path policy that is not assigned to an endpoint or user (Assigned column value of Not Assigned).
- Click Delete.
A confirmation dialog is displayed. - Click Yes.
The Trusted Path policy is deleted.
Filter the Policy Name and Policy Type columns to locate the policy.
The selected policy is highlighted.
If the policy is currently in use, a message is displayed telling you that the policy cannot be deleted until it has been unassigned.
Exporting Trusted Path Policies
You can export a list of policies to a CSV (Comma Separated Value) file. To export data, refer to Exporting Data.
The list of policies is saved as a CSV file with the following columns:
|
Name |
Description |
|---|---|
|
Status |
Enabled or Disabled |
|
Policy Name |
The name of the policy |
|
Assigned |
Assigned/Not Assigned (if assigned, export includes the groups and endpoints that the policy is assigned to) |
|
Policy Type |
The type of policy (Easy Lockdown, Trusted Updater, and so on) |
|
Last Updated Date (Server) |
The date and time (on the server) that the policy was last changed |
Trusting Files from the Application Library
You can trust an files directly from the Application Library and add them to existing Trusted Updater Policy.
Prerequisites:
You have grouped or ungrouped installer files in your Application Library that you need to be treated as a Trusted Updater.
- Select Manage > Application Library.
The Application Library page is displayed. - In the Application Browser, expand the containers until you reach the one containing the files you want to add.
- In the Application Library list, select the files you want to trust.
- Click Trust.
The Trust Selected Files dialog opens. -
Add the files to a new or existing policy:
- Select Add to one or more existing policies option, then click OK.
- Type a Policy Name for the new Trusted Updater. Give the policy a descriptive name. For example, if this Trusted Updater policy relates to particular applications used by the graphics department you could name it Graphics Applications.
- Add more files as trusted updaters to the new policy:
- Click Add.
- Select Files from application library or Files from other policies.
- Search for and select one or more files.
- Click Add Updaters.
- Click OK.
- Select an Activation option.
- Click Next. The Assign the trusted updater to groups and/ or endpoints panel displays.
- Edit the list of targets (groups or endpoints) for the policy.
- Click Finish.
- Select the Add to one or more existing policies option.
- Select one or more of the existing policies. You can click View details to review the policies first, paying particular attention to the users or endpoints that are affected.
- Click OK.
Sort the files by folder/path to help identify the files for a particular application.
The Trust button is enabled.
|
Option |
Description |
|
|---|---|---|
|
Create a new Trusted Updater or Trusted Installer policy: |
If you click Finish at this point, the policy will be created but not assigned to any endpoints. You can assign the policy to endpoints at a later time. |
|
|
Add the file to one or more existing policies: |
|
|
One or more files you selected from the Application Library are added as Trusted Updaters.