Service Manager powered by HEAT
Working with Services
•Creating a Service Desk Category
•Viewing and Editing Agreements
•Service Manager powered by HEAT
•Service Manager powered by HEAT
About Creating a Service
You can create a service to offer to your customers. If your organization provides multiple services (such as web hosting or mobile communications), you can link separate service level agreements and service level packages based on each.
The process for defining and offering a service is:
1.Create and define a request offering and assign it to a category. See Working with Request Offerings.
2.Create and define a service request. See About Creating Service Requests.
3.Optional. Create and define service level agreements. The service level agreement defines the terms and conditions for these request items. See Working with Service Level Agreements
Creating a Service
1.Log in to the application as a service owner.
2.Open the Services workspace.
3.Click New Service. The system displays a new service record.
New Service Record
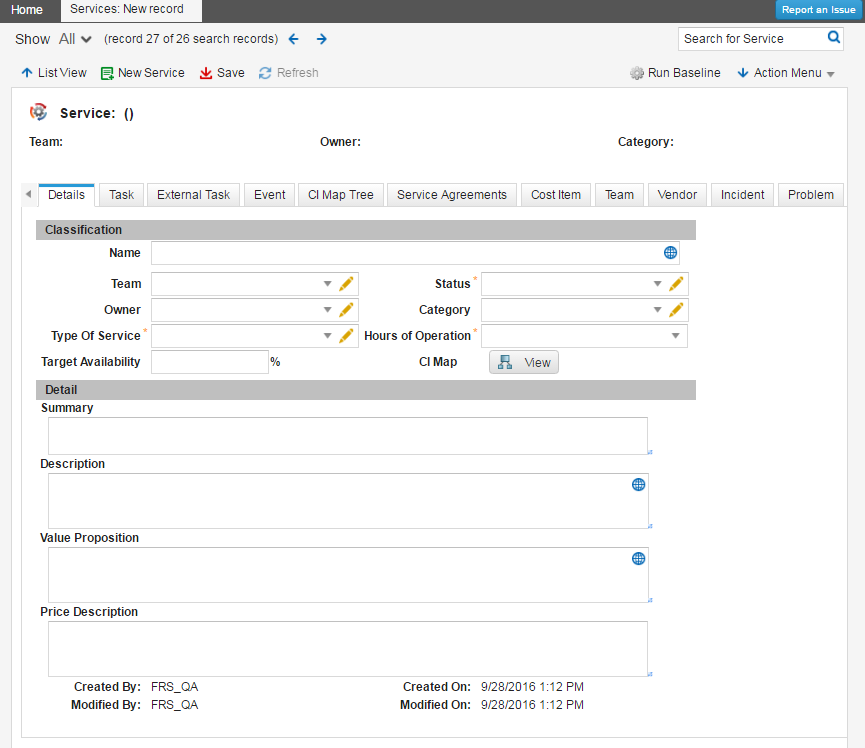
The following default tabs appear (results may vary depending on your system setup):
•Details: Continue to the next step.
•Task: Lists any tasks linked to this record. See Working with Tasks.
•External Task: Lists any external tasks linked to this record. See Using External Tasks.
•Event
•CI Map Tree: See Working with the CI Map.
•Service Agreements: Lists any service agreements linked to this record. See Working with Service Level Agreements.
•Cost Item: Lists any cost items linked to this record. See Working with Cost Items.
•Team: Lists any teams linked to this record.
•Vendor: Lists any vendors linked to this record. See Service Manager powered by HEAT.
•Incident: Lists any incidents linked to this record. See Viewing an Incident.
•Problem: Lists any problems linked to this record. See Working with Problems.
•Change: Lists any changes linked to this record. See Creating a Change Request.
•Change Window: See Setting up a Change Window and Lockout.
•Change Lockout: See Setting up a Change Window and Lockout.
•Outage Log: See Working with the Outage Log.
•Release: See Working with Releases and Release Management.
•Service Level Package: Lists any service level packages linked to this record. See Working with Service Level Packages.
•Service Desk Category: See Creating a Service Desk Category below.
•Cost Driver: Lists any cost drivers linked to this record. See Working with Cost Drivers.
•Distribution: Lists any distributions linked to this record. See About Distribution.
•Allocation: Lists any allocations linked to this record. See About Service Allocation.
4.Enter the following information under the Details tab.
| Field | Description |
|---|---|
|
Name |
A unique name for the service. |
|
Team |
The responsible team. Select from the drop-down list. |
|
Owner |
The owner. Select from the drop-down list (populated according to the chosen team). |
|
Type Of Service |
The service type. Select from the drop-down list. |
| Target Availability | The target availability for this service. Enter a percentage. |
|
Status |
The status. Select from the drop-down list: Planned: Draft state; prior to the design state. Design: Work in progress; service is being designed. Transition: Design phase complete; preparing to update the status to production. Production: Service is in use. Retired: Service is no longer in use. |
|
Category |
A category or collection for this service. Select from the drop-down list. |
|
Hours of Operation |
A defined value that indicates the time period for the availability of this service. |
| CI Map | Displays the CI map. |
|
Summary |
A brief summary of the service. |
|
Description |
A description of what the service includes. |
|
Value Proposition |
Information about the benefits of this service to the customer. |
|
Price Description |
Information about the pricing structure. |
5.Click Save.
After creating a service, create a team (if you are using operational level agreements
Creating a Service Desk Category
The system lists request offerings in categories. These categories are a convenient way to organize the services that you offer.
1.Log in to the application as a service owner.
2.Open the Services workspace.
3.Open a record.
4.Click the Service Desk Category tab.
Service Desk Category List
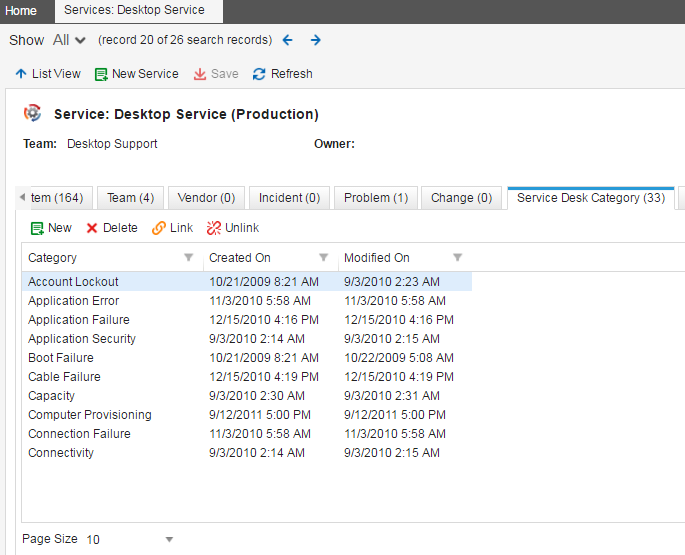
5.From the tab toolbar, click New. The system displays the New Category dialog box.
6.In the Category field, enter the name of the category.
7.Click Save.
The category that you created appears as an option in the category menu for the selected service in the Incident workspace.
Viewing and Editing Agreements
You can view which agreements have been attached to certain services. You can modify some of the details of these agreements in the Services workspace.
1.Log in to the application as a service owner.
2.Open the Services workspace. The system displays a list of services.
3.Open a service.
4.Click the Service Agreements tab. The system displays a list of agreements of the following types:
•OLA: Operational level agreements.
•SLA: Service level agreements.
•UC: Underpinning contracts.
5.Highlight an agreement from the list.
6.Click Go to to see the details.
7.Modify any fields as needed.
8.Click Save.
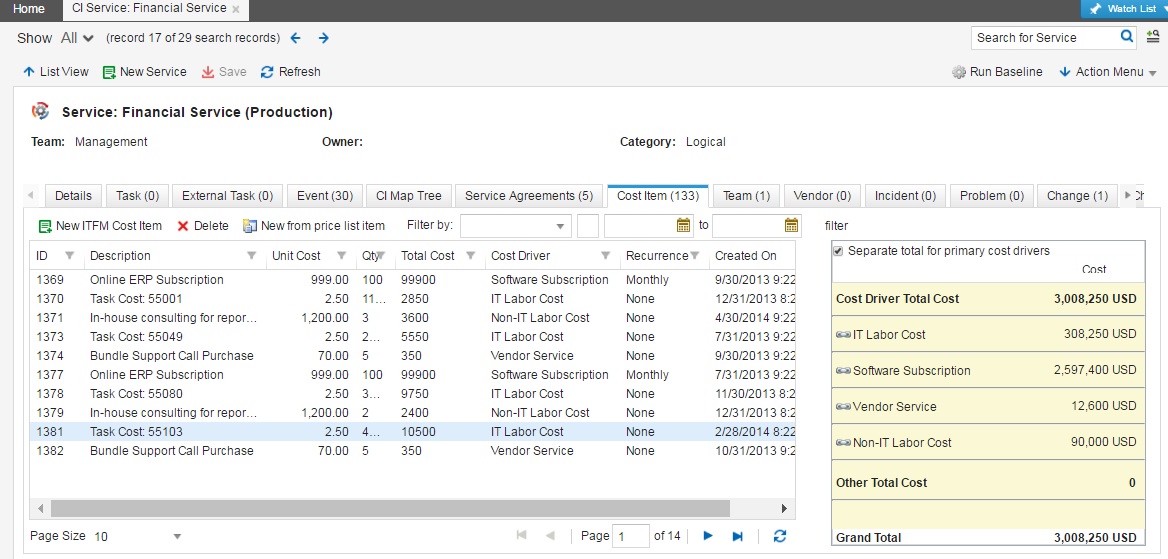
Viewing Service Costs
Costs added to a service automatically show up in the Cost Item tab.
1.Log in to the application using the Administrator role
2.Open the CI Service workspace.
3.Open a service.
4.Click the Cost Item tab.
5.Observe the task at the bottom of the list. You might need to refresh the window to see the latest results.
The Task Cost Item on the CI Service Workspace
About Creating Teams
Only administrators can create teams.
Was this article useful?
The topic was:
Inaccurate
Incomplete
Not what I expected
Other
Copyright © 2017, Ivanti. All rights reserved.